There are plenty of WooCommerce wishlist plugins available in the WordPress Repository. But did you know that not all of them let you customize visible text fields easily? In this article I will show you how to do it in just 4 steps with a free WooCommerce wishlist plugin.
Contents
- Flexible Wishlist - Analytics & Emails
- Step 1: Download the Flexible Wishlist for WooCommerce plugin
- Step 2: Go to text settings
- Step 3: Start your wishlist text customization
- Step 4: Save your changes
- Bonus: Flexible Wishlist PRO - Analytics & Emails
- Flexible Wishlist PRO - Analytics & Emails £59
- Customize all text buttons for Black Friday 2022
- Wishlist text customization: summary
- Flexible Wishlist - Analytics & Emails
- Related Articles
- A free WooCommerce wishlist plugin. How to add it to your store?
- Introducing the Flexible Wishlist for WooCommerce plugin
- Unlimited wishlists for FREE with Flexible Wishlist
- Wishlist icon: choose your own with the Flexible Wishlist plugin
- Flexible Wishlist PRO is here! Improve Flexible Wishlist with Analytics & Emails
Flexible Wishlist - Analytics & Emails
Allow customers save their favorite products for later and identify the most popular products by tracking wishlists' content. Create and send promotional e-mails. Stay one step ahead of your customers' needs and meet their demands.
💾 Active Installations: 800+ | WordPress Rating:
Step 1: Download the Flexible Wishlist for WooCommerce plugin
This simple, yet powerful, WooCommerce wishlist plugin for Black Friday will be your choice, when it comes to your wishlist text customization. It has all a demanding user might ask for and at the same time it is incredibly intuitive and easy to use. With its help you will easily customize text buttons on your wishlist.
Flexible Wishlist - feature overwiev and quick introduction to the plugin:
Firstly, download the plugin and after that activate it.
Flexible Wishlist FREE →
Once you are done with it, a cart icon with a heart inside will appear on the left side of your WooCommerce dashboard. That’s your new WooCommerce wishlist plugin. Click it and let’s start your WooCommerce wishlist text customization!
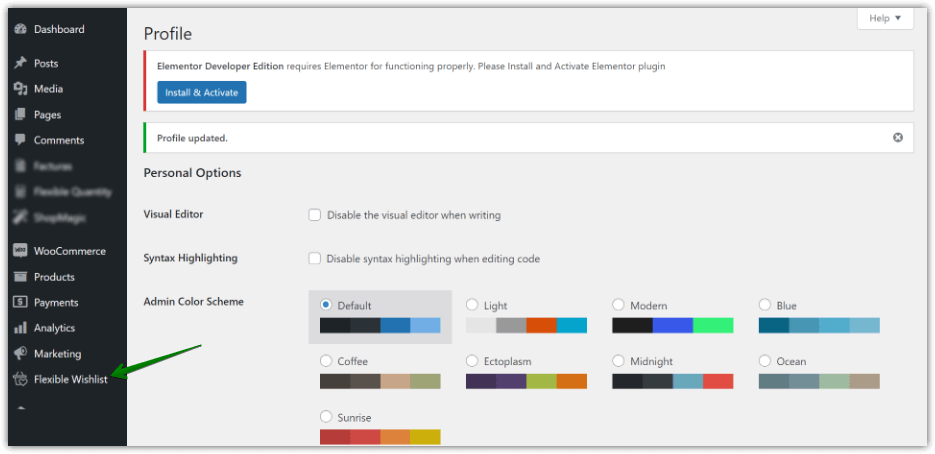
Step 2: Go to text settings
Secondly, find the text settings section. You will find them among all the settings after clicking the Flexible Wishlist logo in your cockpit.
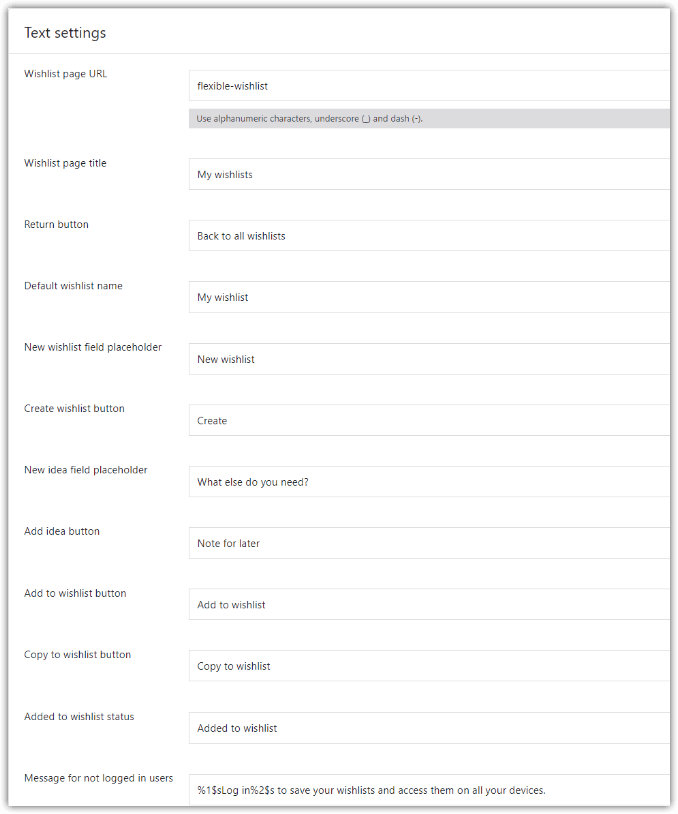
As can be seen on the printscreen above, you can basically customize all of the text inputs available in your new wishlist.
Step 3: Start your wishlist text customization
- Flexible Wishlist allows you to edit the following text fields:
Wishlist page URL - Insert your own URL, which harmonizes best with your store
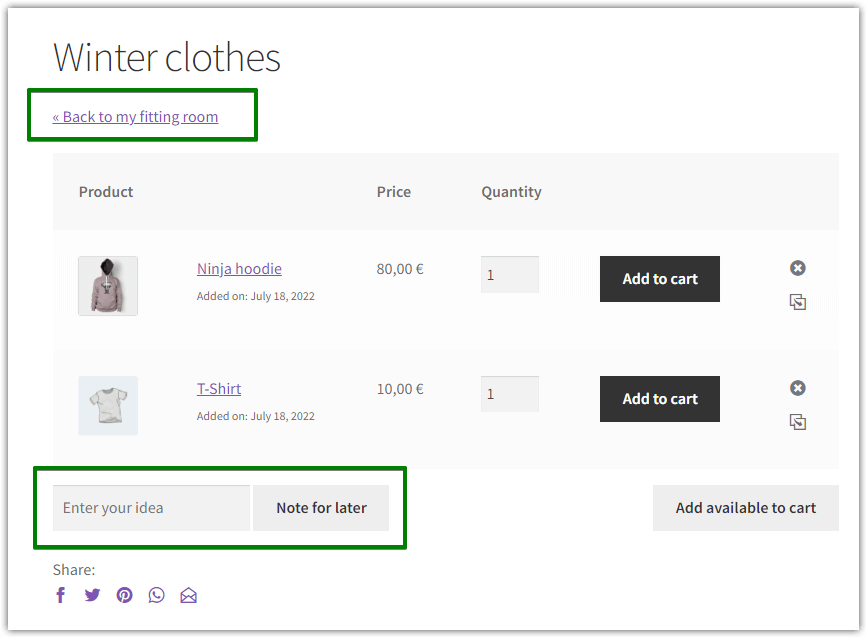
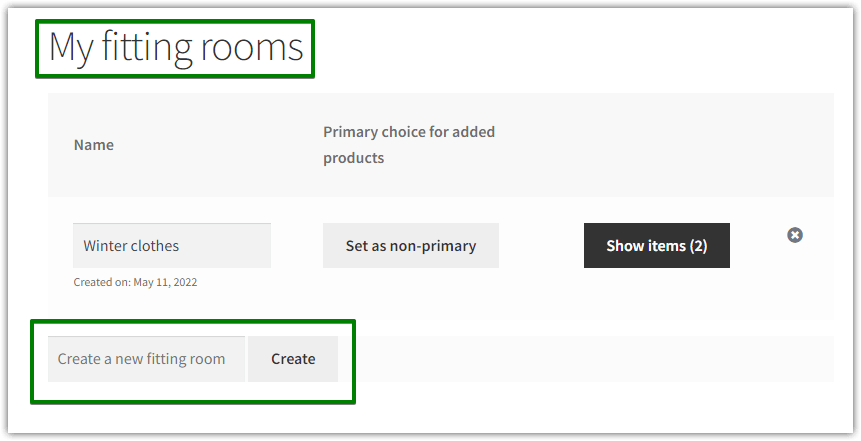
Wishlist page title - Will be displayed above your customers’ wishlist(s)
Return button - Return to all wishlists view
Default wishlist name - Your wishlist may be named in any way. “My wardrobe”, “My favorite items” or “My storage”. Be creative!
New wishlist field placeholder - You can create a new list by entering the field placeholder, such as New wedding list.
Create wishlist button - Enter a title for the button to create a new wishlist.
New idea field placeholder - Enter a placeholder, which will appear in the ideas (notes) section within the wishlist
Add idea button - Name the button, which creates a new idea (note)
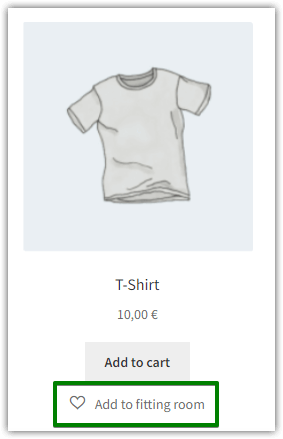
Add to wishlist button - Place text that invites the user to add a product to the list, e.g., Add to Wardrobe.
Copy to wishlist button - Enter the title of the button to copy the product to the list.
Added to wishlist status - Edit the message that appears after adding a product to the wishlist
Message for not logged in users - Decide what message you want to display to the users, who visit your shop without first logging in. Encourage them to create an account, hence this message.
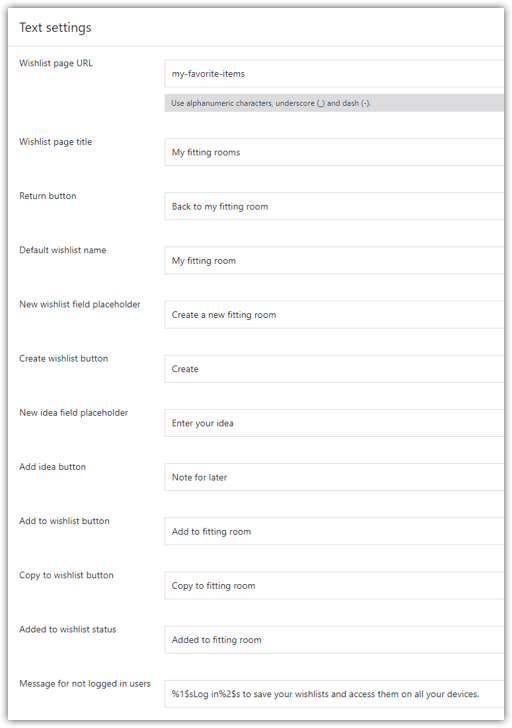
Now let me show you an example of how these wishlist text inputs may be customized and how does it look like on a WooCommerce shop page:
Step 4: Save your changes
Don’t forget to save your changes!
Are you curious to see what it looks like on a live WooCommerce shop page? Let me show you some screenshots of the customized text inputs:
Bonus: Flexible Wishlist PRO - Analytics & Emails
We strongly recommend taking a look at the PRO version. Flexible Wishlist PRO - Analytics and Emails was created to provide you with a powerful marketing tool.
Why Flexible Wishlist PRO - Analytics & Emails?
✅ Create and send promotional emails
✅ Have insight into your customers' wishlists
✅ Analyze the most frequently added products to wishlists and sell them more smoothly by analyzing the stock
Flexible Wishlist PRO - Analytics & Emails £59
Allow customers save their favorite products for later and identify the most popular products by tracking wishlists' content. Create and send promotional e-mails. Stay one step ahead of your customers' needs and meet their demands.
💾 Active Installations: 800+ | WordPress Rating:
The plugin the article is about is great for helping you prepare your store for your Black Friday 2022 campaign. Install the wishlist plugin before Black Friday starts so that your customers can add the products they will buy on Black Friday 2022 or Cyber Monday. During the holiday season, a wishlist should be in virtually every store. The one covered in this article will additionally allow you a full wishlist text customization, so you can customize any text visible to the customer. Customize the plugin for your store and watch your store's conversions increase.
Wishlist text customization: summary
In essence, in this post I tried to show you how easy it is to customize text fields with the Flexible Wishlist for WooCommerce plugin. My objective was to encourage you to try it yourself and find out how intuitive the plugin is and that text button customization within a wishlist plugin is really possible in just 4 steps. Take this plugin for a test ride and let us know what you think about it in the comments!
Flexible Wishlist - Analytics & Emails
Allow customers save their favorite products for later and identify the most popular products by tracking wishlists' content. Create and send promotional e-mails. Stay one step ahead of your customers' needs and meet their demands.
💾 Active Installations: 800+ | WordPress Rating: