In this beginners guide we shall discuss email settings. How important it is to inform customers of order status, I probably don’t have to tell you. For user to have a sense of control over his order, what’s necessary is to guarantee flawless communication. The best way to do this remains through email. This guide will show you, how to configure the email bookmark properly.
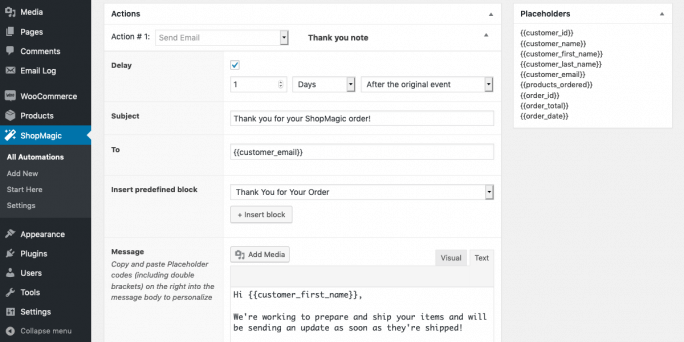
WooCommerce follow up emails with ShopMagic (free plugin) →
Go to WooCommerce -> Settings -> Emails
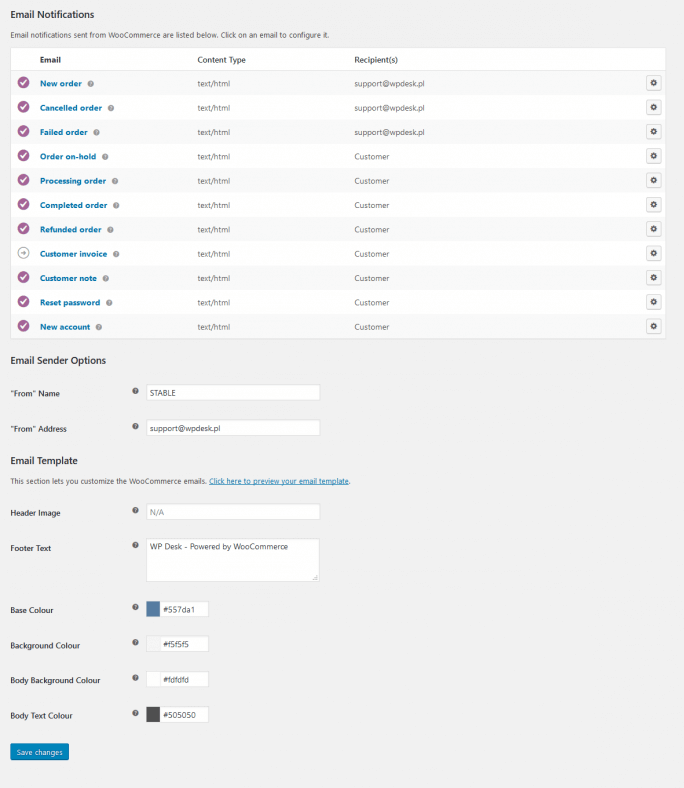
Email notifications
By clicking on a given notification in the table will enable you access these settings.
In this section you have a preview of the settings of given emails. The table will show you, which format has got a given message (text, HTML, text+HTML) and who is its recipient. By going to configuration of selected emails, you can change their settings.
New order, cancelled order, failed order. These notifications are for shop service. Using these, you can make the following changes:
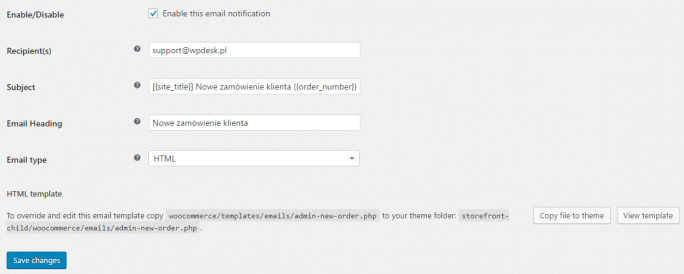
Enable/Disable. You can decide whether to activate a given email notification.
Recipient(s). Decide, on what email addresses a given notification will be sent to. You can add several recipients, by placing a coma after each email address.
Subject. Here you can set email subject. The following tags are at your disposal: {site_title}, {order_number}, {order_date}.
Email heading. Change email heading or just leave default one.
Email type. Decide on email format: text, HTML or text + HTML.
HTML template. If you want to edit template of a given email, you can do this by copying and overwriting the currently existing one.
Order on-hold, Processing order, Completed order, Refunded order, Customer invoice, Customer note, Reset password, New account. These notifications are for buyer. By configuring them, you can make the following changes:
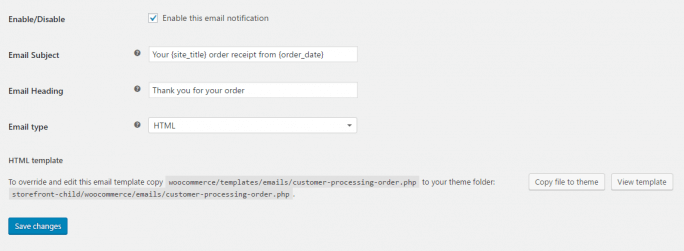
Enable/Disable. You can decide whether to activate a given email notification.
Subject. Here you can set email subject. The following tags are at your disposal {site_title}, {order_number}, {order_date}.
Email heading. Change email heading or just leave default one.
Email type. Decide on email format: text, HTML or text + HTML.
HTML template. If you want to edit template of a given email, you can do this by copying and overwriting the currently existing one.
Extra options
Shall there be a need to customise email, WooCommerce naturally gives such opportunity to the user. There are many ways to do this. The easiest one is to apply the dedicated plug-ins. Users can also adapt email templates by themselves.
Email sender options
This section enables you to set, how email will appear in inbox.
“From” name. Here you decide what name of sender will appear in mailbox. It makes sense to think through the name, since it’s the name that initially lets recipient identify a given email. Make sure that name is explicit and that it lets customers promptly identify the sender. Do not make it too long either.
“From” address. Here you decide, what email address will appear in mailbox. Here too, it is suggested to make it clear-cut, by adding an easy to remember email address.
Email template
This section lets you customise sent emails. The following options are at your disposal:
Header image. By using this option you can add an image, which will be displayed in email just above its heading. Image should be added in the form of a link directing to a given file from media library.
Footer Text. This is just text, which will appear in email footer.
Base colour. Background colour, Body background colour, Body text colour. Hereyou can change default colours by using HEX code. Remember to make sure your email is readible, the aesthetics only come afterwards.
