Account settings in WooCommerce are frequently skipped by the sellers. However, they are as important as all the others, so there is no point in marginalizing them. On the contrary, configuring user & customer accounts in WooCommerce may increase your sales!
Adding WooCommerce products and a beautiful checkout design won't work without customers!
Learn how to properly set up the user & customer accounts in WooCommerce!
Contents
- Setting up the WooCommerce My Account Page
- Customer Accounts in WooCommerce
- Account & Checkout endpoints
- Summary
- My Account in WooCommerce - Settings, Shortcode & Custom Fields
- WooCommerce Checkout - Settings, Shortcode & Configuration Guide
- WooCommerce Checkout Page: settings, missing options & errors
- Enable WooCommerce guest checkout plus 3 small tips to get more customers
- Customize the WooCommerce Checkout Page: Tips & Tools for Success
Setting up the WooCommerce My Account Page
Follow the steps below to successfully configure user & customer accounts in WooCommerce!
-
Advanced tab
👉🏽 First, let's start with the Advanced settings. Go to your WP menu: WooCommerce → Settings → Advanced.
Page setup
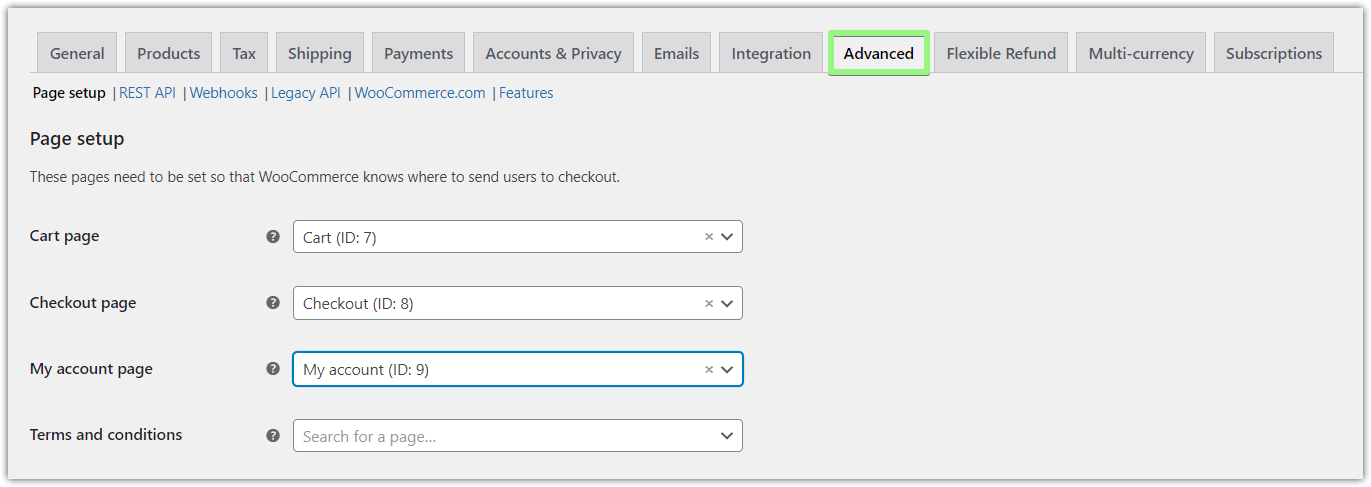
Personalize the WooCommerce customer accounts page. Go to the Advanced tab first Here you set where to send users, to access the core WooCommerce pages, including My Account.
Select the My Account page, which is created when you activate WooCommerce.
Make sure that the [
woocommerce_my_account] shortcode is present on the selected page. Otherwise, the account settings and information about orders will not be displayed to the user.
💡 You can also read more on how to use the woocommerce_my_account shortcode, My Account page settings, and how to add custom fields to it. -
Accounts & Privacy tab
Go to WooCommerce → Settings → Accounts & Privacy.
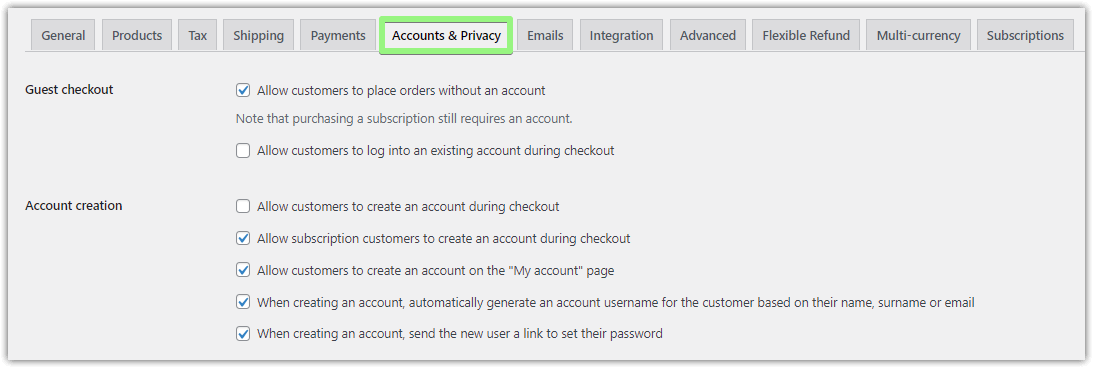
Accounts & Privacy tab - proceed to the Account creation section Enable Account creation
Go to the Account creation section. Check the checkbox Allow customers to create an account during checkout.

Mark this checkbox to proceed with the WooCommerce customer accounts settings Using that option you can enable account creation on the Checkout page and/or My Account page. This option will let you decide, at which point your customers will be able to register at your shop.
Marking the option Account creation on the Checkout page, shall enable a customer to create his account upon placing an order, immediately after he marks the Create an account? checkbox.
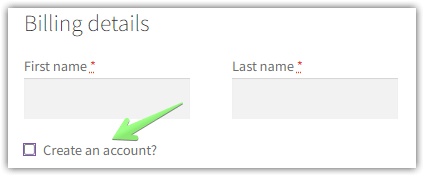
WooCommerce user accounts: let your customers create an account directly at the checkout When you set the option Enable registration on the My Account page, after going to the My account page, the user shall be enabled to register.

Check this checkbox to allow customers to create an account on the "My account" page 👉🏽 As a result, your customers will see this on the My Account page:
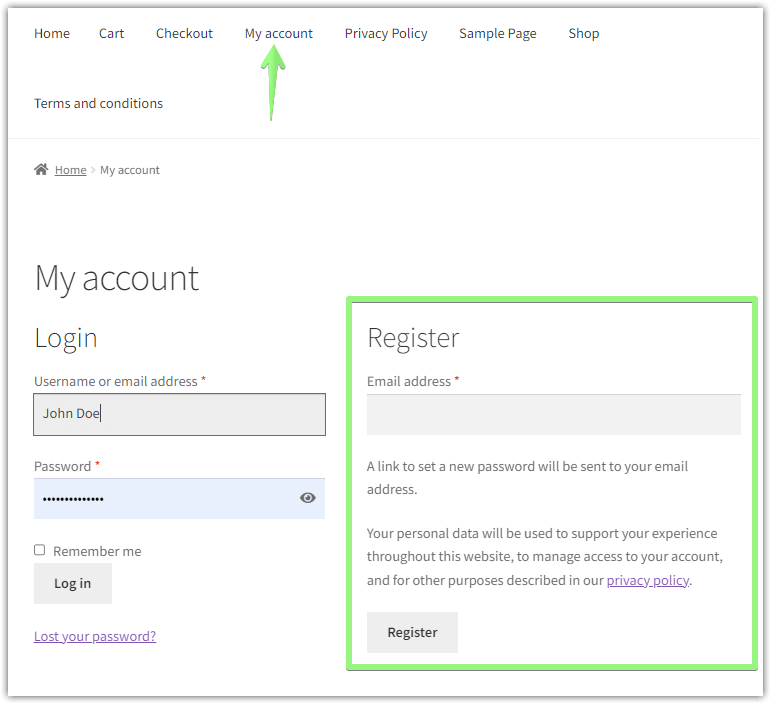
WooCommerce user accounts can be created from the My Account page
-
Login
In this section, you can decide whether to allow customers to log into an existing account during checkout. Go to the Accounts & Privacy tab and check the following checkbox:

Manage WooCommerce customer accounts in the Accounts & Privacy tab 👉🏽 If you mark this option, you will obtain the following effect:

WooCommerce user accounts can be managed easily. This is an example of what you can do.
Customer Accounts in WooCommerce
When creating their accounts, customers can submit their usernames, but you can also help them out in that by creating a username from the email address. All you need to do is to mark in the settings the option When creating an account, automatically generate an account username for the WooCommerce customer based on their name, surname, or email.
Take a look:

When this option is active, the username shall be created from the email prefix e.g. for the email address [email protected] it shall be johndoe. However shall your customer decide to use a repetitive prefix e.g. [email protected], their username shall be added with a number (e.g. john5, etc.).
👉🏽 In this section you can also decide if the password used by a customer is to be created by the customer himself or if the system is to do it for him. If you mark the option When creating an account, send the new user a link to set their password, it shall be sent to the email address given at registration.

Account & Checkout endpoints
Go to the Advanced tab again if you want to manage checkout endpoints:
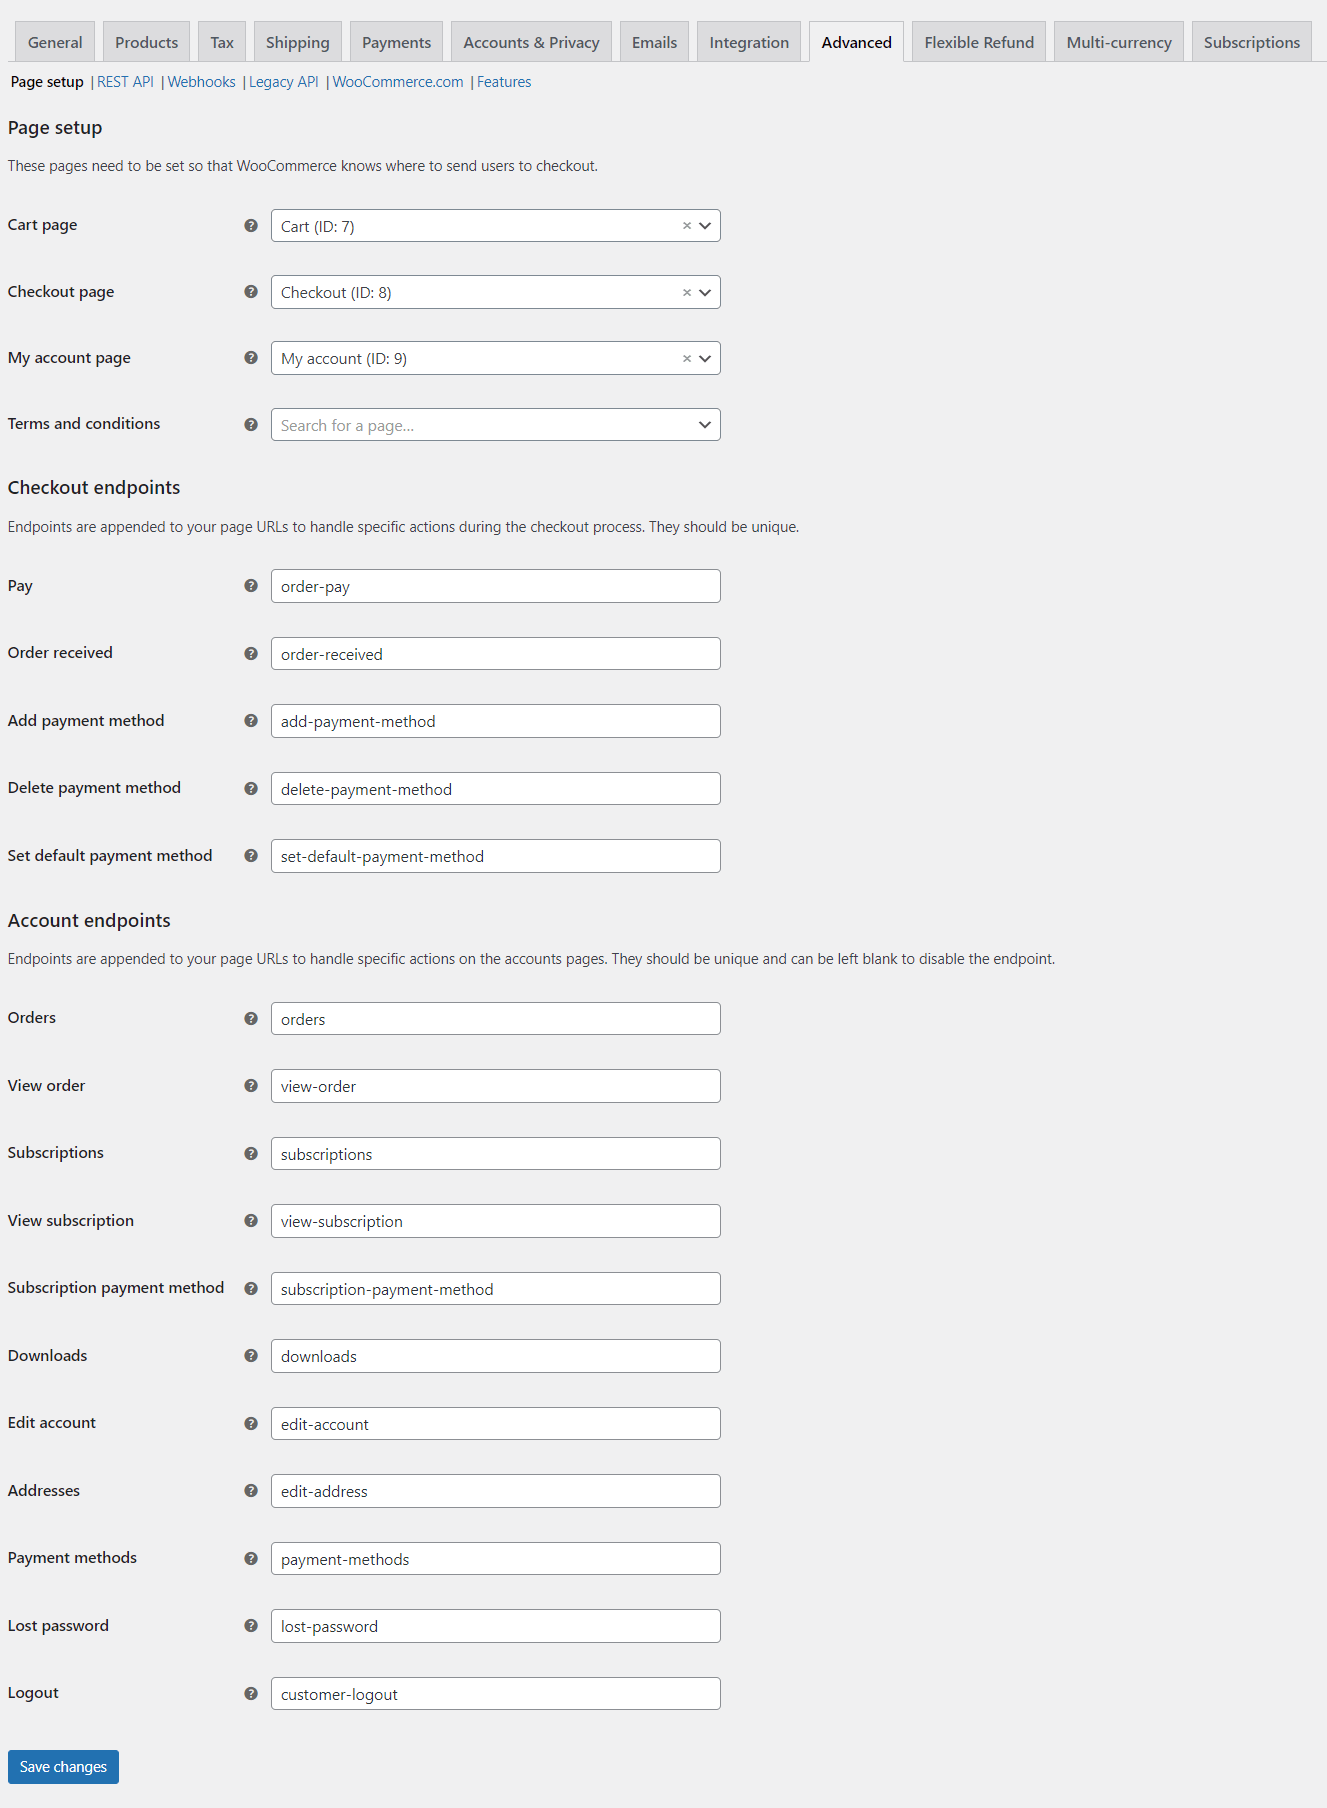
👉🏽 In this section should be set unique postscripts to the shop-name.pl/my-account/ URL address. Thanks to the postscripts, each page obtains a unique URL address. For example, the URL for the checkout page can look like this:
shop-name.pl/my-account/orders
This does not look complicated, right🤗? However, shall you have any questions, do not hesitate to ask them in your comments.
Download it directly from here:
Flexible Checkout Fields WooCommerce
Edit, add new or hide unnecessary fields from the WooCommerce checkout form. Add pricing to fields and use conditional logic. It's all about conversions and better user experience. NEW: now you can set multiple conditions (OR) under one or more condition groups (AND).
💾 Active Installations: 80,000+ | WordPress Rating:
Summary
Today, you've learned how to set up the My Account page, user registration, and customer accounts in WooCommerce.
If you have any questions let us know.
-
Add a message in the WooCommerce checkout

WooCommerce checkout message. Find out how to add a note field to the checkout page with Flexible Checkout Fields. -
Add extra custom fields to checkout

WooCommerce custom fields guide. Find out how to add and configure WooCommerce checkout fields. A real treasure trove of knowledge.


Leave a Reply