Contents
Plugin settings
Go to Allegro → Settings to configure the plugin:
Login details
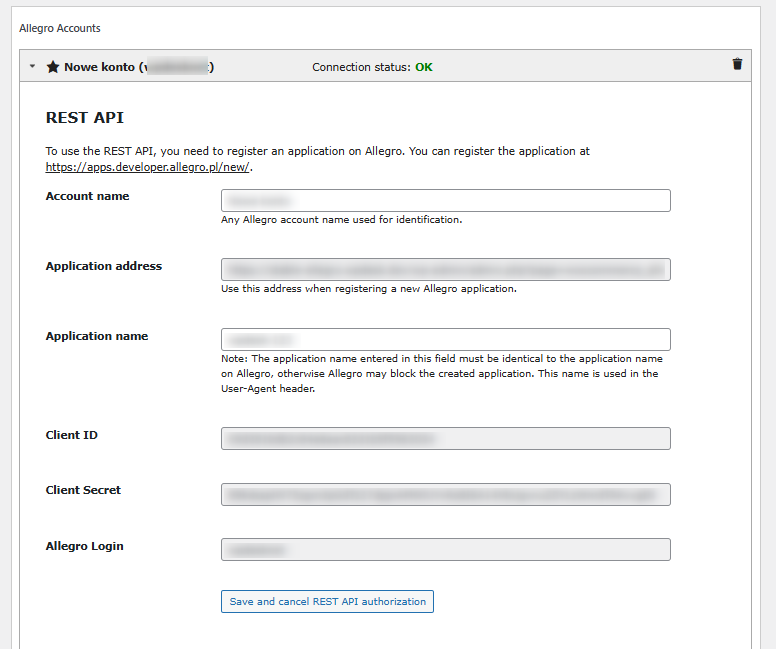
Account name – enter any name to identify the Allegro account. It’s used for internal management only.
Application address – copy this URL when registering your Allegro app.
Application name – enter the exact name of the app you created in the Allegro Developers dashboard. The name must be identical to the app name displayed on Allegro, without any additional characters, spaces, or changes to the text. This name is used in the User-Agent header. Entering an incorrect name may result in Allegro blocking access to the app.
Client ID and Client Secret – paste the keys you got after registering the app in Allegro.
Allegro Login – this field shows the connected Allegro account login after successful authorization.
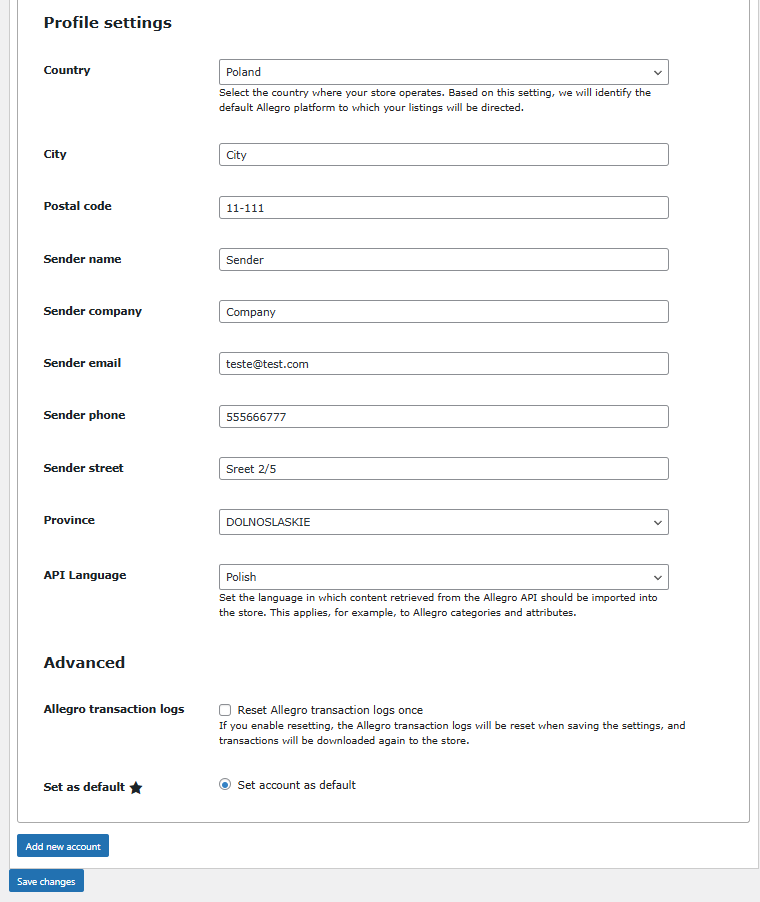
Profile settings – add your store’s or Allegro account’s address information, including country, city, ZIP code, sender name, company name, email, phone number, street address, province, and API language.
The Country setting defines the default Allegro marketplace for listings. The plugin supports Poland, Czech Republic, Slovakia, and Hungary. The API Language setting supports Polish, English, Slovak, Czech, and Hungarian.
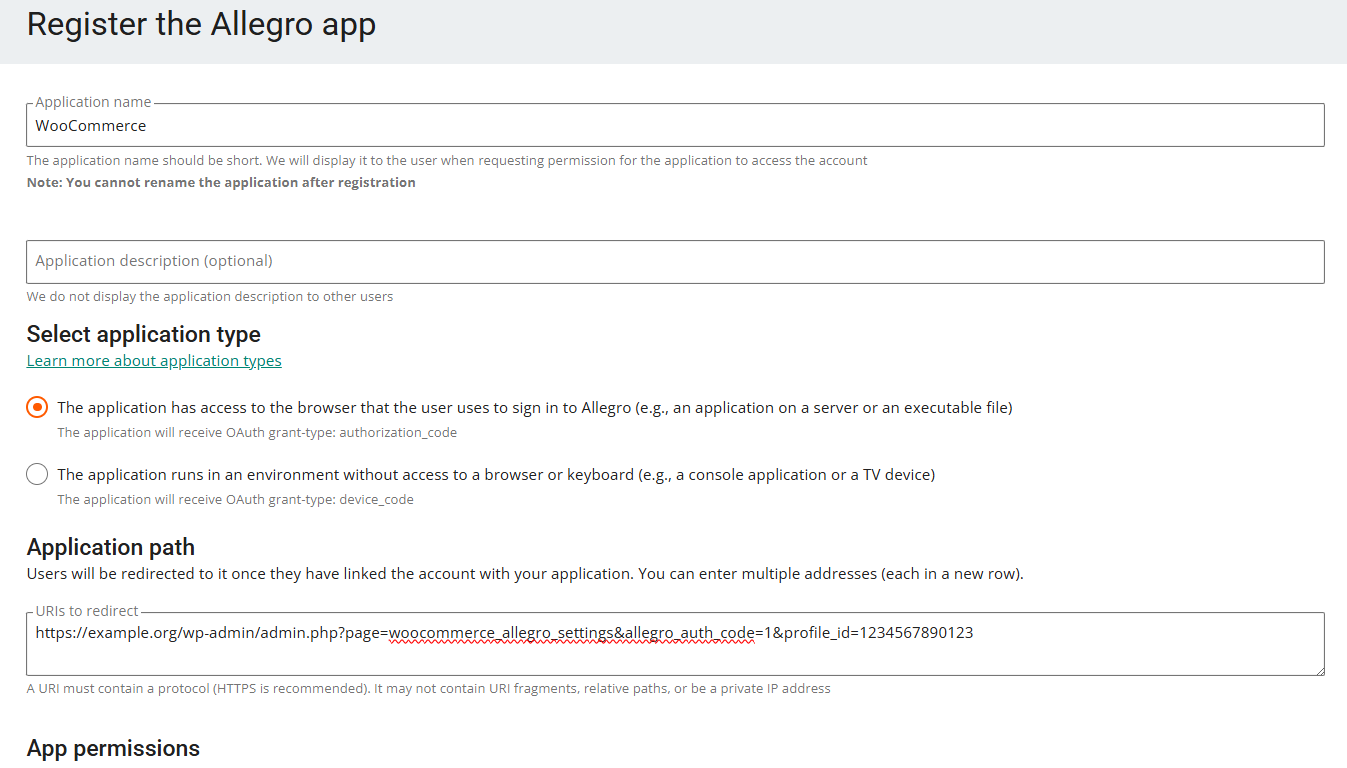
- Go to https://allegro.pl/moje-allegro/moje-konto/dwustopniowe-logowanie and enable two-step login.
- Log in at https://apps.developer.allegro.pl/.
- Click Register new application.
- Set the application name and description.
- Choose the application type.
- Paste the Application address from the plugin settings into the application path field and complete the registration.
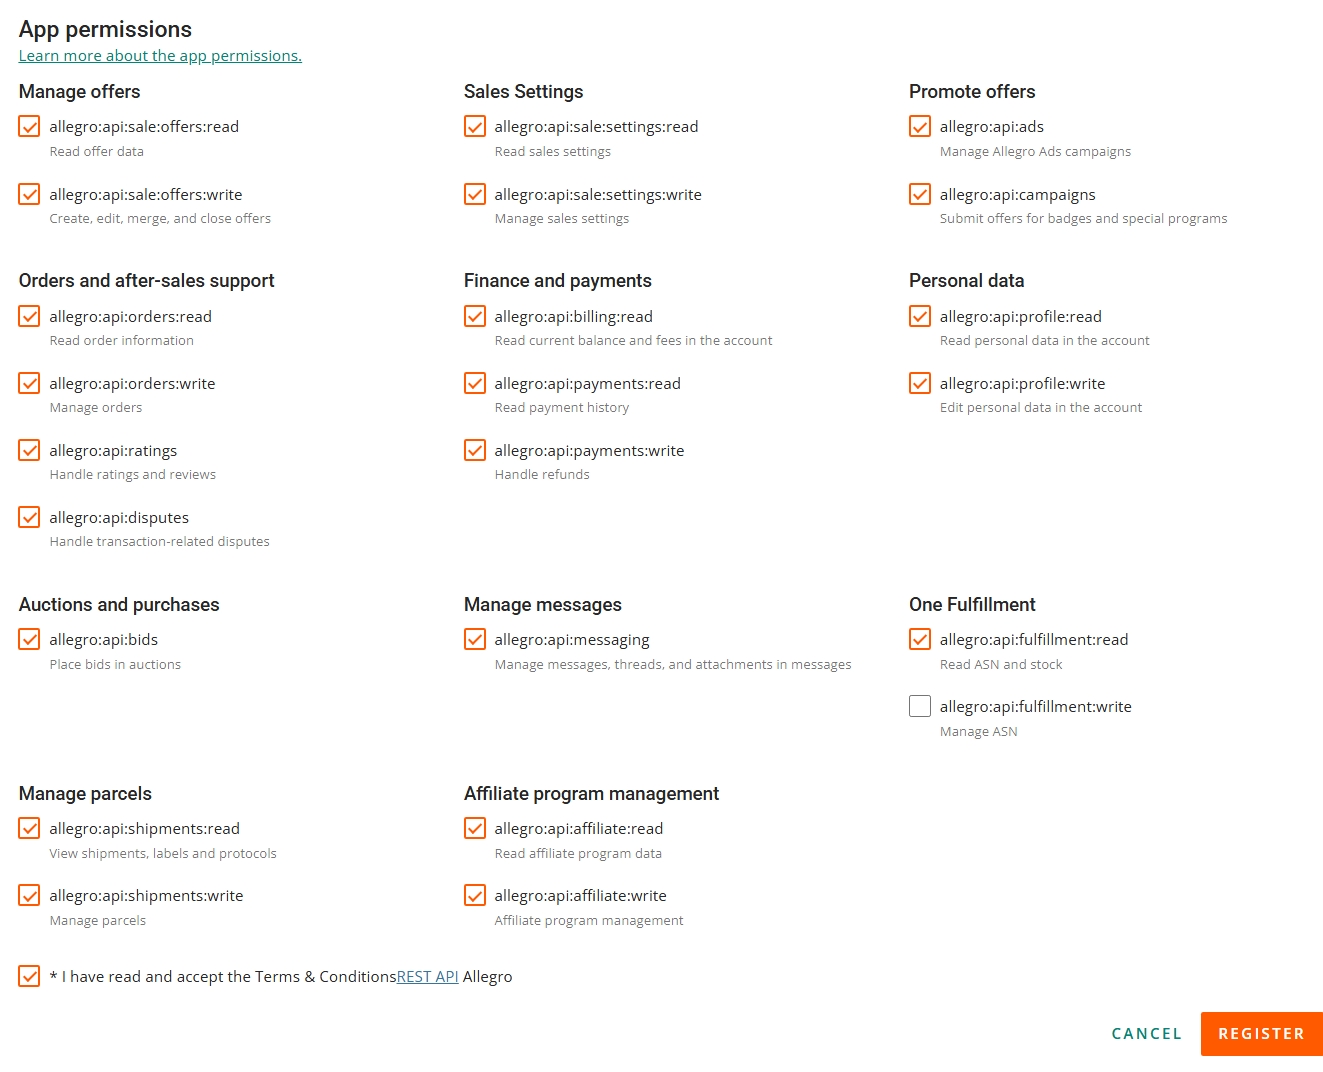
- Select all app permissions required by the plugin features you want to use.
- Copy the Client ID and Client Secret into the plugin settings.
- Save the settings.
- Click Save and authorize REST API.
Connection status
If everything is set up correctly, you’ll see OK. If something is wrong, the status will show No connection.
Advanced
Allegro transaction logs
After every order import from Allegro, the plugin saves a log entry. It lets the plugin continue from where it stopped. If you removed an order by mistake and want to fetch it again, enable this option and click Save. Missing orders still available in the log can then be imported again.
Debug mode
If you notice issues with the plugin, enable Debug mode. The plugin will create the allegro.log file and save diagnostic information that can help with troubleshooting.
You can check log entries in WooCommerce → Status → Logs.
The Log API request option lets you log Allegro auction listing parameters. You can also use Automatic disabling to turn debug mode off automatically after a selected time.
Allegro Delivery
The plugin includes built-in Allegro Delivery settings for orders imported from Allegro. You can configure automatic shipment creation, default label settings, package sizes, and sender point mappings in Allegro → Settings → Allegro Delivery.
If you enable Auto-create shipments, the plugin can create a shipment automatically when an imported Allegro order changes to the selected WooCommerce order status. Automatic shipment creation works only for orders imported from Allegro, because they contain an Allegro order ID.
In this section, you can configure:
- Auto-create shipments — create shipments automatically after the selected order status is reached.
- Auto-create on status — choose the WooCommerce order status that triggers shipment creation.
- Shipping method — choose Parcel point or Courier pickup. Courier pickup can automatically schedule a pickup.
- Pickup date and Preferred pickup time — define when courier pickup should be scheduled.
- Default label format and Default label page size — set the default format and size for generated shipping labels.
- Predefined package sizes — save package dimensions and weight for faster shipment creation.
- Sender point mappings — map delivery methods to sender point codes so the plugin can fill the sender point automatically.
On the WooCommerce order edit screen, Allegro orders include the Allegro Delivery metabox. From there, you can create a shipment, generate a label, cancel a shipment, order pickup, and check the shipment status history.
Default categories
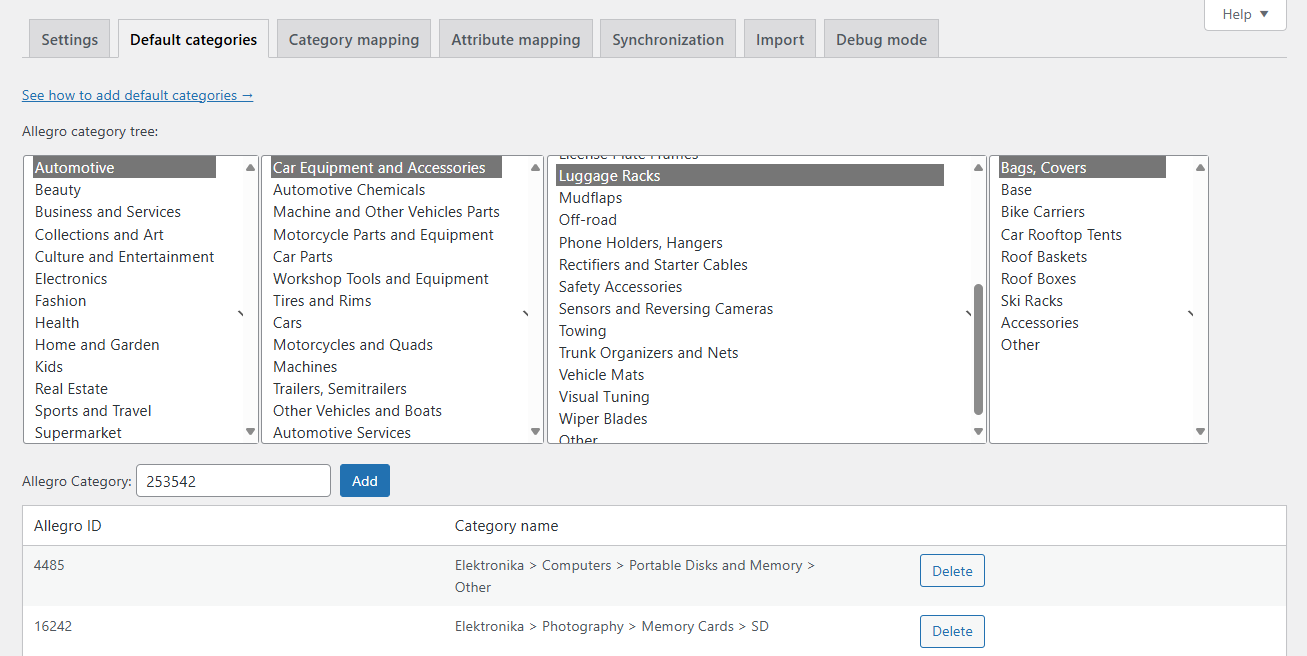
Here you can choose Allegro categories for listing your products. You can search for a category by name or paste its ID into the Allegro Category field and click Add. That way, you can quickly find the right category when listing items.
Category mapping
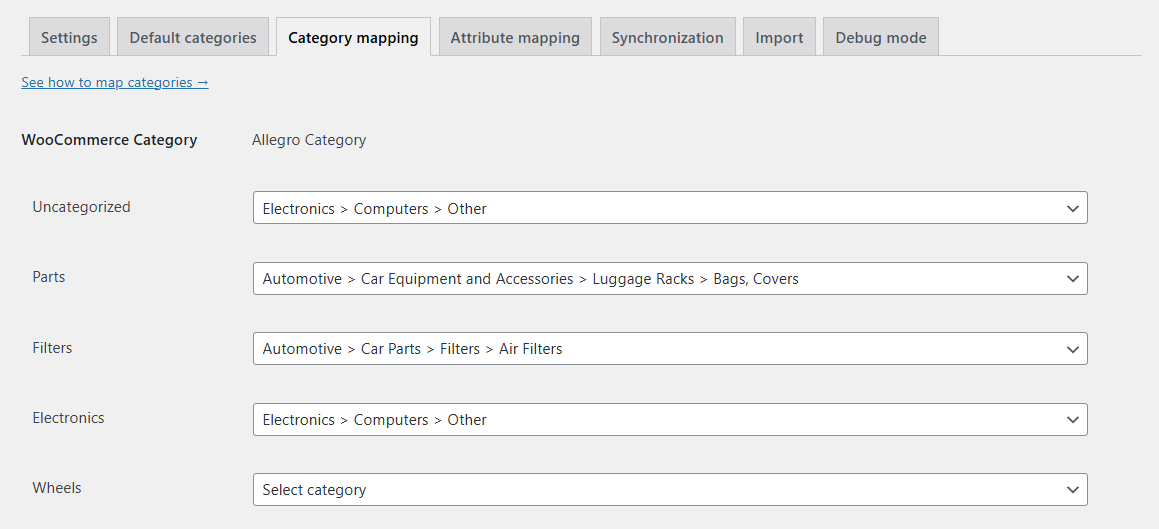
To speed up product listing on Allegro, map your WooCommerce categories to Allegro categories. You’ll see a list of all your WooCommerce categories here. If you’ve already selected default Allegro categories, choose one next to each WooCommerce category. Click Save to store the changes.
Attribute mapping
To automate listing products on Allegro, map WooCommerce attributes to Allegro category fields.
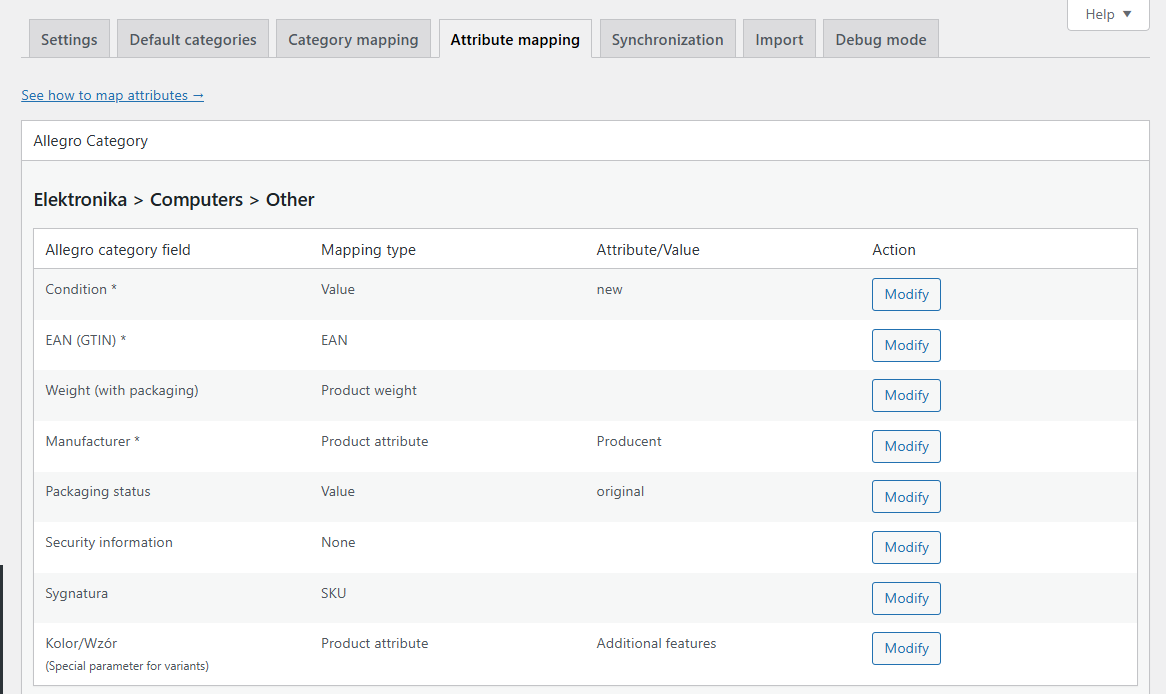
Some Allegro categories require additional product details like color, material, or size. In the Attribute mapping tab, you’ll see fields for the selected default Allegro categories. You have several options to assign values to those fields:
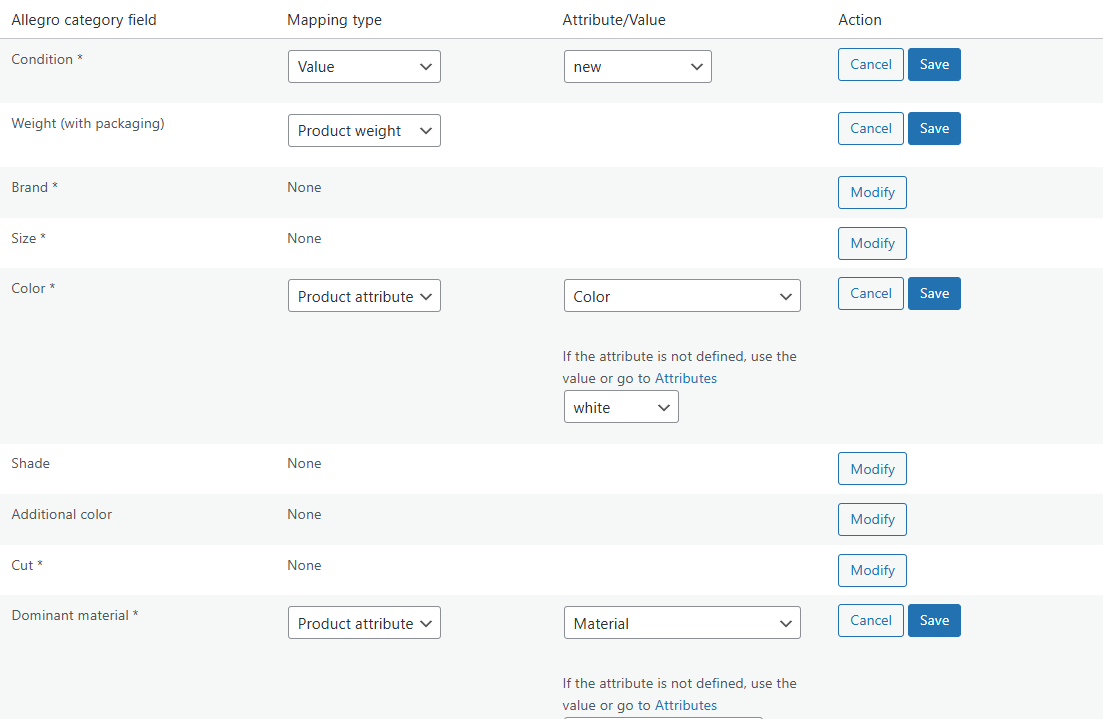
Product attribute – select one of the global WooCommerce attributes. You can also define default values to use when the product doesn’t have that attribute set.
SKU – choose this option to pull the value from the product’s SKU field.
Product weight – for the Allegro Weight (with packaging) field, you can assign the product’s weight from WooCommerce or use a custom value or attribute.
Value – choose one of the predefined Allegro values or enter your own value, depending on the field. That value will always be used when listing the product.

This is especially useful if your store offers many color or pattern variations.
Synchronization
Import orders from Allegro
To start importing purchases from Allegro and creating WooCommerce orders, enable Download purchases from Allegro. The checkbox label in the plugin is Download purchases from Allegro to WooCommerce orders. This also updates stock levels in WooCommerce based on imported Allegro sales.
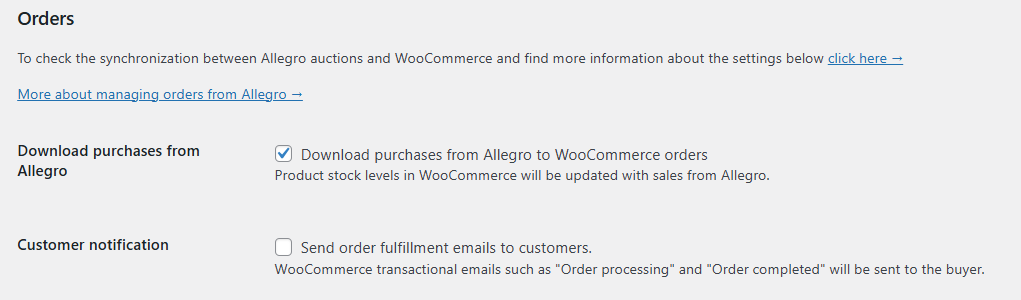
The plugin checks for new purchases on Allegro every 10 minutes.
If you also enable Send order fulfillment emails to customers., the buyer will receive standard WooCommerce transactional emails based on the order status:
- WooCommerce “Order processing” email
- WooCommerce “Order completed” email
Registering users in the store
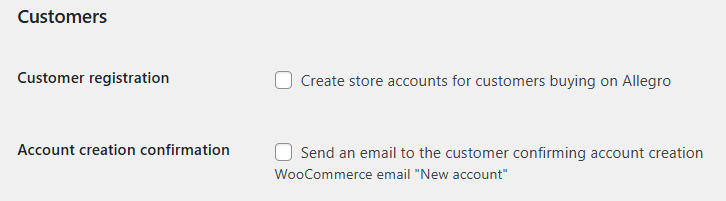
You can allow automatic account creation for customers buying on Allegro and send them a confirmation email.
If you enable Create store accounts for customers buying on Allegro, an account will be created for every Allegro user whose order is imported into WooCommerce.
If you also enable the account creation confirmation email, the customer will get an email with a request to set a password for the newly created account.
Stock level synchronization
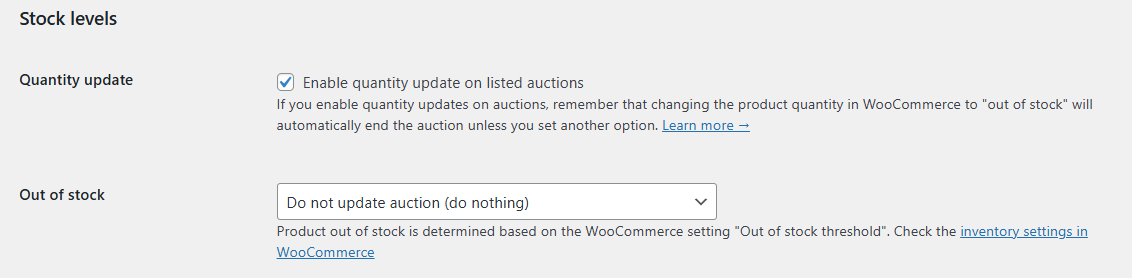
Stock synchronization can work both ways. When a product is sold in the store, its quantity can also be updated on the linked auction. If you enable Enable quantity update on listed auctions, make sure to define what should happen when the product is out of stock. You can leave the auction unchanged, end it, or change the auction quantity to 1 piece.
Out-of-stock status is based on the Out of stock threshold in your WooCommerce inventory settings.
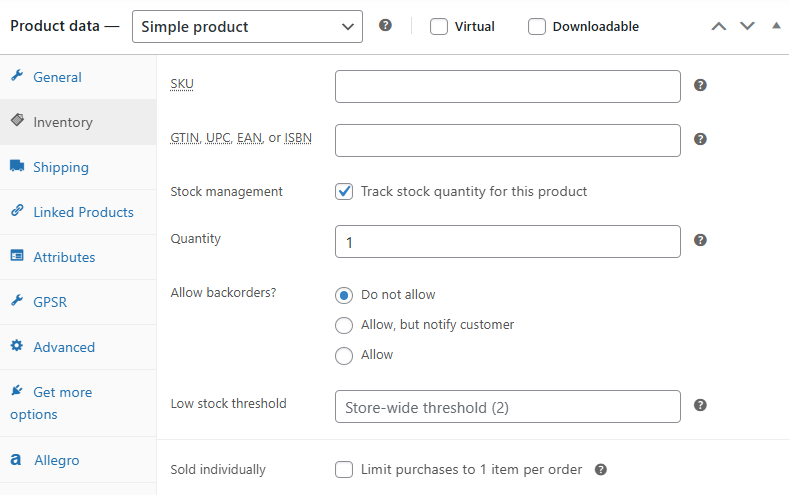
Synchronization works only if Manage stock is enabled for the product. If the Enable stock management at product level checkbox is not checked, synchronization will not run for that product.

Automatic auction resumption – enable this option to automatically relist auctions that were ended due to out-of-stock status. When stock is increased, the plugin will detect it and relist the auction. The auction will keep its original ID and URL. This requires the End auction option to be selected under Out of stock settings.
Price synchronization
You can enable two-way price synchronization between WooCommerce products and Allegro auctions:

Changing the WooCommerce product price will update the price on all linked Allegro auctions.
Changing the price on an Allegro auction will update the WooCommerce product price linked to that auction.
Prices are always synced 1:1, including WooCommerce tax settings. If you previously used a price modifier in the auction template, it will be ignored, and the template fields will be disabled:
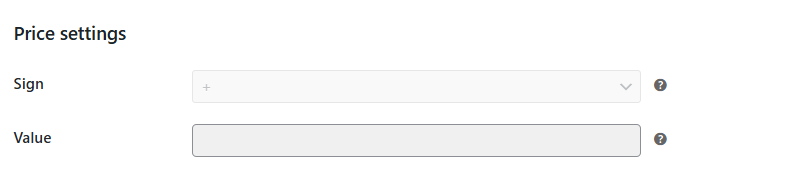
With price synchronization enabled, you can’t edit auction prices manually:
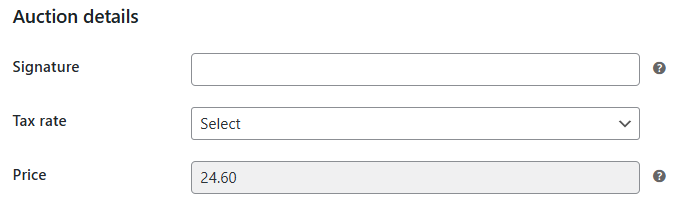
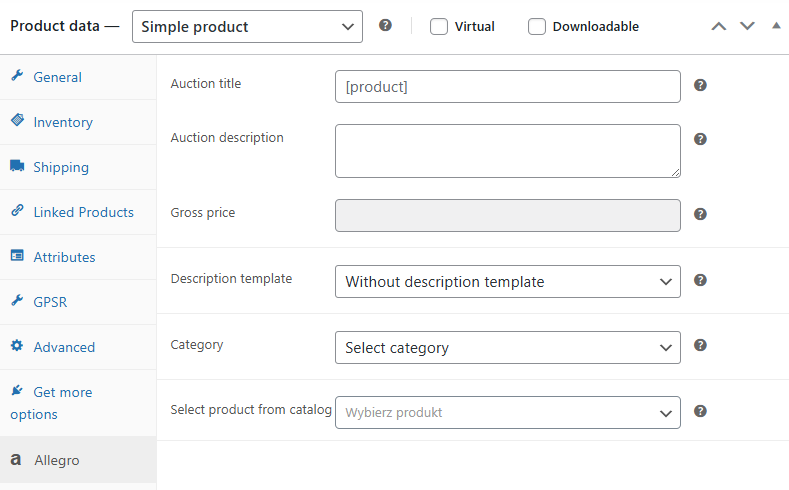
The price entered in the Allegro tab in the product settings is also ignored:
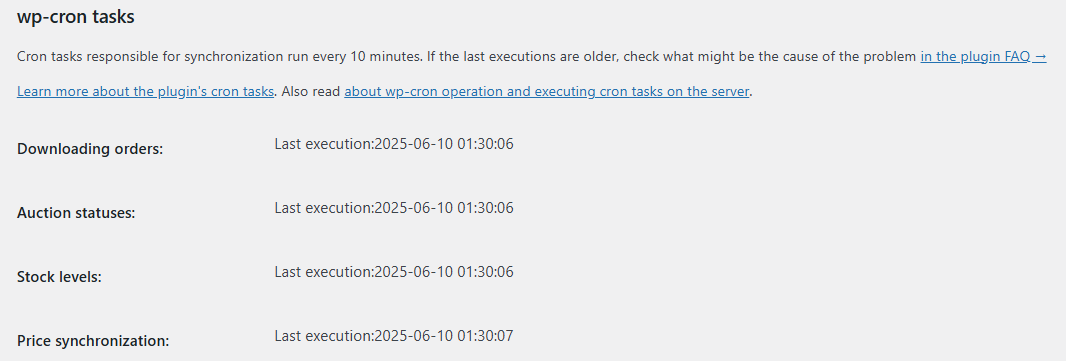
wp-cron tasks
If background tasks aren’t running, for example orders aren’t being imported or auction statuses don’t change, you can check when the last synchronization happened. Synchronization tasks run every 10 minutes. If no update has occurred for a while, there might be a problem with the Allegro API connection or wp-cron may be blocked.