You've got your shop; you've got great products. Do you need anything else? Yes, you need to set the price for your WooCommerce products! It's a crucial part of your business and essential in your e-commerce strategy. I'll start at the very beginning when you add prices to your WooCommerce products and work through to the very end when a customer places an order.
You will read about:
- WooCommerce price settings
- WooCommerce tax settings
- Product price in WooCommerce
- How to change the product price in WooCommerce?
- Setting decimals for price in WooCommerce
- How do customers see the product price in WooCommerce?
- Product price in WooCommerce orders
- Hooks in WooCommerce
- Import products with updated price in WooCommerce
- Pricing rules with Flexible Pricing for WooCommerce
WooCommerce price settings
Before starting with the product price, you should ask yourself about taxes in your shop. If you are not sure about that, I recommend consulting with a tax professional or an accountant.
WooCommerce tax settings
So in your WooCommerce shop, start with enabling taxes. Go to WooCommerce > Settings > General, select the Enable Taxes and Tax Calculations checkbox. Remember to save the changes.

Now you can start configuring tax options. You will see a new tab in the settings - TAX. You may be wondering why I'm talking about taxes, and you haven't entered the Product's price yet. Sorry, but this step is significant and could save your time in the future. Here you can decide how to input product prices later on.
You have two options:
Yes, I will enter prices inclusive of tax - which means that all product prices are input using your store's base tax rate.
No, I will enter prices exclusive of tax - for this setting, I use an example. In Poland, the tax rate is, in most cases, 23%. If the product price is 99, you’ll have to input 80,48.
Next, there are two options that decide how prices are displayed in the store. You can choose to include or exclude the tax. This setting will determine how to display prices on the front-end of your store.

Product price in WooCommerce
Let's start with a scenario where you add a new product to your shop. Go to Product in your Dashboard and click Add new.
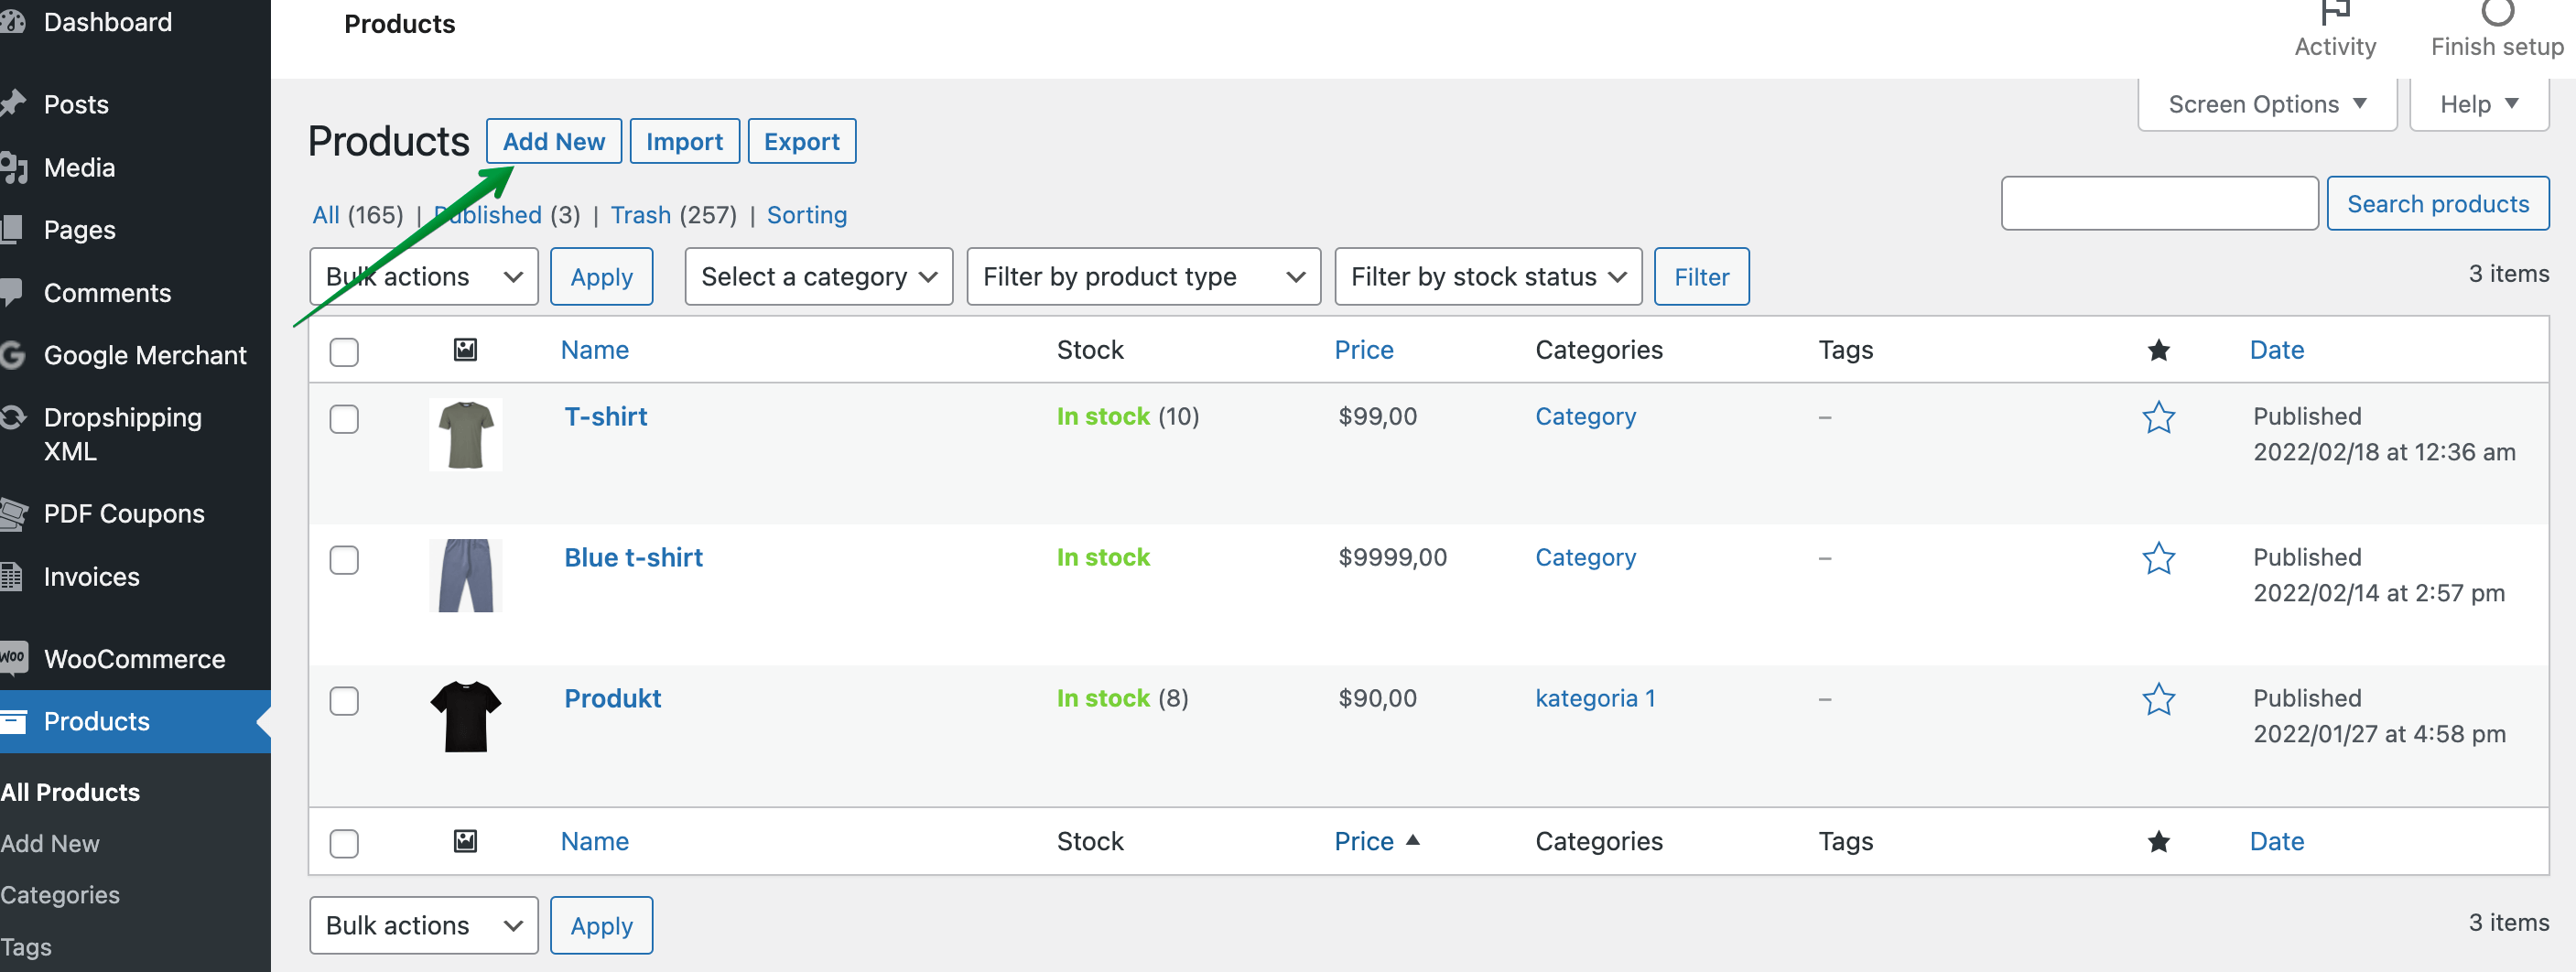
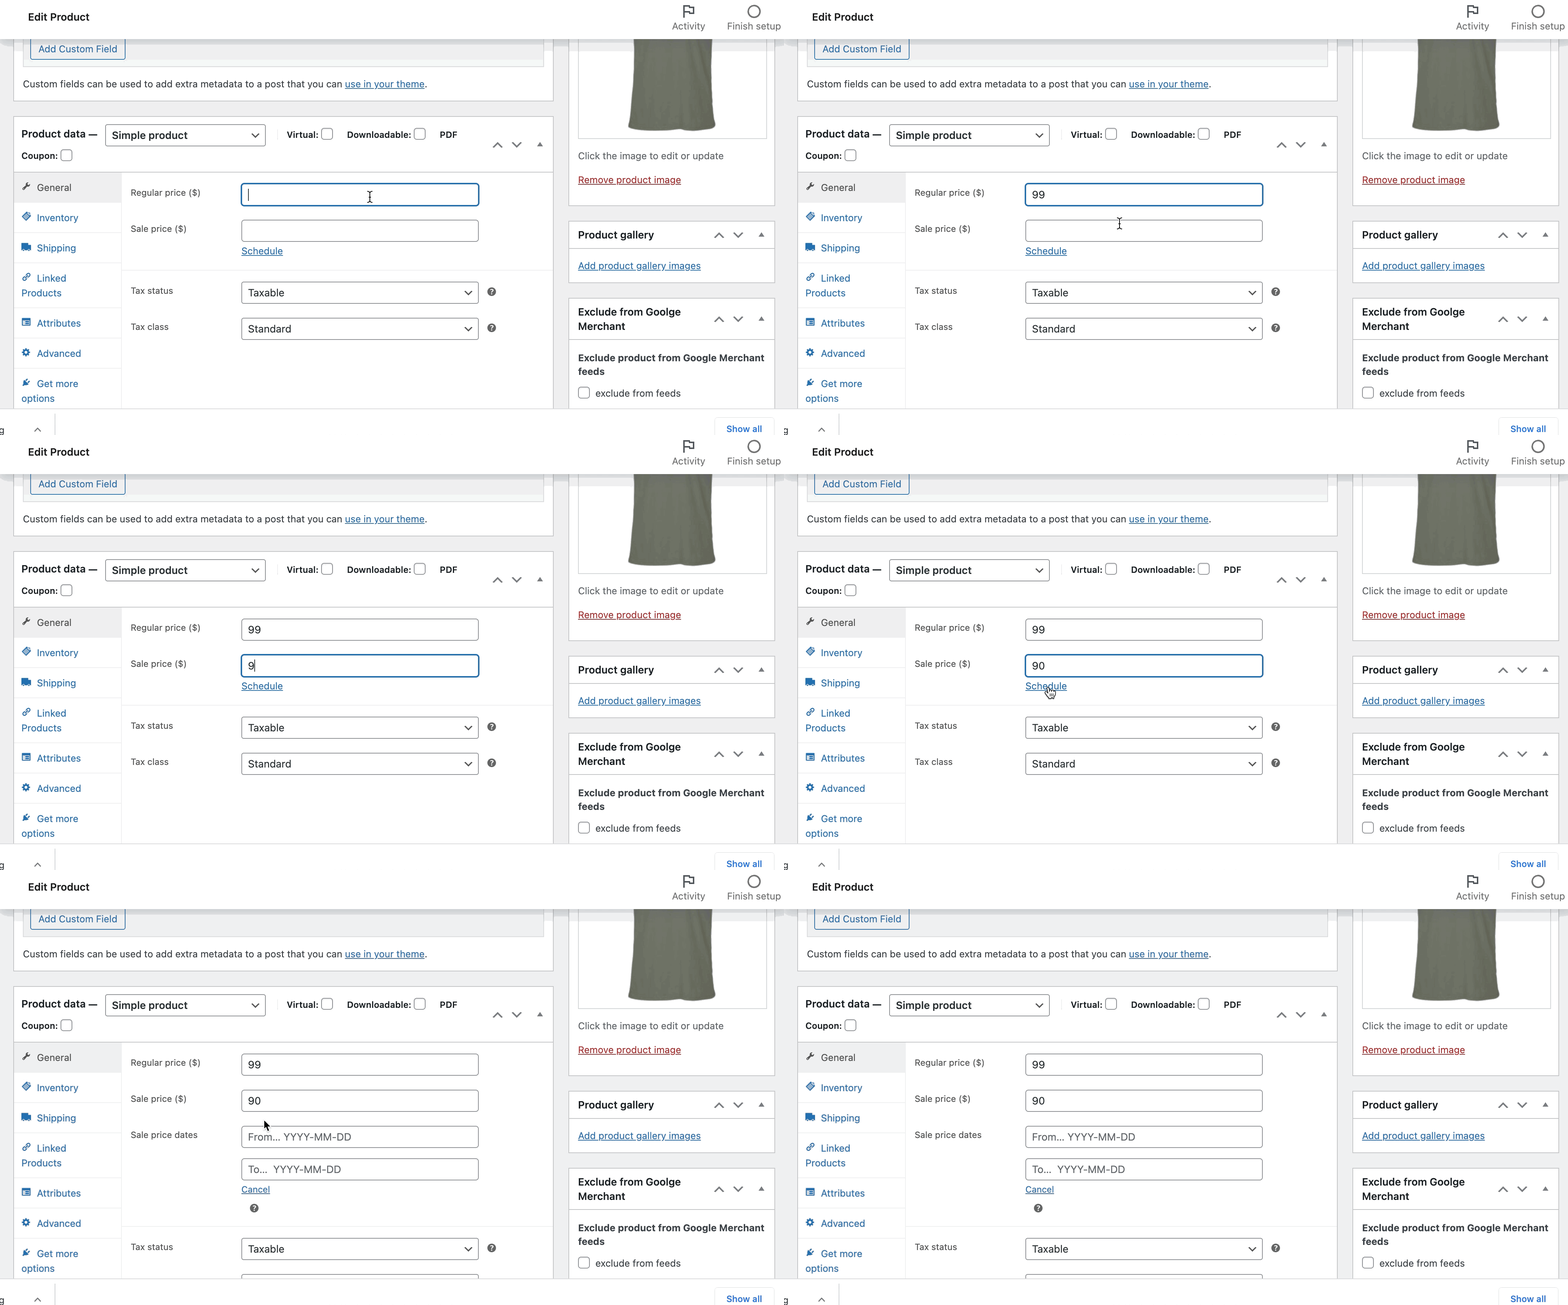
We will skip adding a title or description of a product and go straight to the product data. You will see the Regular and Sale price. You should always add a regular price. Otherwise, the add to cart button will not appear on the product page.
The sale price is for discounts of course. Customers love them, so it's worth using this field. The sale price field has also great scheduling functionality. Thanks to it, you can set the beginning and end of the promotion.
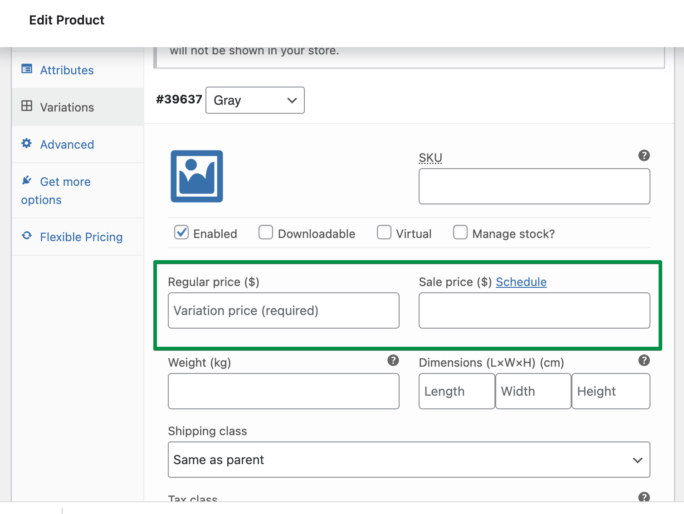
Oh yes, I remember about variable products. In WooCommerce, every product variant has its price. If your Product has a variant, go into every single and add price.
How to change the product price in WooCommerce?
In another scenario, you already have products in your store and want to edit the price. You can go for a list of all products and choose a product with a different price. Scroll to product data and change regular or sale prices. Don't forget to save changes.
WooCommerce also provides a quick edit option. It allows you to change the price without editing the WooCommerce Product. How to do this? Hover the cursor on the Product you want to edit, and the quick edit option appears. Click on it, and you will see a window like on the screen below:

Change the product price and save changes. That is all, an easy way to quickly change some product data.
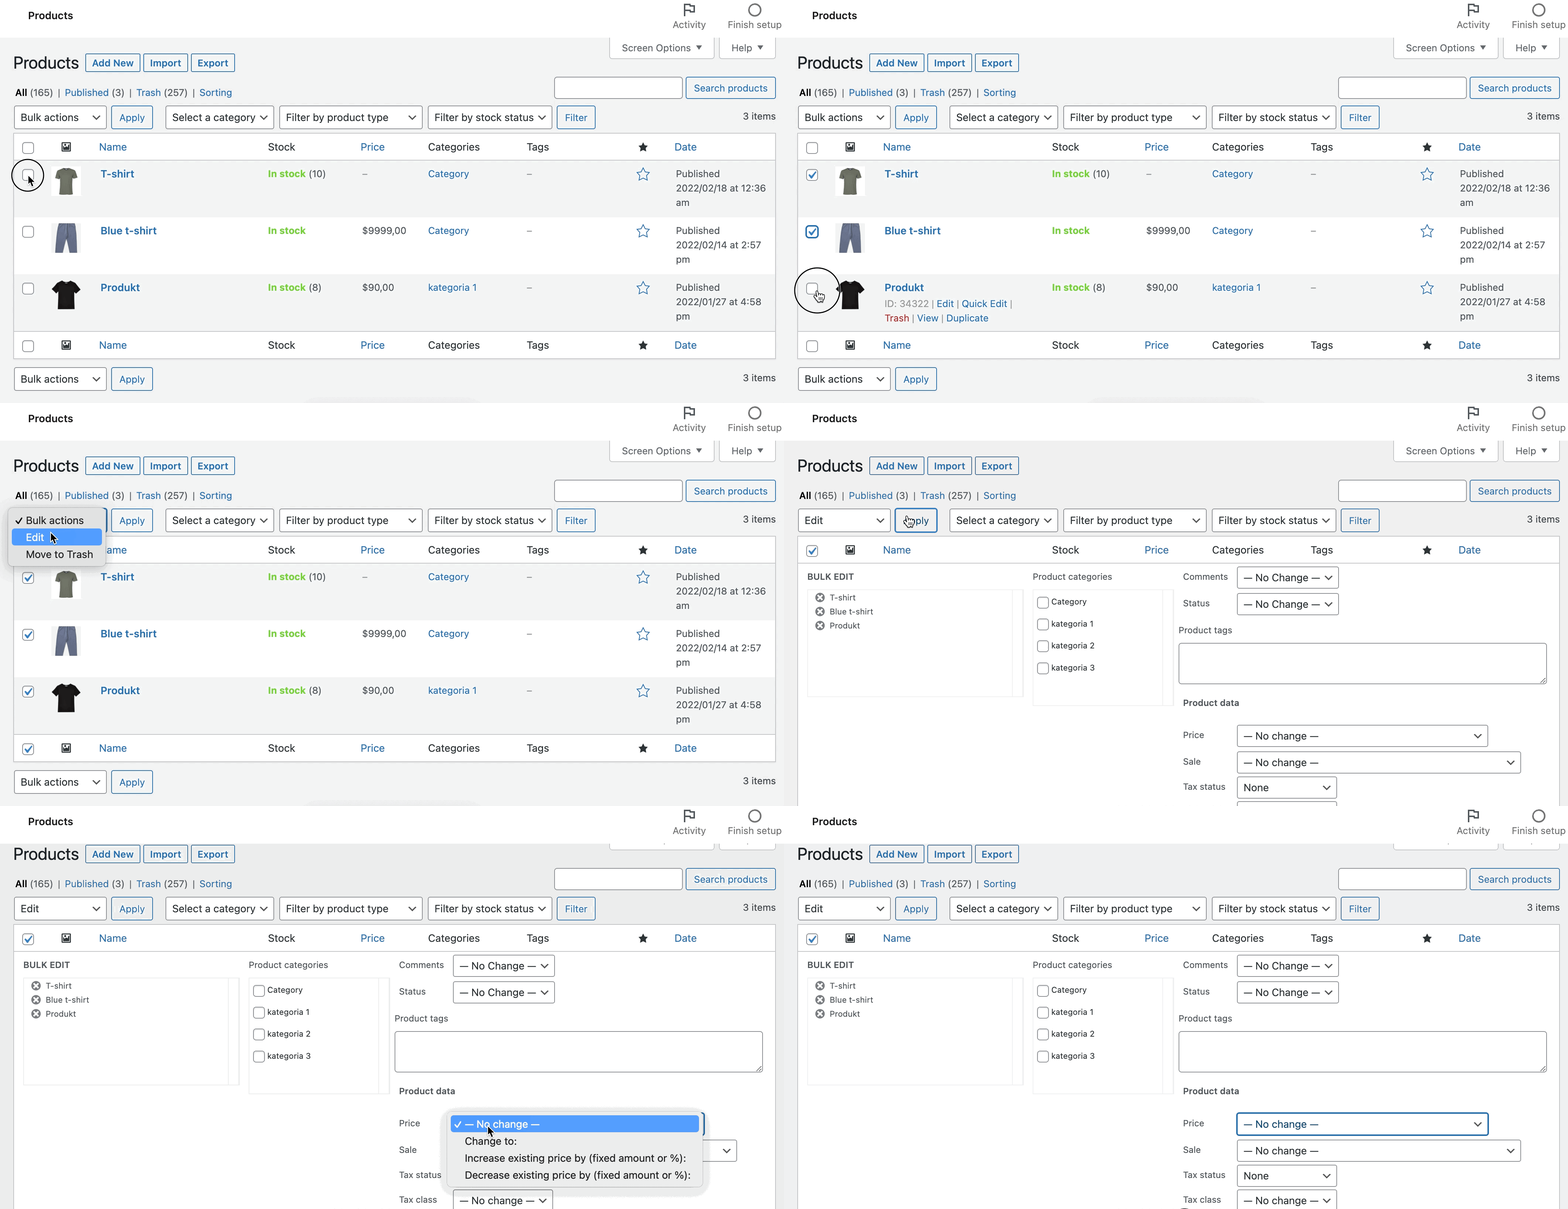
If you want to set the same prices for multiple products, the best way is to use the bulk edit option. Go to the product list and choose products. Edit and click on the Apply button. Now you can change the price for more WooCommerce products at once. Note that you can also change the WooCommerce product price by a percentage value. Then save, and done!
How to set decimals for product price in WooCommerce?
Under General settings in WooCommerce, you can set your store Currency, Currency position, Decimal separator, and Number of decimals. A number of decimals setting allows you to set the number of digits that appear after the separator. The selected option will display prices throughout your website with decimals, for example, $12.00.

How do customers see the product price in WooCommerce?
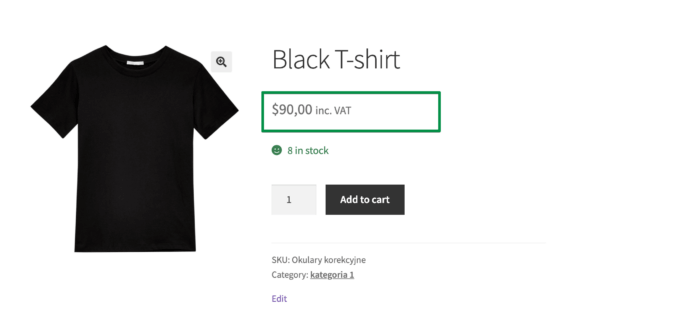
The price in WooCommerce can be displayed in many ways in your shop. I showed you before that you can display prices with and without taxes. You can also add a suffix to the product price. Go to WordPress Dashboard > WooCommerce > Settings > Tax > Tax Options > “Price display suffix”.
You can add a text to show after product price. You can use two shortcodes {price_including_tax} and {price_excluding_tax}. For example:
Product price in WooCommerce orders
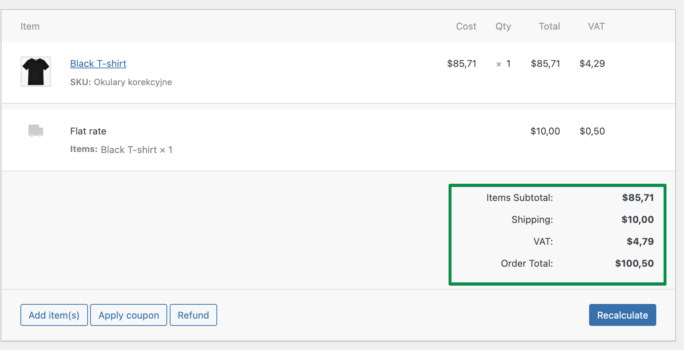
In WooCommerce, you can easily see the order details. Go to the list of orders and select the one you want to check. Now you can see order details with all of the information, including prices.
Every single product has a cost, quantity, and total price. If you have configured tax rates in the store, the cost is a net price. In this line, you can also find taxes.
Of course, you can see an overview of the order's cost. You’ve got there:
- Items subtotal, which is cost excluding tax,
- Shipping cost,
- Taxes — the amount of taxes for the whole order,
- The order total — the total of all costs
Hooks in WooCommerce
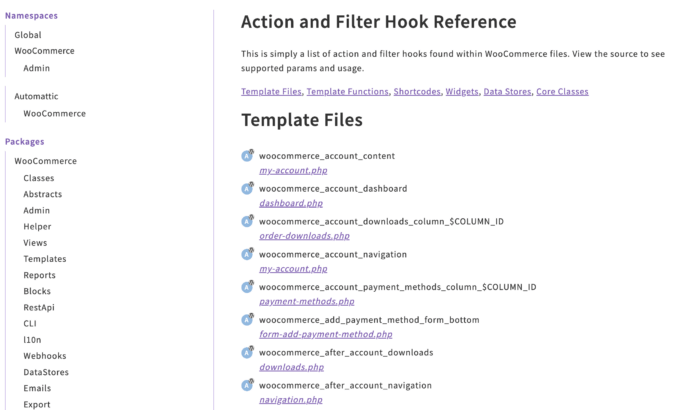
If you are familiar with PHP code you can customize your WooCommerce store with hooks. Here you can find tons of filters to help you modify default WooCommerce functionality.
Import products with updated price in WooCommerce
The last option is updating product prices with the CSV file. WooCommerce has import products functionality. You can download the CSV file into WooCommerce with all products, change prices directly in the file and then import the new file to your shop.
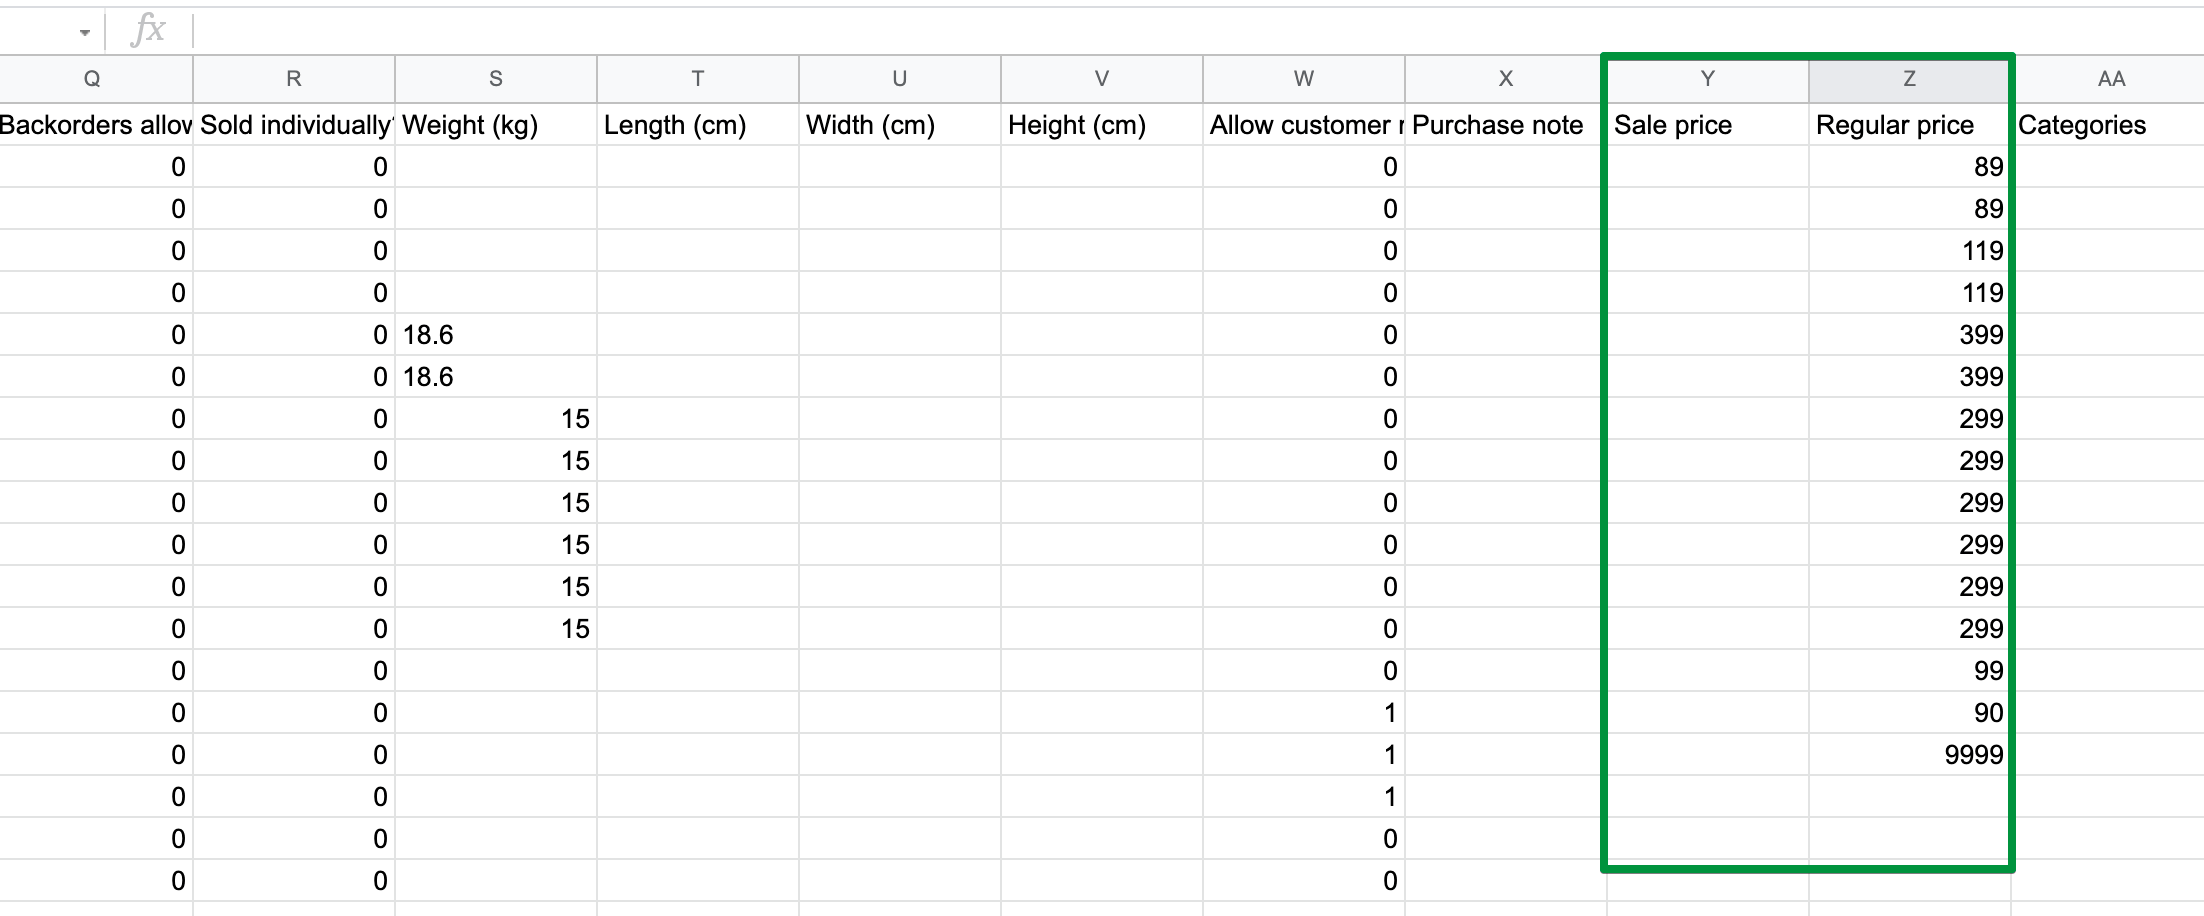
First, export the product to a CSV file, then open it in an editor (You can do it with Google Docs). Find the Regular price column and change the product price. You can also edit the Sale price in the same way. After that, save a CSV file and import it to your shop.

You may think that is all now, but in fact, this is just the beginning of the fun with prices. :)
Of course, if you need more you’ll need a plugin to add custom discounts for products in your store. For example, when you want to add bulk, role, group, or quantity based pricing in WooCommerce.
To create such discounts and custom pricing rules, I will use the Flexible Pricing For WooCommerce plugin. Let’s see the plugin in action!
Pricing rules with Flexible Pricing for WooCommerce
Flexible Pricing WooCommerce £79
Customers love sales and pricing deals. Use this! Create promotions like Buy One Get One Free to get more sales in your store. The most dynamic pricing plugin for WooCommerce.
💾 Active Installations: 8000+ | 🔄 Last update: 2025-07-01
With the Flexible Pricing for the WooCommerce plugin, you can realize a lot of discount scenarios—for example, price based on category. You can easily set discounts for individual categories.

After that, your customers can see discount prices in your shop. Above all, this is an excellent strategy for Black Friday and other sale seasons.
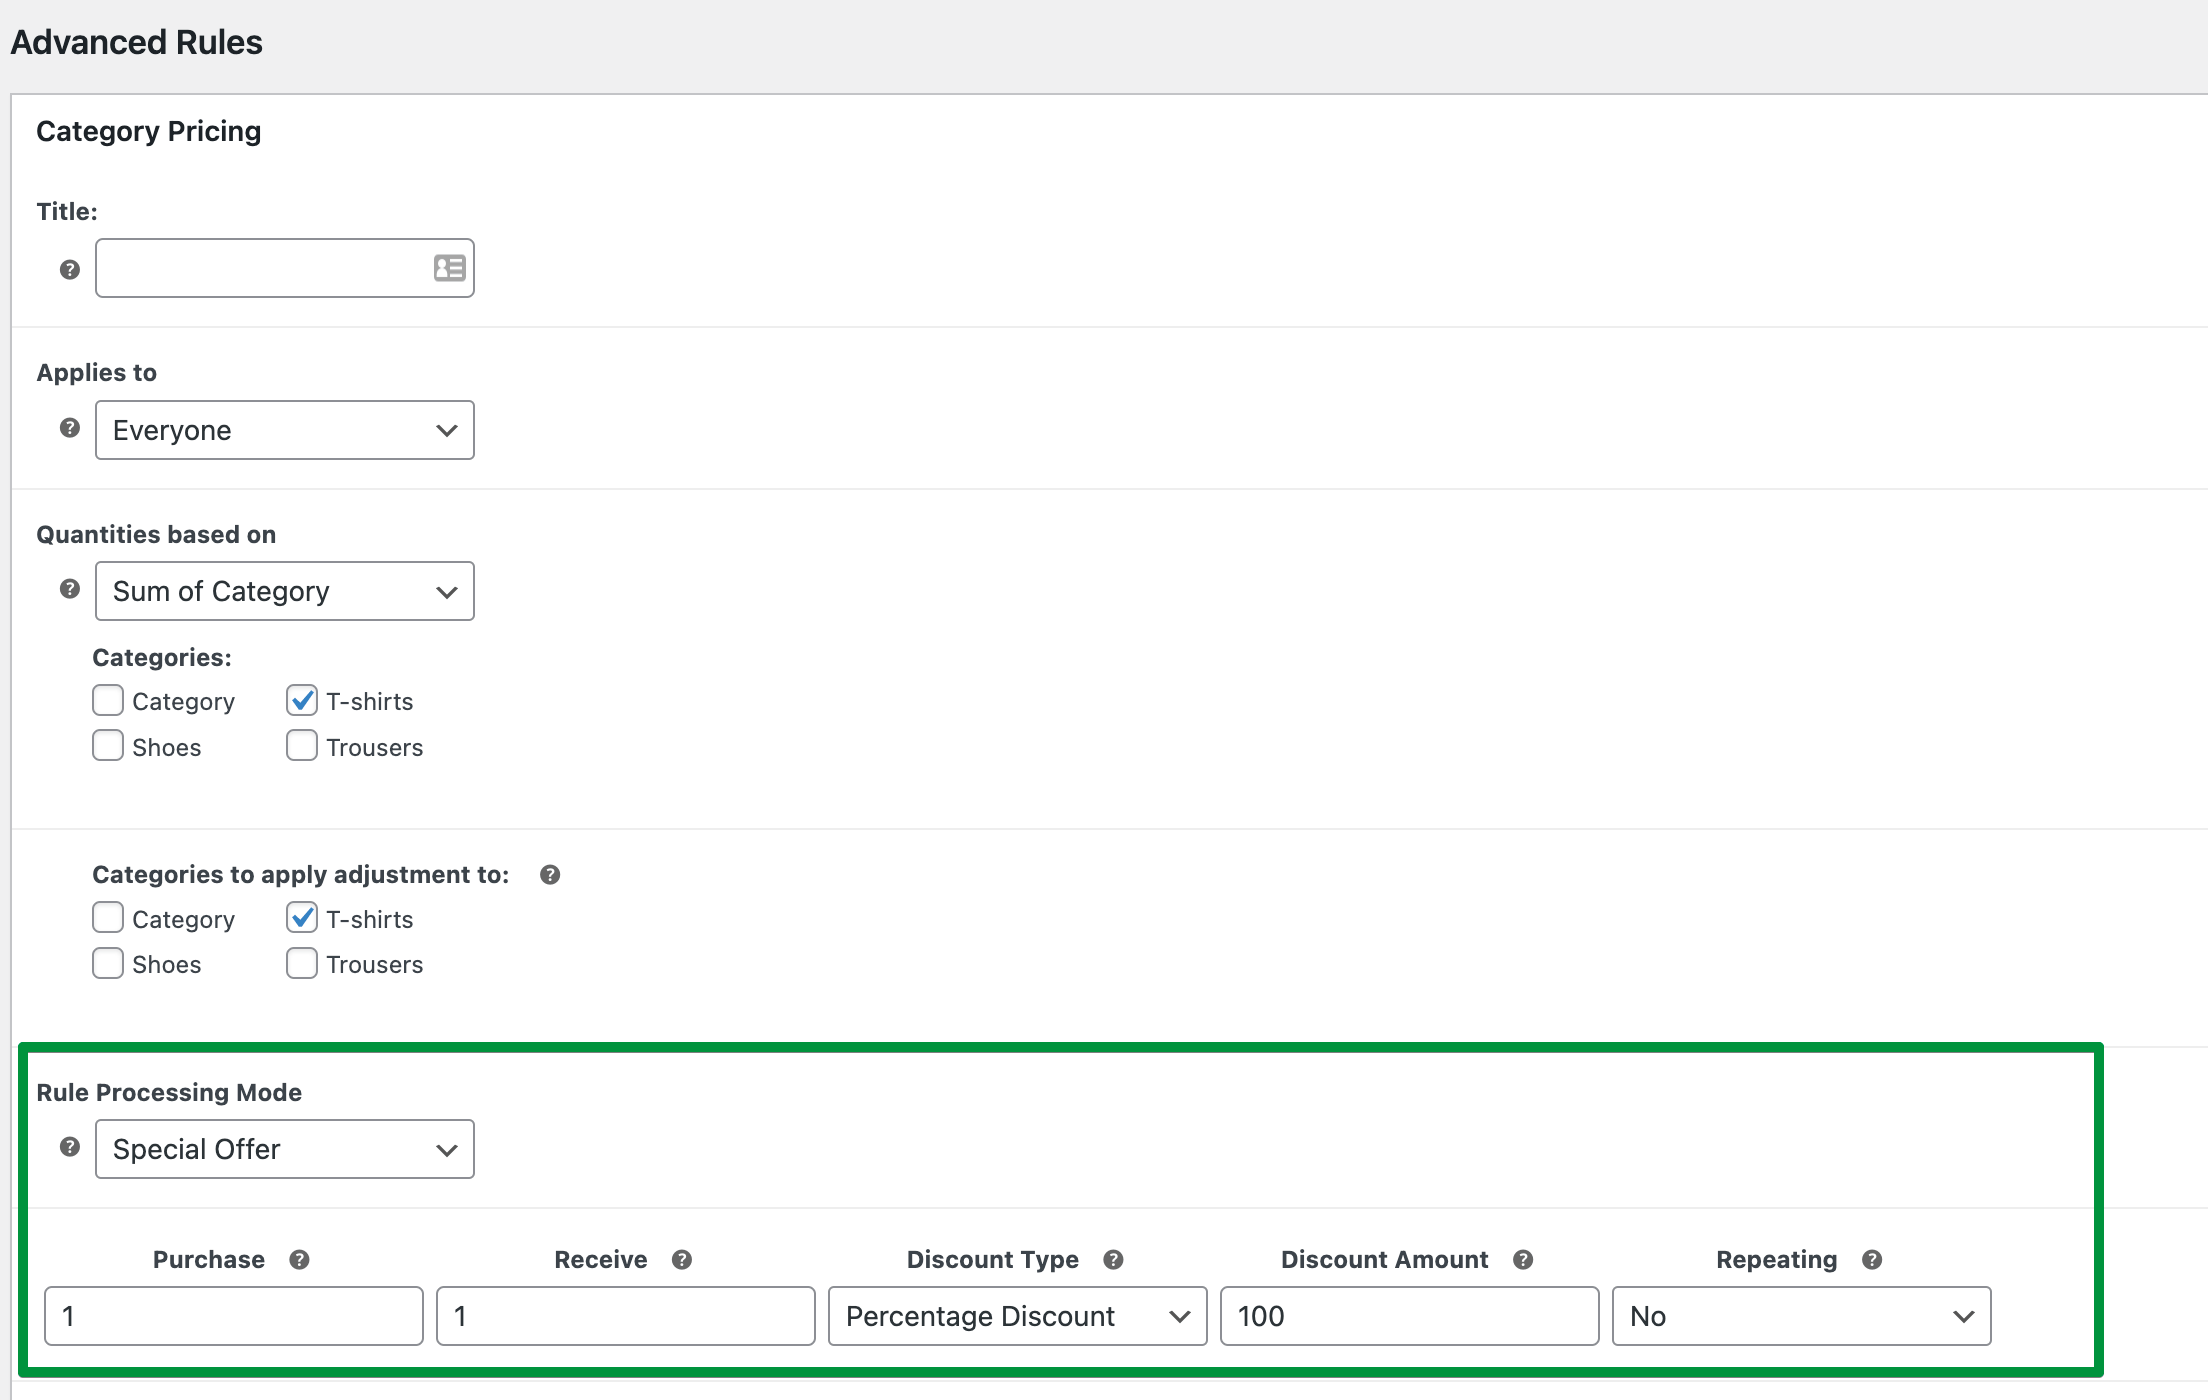
In addition, you can set up a lovely price scenario for your customers - buy one get one free. With advanced discount rules, you can create a special offer. If they buy one product from a particular category, they get another one for free—a great deal for buyers who will be happy to return to your store.
You can also test Flexible Pricing for WooCommerce in your free demo.
Hope my article helps you better understand WooCommerce pricing. As you could read above, you have many options that will make your shop more attractive for buyers. Good luck and enjoy your journey to creating your perfect WooCommerce store.


