This document answers frequent questions about the Flexible Checkout Fields - a checkout field editor plugin and WooCommerce checkout missing settings. Also, what to do when you encounter checkout error messages or when your woocommerce_checkout shortcode is not working!
Contents
- Flexible Checkout Fields: general questions
- Flexible Checkout Fields editor: other issues
- WooCommerce Checkout errors
- The WooCommerce checkout is not working
- WooCommerce checkout fields are not showing
- I think the WooCommerce checkout settings are missing
- About WooCommerce checkout error messages
- There is an internal server error message in the WooCommerce checkout
- WooCommerce informs that you must be logged in to checkout
Flexible Checkout Fields: general questions
How to customize the WooCommerce checkout page?
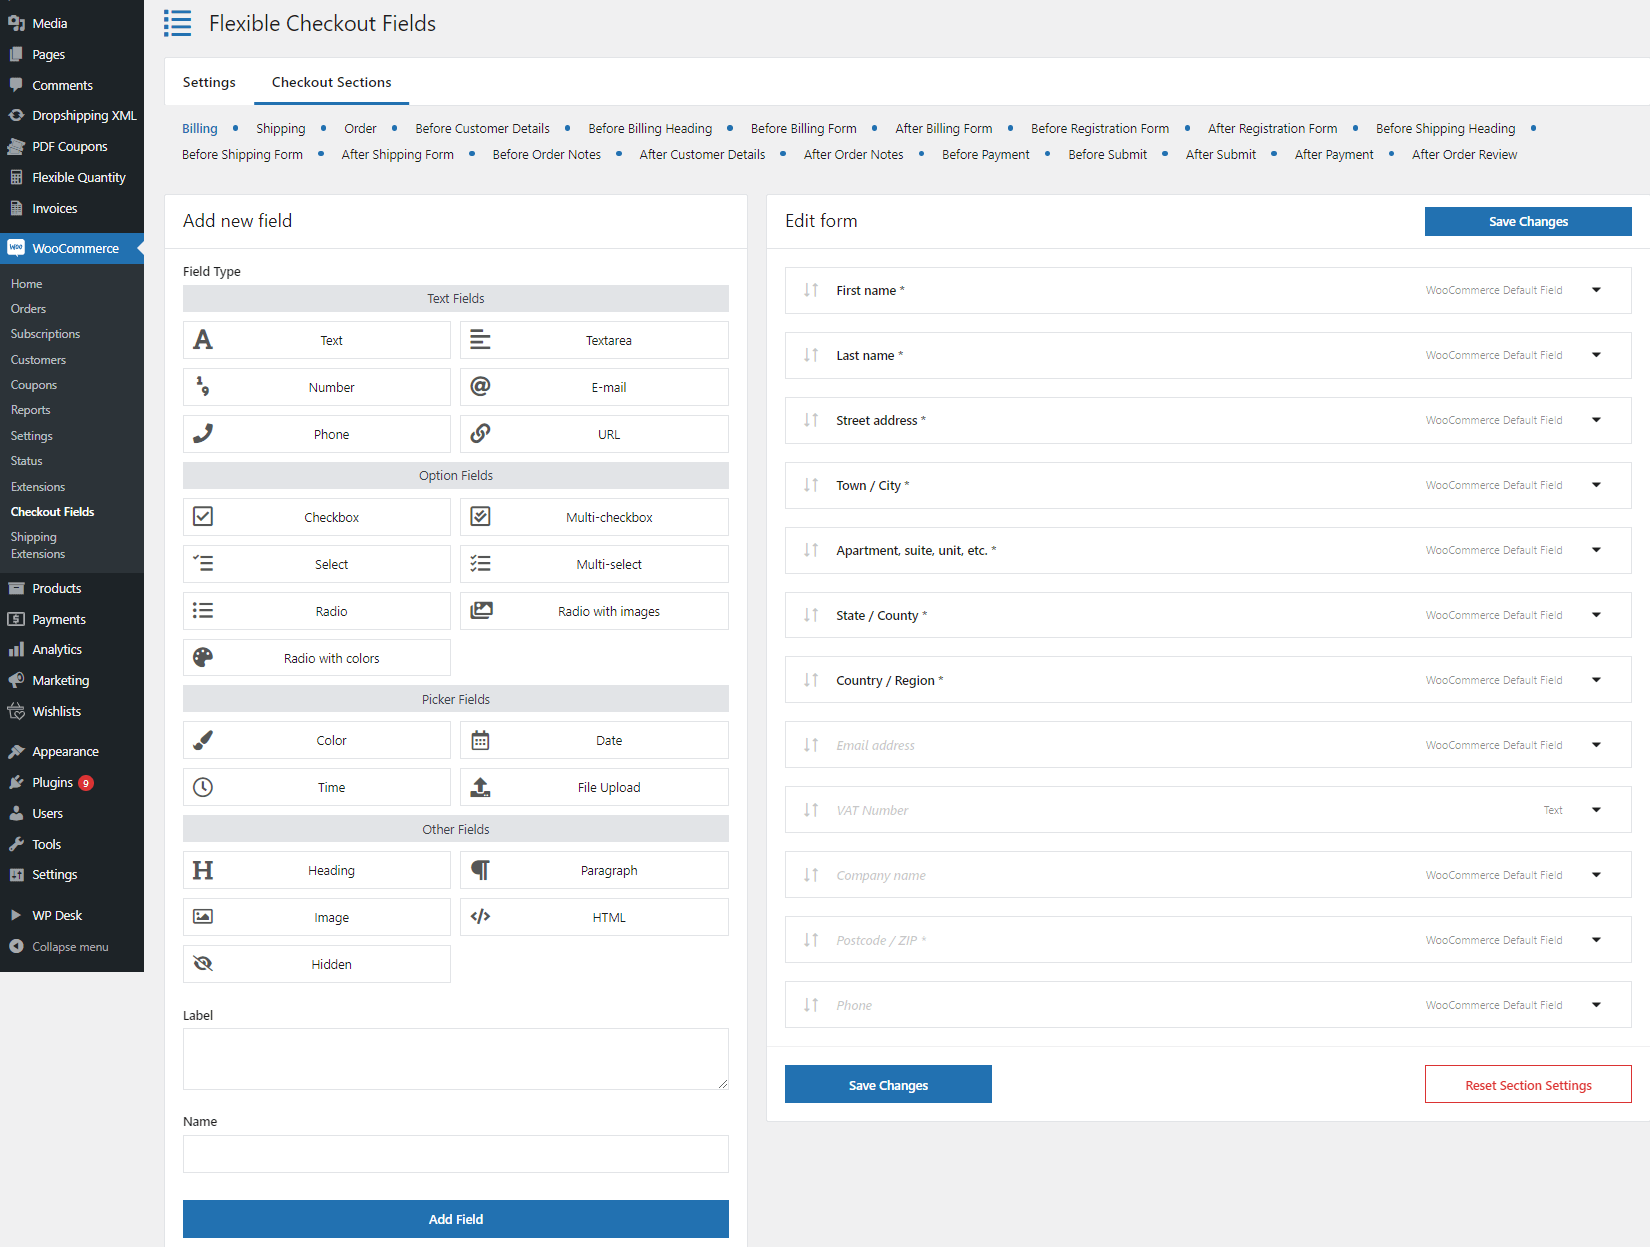
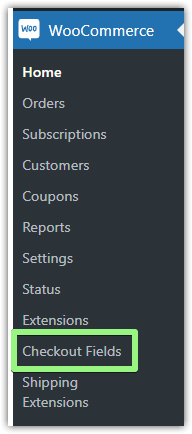
Open the plugin settings and follow the Flexible Checkout Fields documentation. You may add new fields and manage existing ones in WooCommerce → Checkout Fields.
Where are the plugin settings?
The plugin is available in the WordPress menu in the WooCommerce > Checkout Fields tab.
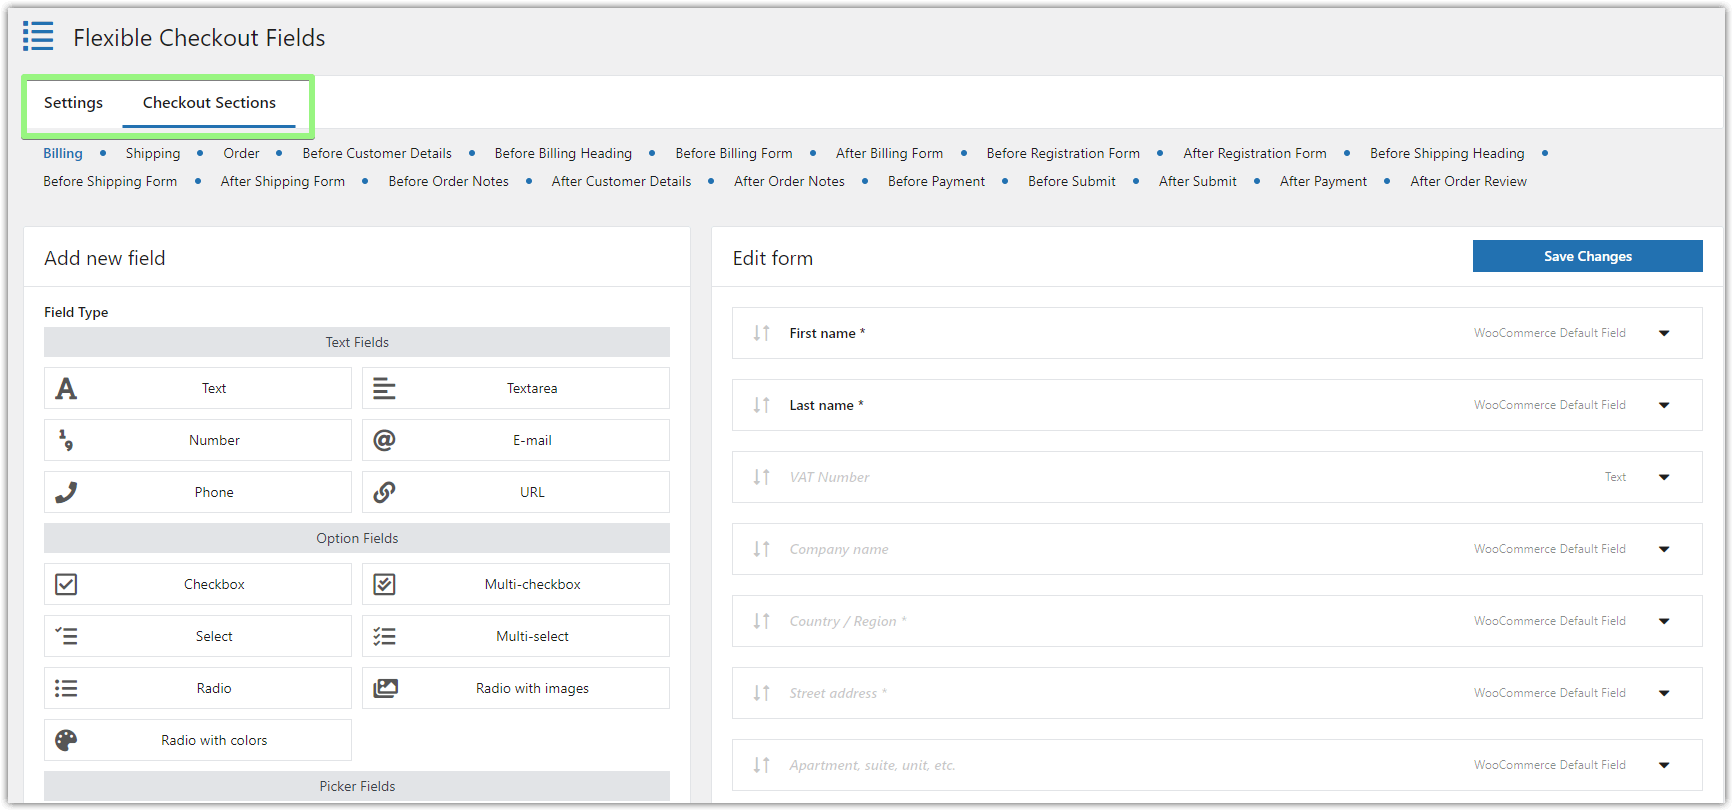
The plugin menu is in the upper left corner and contains two items. The first is Settings where it is possible to turn on additional sections. The second item is Checkout Sections and clicking on it will show all sections enabled in the Settings tab.
💡 If you use more of our plugins for WooCommerce you can activate them in the WP Desk > Subscriptions tab or directly in the Plugins menu.
There is Upgrade to PRO after activating the PRO. Why?
If you have activated the FREE and PRO versions but still see Upgrade to PRO links.
This issue sometimes occurs when there's been an error with the installation. Please reinstall the plugins via FTP.
- Log in to the WP dashboard and deactivate the API key in the WP Desk tab.
- Remove FCF plugins in free and PRO versions. Log out.
- Download the latest version of Flexible Checkout Fields FREE and upload it via FTP.
- Download the latest version of the Flexible Checkout Fields PRO plugin and upload it via FTP.
- Log in to the WP dashboard and activate both plugins.
- Activate the API key using the address registered in the WP Desk account.
Why doesn't the plugin insert fields in another form?
Our plugin supports fields on the Checkout page (hence its name) using the classic woocommerce_checkout shortcode. So the plugin will work if the form is on the page set in WooCommerce as Checkout. And if the page contains the woocommerce_checkout shortcode.
You may find the page assigned for inserting the woocommerce_checkout shortcode in WooCommerce > Settings > Advanced > Checkout page.
Our plugin uses the Checkout subpage environment and WooCommerce purchasing mechanisms. These two conditions must be met. The plugin will not work if e.g. there is a quotation plugin that skips this purchasing process.
Flexible Checkout Fields editor: other issues
Validation error Please enter an address to continue appearing while submitting the form
This message appears when the Country field is hidden. WooCommerce forces this field to be required in most cases. Some shipping and invoice plugins also require this field to be completed and therefore we do not recommend hiding them. Make sure hiding is possible and will not cause a validation error.
You may set the form fields with Flexible Checkout Fields - WooCommerce field editor.
How to show checkout fields in My account and emails?
With the WooCommerce checkout field editor, it's possible for each field with the Display on option:
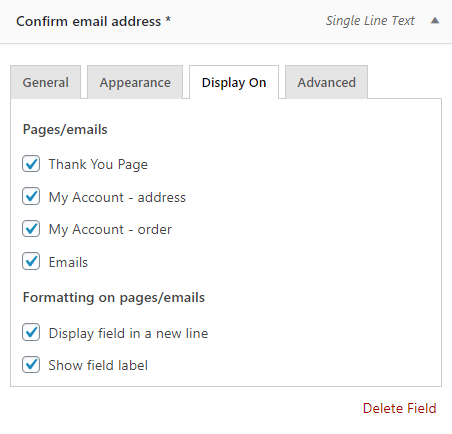
The settings were not saved
It may happen due to saving a lot of settings at once while the server can't handle the request. It may be caused by the max_input_vars PHP parameter. You can find more information about the server configuration for WP Desk plugins.
The WooCommerce checkout field editor is not working. Why?
Follow the steps depending on where the plugin didn't work properly.
-
The WooCommerce checkout page settings
First, find out if the [
woocommerce_checkout] shortcode was added to one of your pages that is set to be the WooCommerce checkout page in the WooCommerce → Settings → Advanced → Page setup. -
Check if the page uses the woocommerce_checkout shortcode
WooCommerce allows using two types of checkout forms (from version 8.3). You may find out which one by editing the checkout page. Take a look if the page uses the classic woocommerce_checkout shortcode.
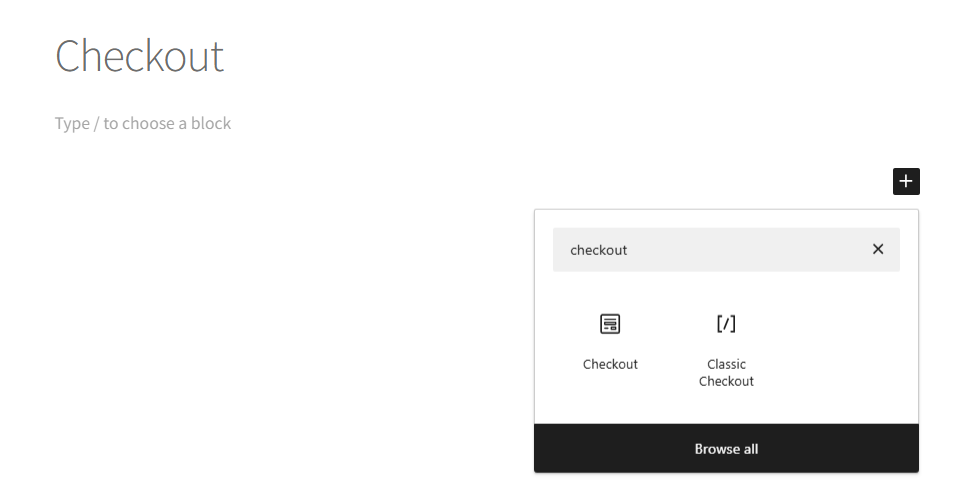
-
Plugin or theme interference
Next, check if you do not have more plugins to manage the checkout fields, or if your theme doesn't have such an option in the theme settings. You can deactivate such plugins or change a theme to one supporting WooCommerce (like Storefront). Then delete the cache of your checkout page.
-
Errors and logs
If that won't help, check the logs in the WooCommerce → Status → Logs and debug files, for example, in the /wp-content/. You can also open the checkout page and see the browser console (Ctrl+Shift+I) to look for any error messages, JavaScript conflicts, etc.
-
Contact us
Finally, contact WP Desk support if Flexible Checkout Fields is not working. Please send us any error logs and describe things you've already checked.
WooCommerce Checkout errors
The WooCommerce checkout is not working
There may be several reasons why the WooCommerce checkout page is not working correctly!
-
Checkout page settings
First, see if the [
woocommerce_checkout] shortcode is present in one of your pages set to be the WooCommerce checkout page in the WooCommerce → Settings → Advanced → Page setup. -
Plugin or theme conflict
Next, look if you have any plugins to manage WooCommerce checkout fields, send emails, add some actions to the checkout page, or if your theme doesn't have any checkout settings.
👉🏾 Try to deactivate some plugins or change a theme to Storefront to see if that will help.
You may also see if there is no PHP code in the functions.php theme file that could've affected the checkout page.
Delete the cache after each step.
-
Errors and logs
If that won't show you the reason, check the logs in the WooCommerce → Status → Logs and any debug files in the /wp-content/ folder of your FTP server. Also, check out the browser console (Ctrl+Shift+I) for any error messages, JavaScript conflicts, etc.
-
Contact us
Finally, contact WP Desk support if you use the Flexible Checkout Fields plugin. Send us any error logs and describe things you've done.
WooCommerce checkout fields are not showing
- First, follow the troubleshooting steps in the previous question (check the woocommerce_checkout shortcode and get the logs).
- Then, check the CSS for the checkout page if some fields are not hidden or not visible.
- Next, see if you're using the latest version of WooCommerce and WordPress and if your theme/ plugins are up-to-date and compatible.
- Check out if someone has the same issue in the WooCommerce, WordPress, or plugin support forums.
- Especially, look for plugins, the active theme, or settings that could hide or remove the checkout field.
- If some checkout fields are still not showing, try to reset the settings of the WooCommerce checkout field editor.
- If you're using Flexible Checkout Fields and some WooCommerce fields are not showing, see if there are no conditional logic settings, the fields are enabled in the plugin settings, or contact WP Desk support.
I think the WooCommerce checkout settings are missing
You can set the checkout in several tabs under WooCommerce → Settings:
- General,
- Tax,
- Payments,
- Accounts & Privacy,
- Advanced.
About WooCommerce checkout error messages
Customers will see error messages when the WooCommerce checkout field validation fails. It happens especially when a buyer does not enter the value for the required fields.
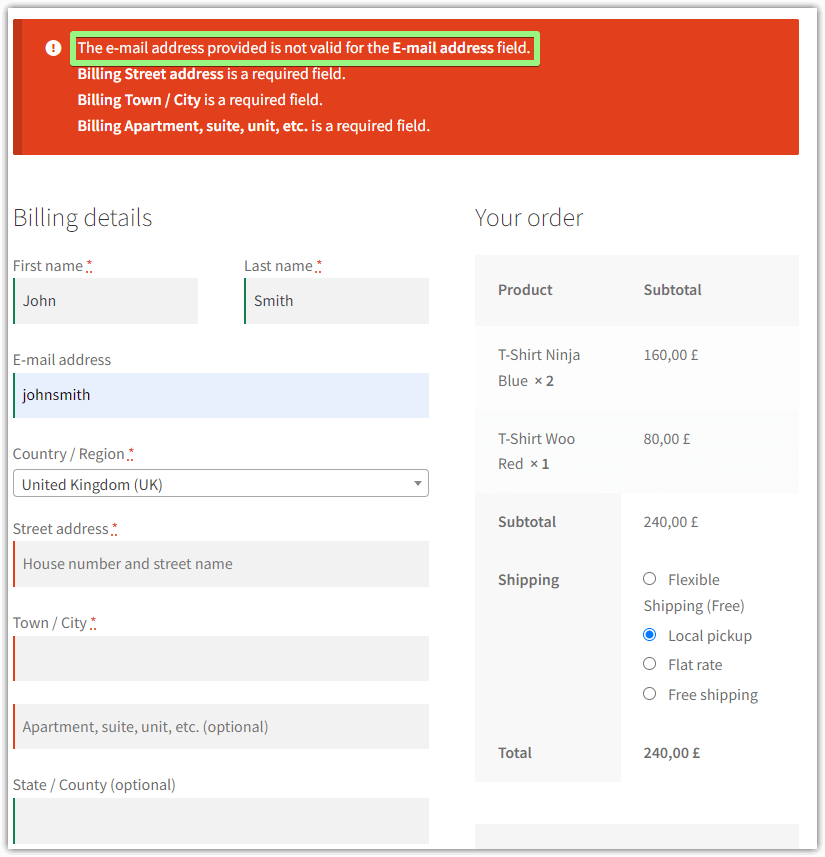
The Flexible Checkout Fields plugin uses the same place to add error messages for the built-in validation and custom one for custom checkout fields. Of course, you can also add custom messages to new sections using hooks.
You can also modify and adjust the error messages using the custom code with the woocommerce_after_checkout_validation action (hook). Read more in the WooCommerce docs.
There is an internal server error message in the WooCommerce checkout
The WooCommerce checkout internal server error may appear on the page or as a checkout message due to several reasons. Follow the list below to check the reason for the server error message on the WooCommerce checkout page.
- Check out if you set the checkout page in WooCommerce → Settings → Advanced and if the woocommerce_checkout shortcode is present on one of your pages.
- WooCommerce, WordPress, plugins, and your theme are up to date.
- PHP and MySQL versions on the server are compatible with the latest versions of WooCommerce, WordPress, plugins, and your theme.
- Look for any error messages in the WooCommerce → Status → Logs or in the browser console (Ctrl+Shift+I). You may read more on how to get the WooCommerce system status.
- Enable debugging in WordPress and WooCommerce to gather more intel.
- Check your custom code, for example, in the functions.php or child theme PHP files because the internal server error message may be caused by looping files.
- Temporarily disable all plugins then activate them one by one to find the one causing the issue (for example, a plugin that interferes with the WooCommerce checkout or using its hooks). Also, change the theme to Storefront to see if that makes a difference. It's best to try this approach after making a backup or with a site clone.
- Check if your site URLs or WooCommerce security settings such as SSL haven't been changed recently.
The internal server error on the WooCommerce checkout page or any error messages may block getting new orders so it's crucial to handle them and optimize the checkout fields.
WooCommerce informs that you must be logged in to checkout
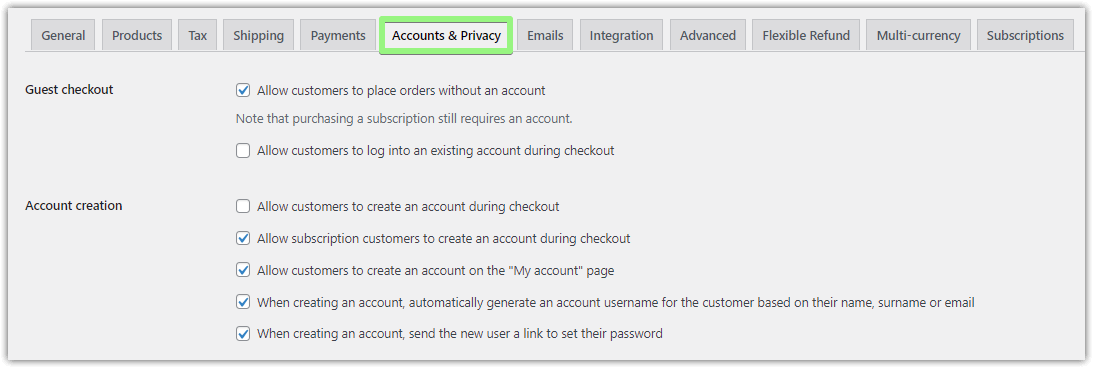
WooCommerce gives you the option to enable guest checkout. You can find it under the WooCommerce → Settings → Accounts & Privacy. Check the first option to let visitors place orders without creating accounts and logging in.
If you can see the "you must be logged in to checkout" message, check the Accounts & Privacy settings and enable the Allow customers to place orders without an account option.
