By default, WooCommerce does not allow you to utilize one page checkout. However, there are ways to do it without much effort. Today, we're diving into the magic of WooCommerce one page checkout and exploring how the Flexible Checkout Fields plugin, along with some handy shortcodes, can transform your store's checkout experience.
Contents
- The power of one page checkout for WooCommerce 🚀
- Customization made easy with shortcodes
- WooCommerce 1 page checkout with a shortcode
- Why use shortcodes?
- Introducing Flexible Checkout Fields
- Flexible Checkout Fields in action
- The Result? Happier Customers and Increased Conversions
- Conclusion
- WooCommerce Checkout - Settings, Shortcode & Configuration Guide
- Customize the WooCommerce Checkout Page: Tips & Tools for Success
- WooCommerce checkout add-ons: 20 plugins for better checkout
- How to Customize your WooCommerce Checkout Page for free
- WooCommerce Checkout Page: settings, missing options & errors
The power of one page checkout for WooCommerce 🚀
Implementing a one page checkout for WooCommerce involves a combination of configuration settings, theme compatibility, and sometimes the use of plugins. However, just imagine a checkout process so streamlined that your customers can complete their purchase in just one swift move 😍. That's the essence of WooCommerce one page checkout, and it's a game-changer for online businesses. No more navigating through endless steps—just a single, user-friendly page to seal the deal.
Customization made easy with shortcodes
Let's talk about shortcodes for a bit —those nifty bits of code that work like magic behind the scenes. With our little help, you can use the [ woocommerce_cart ] shortcode to display a concise summary of the items in your customer's cart. It's like a sneak peek, giving them a quick overview before they proceed to checkout. Where to apply this shortcode and how to do it? It's easy!
👉🏽 Simply go into your product settings and follow these 4 steps:
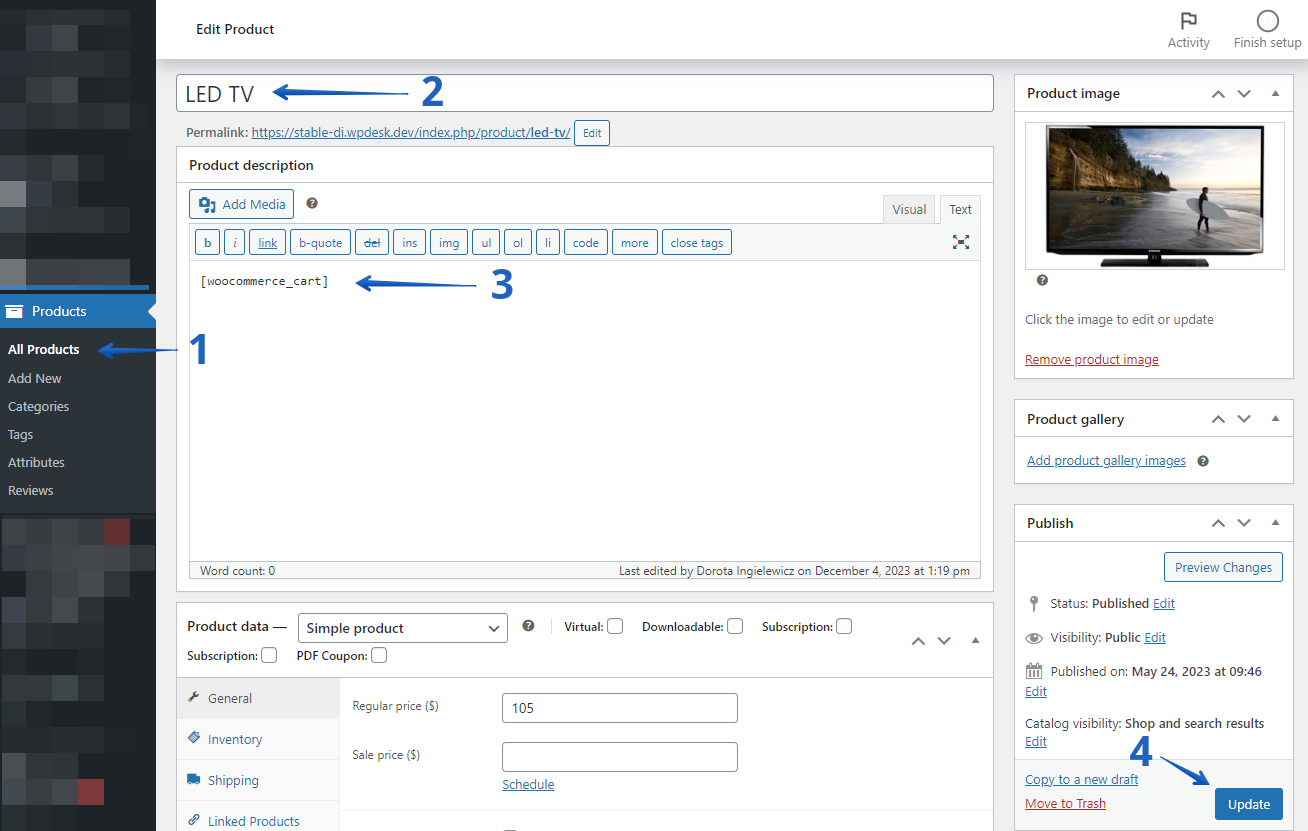
- Go to All Products and choose the product you want the cart summary to be displayed.
- Enter this specific product and start editing.
- Add shortcode [ woocommerce_cart ] in the product description.
- Don't forget to save all the changes by clicking on the Update button.
👉🏽 When the user adds the product to the cart, they will see the following screen:
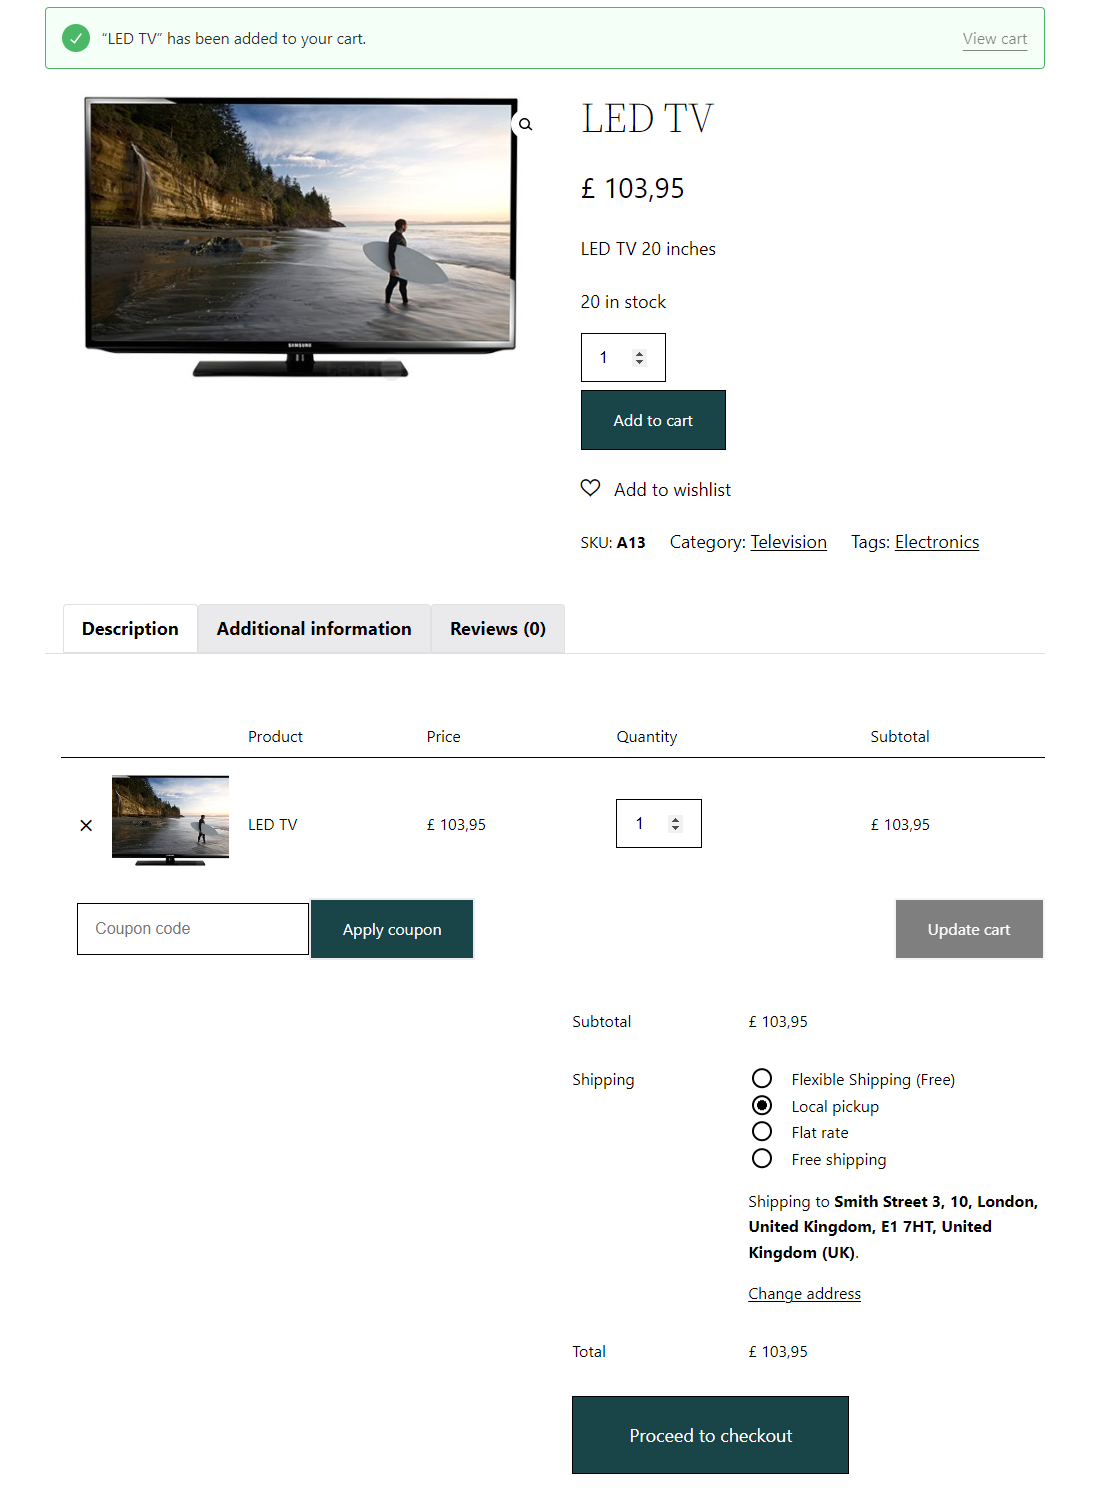
But wait, because there's more. By the same means, you can add also a checkout form here.
WooCommerce 1 page checkout with a shortcode
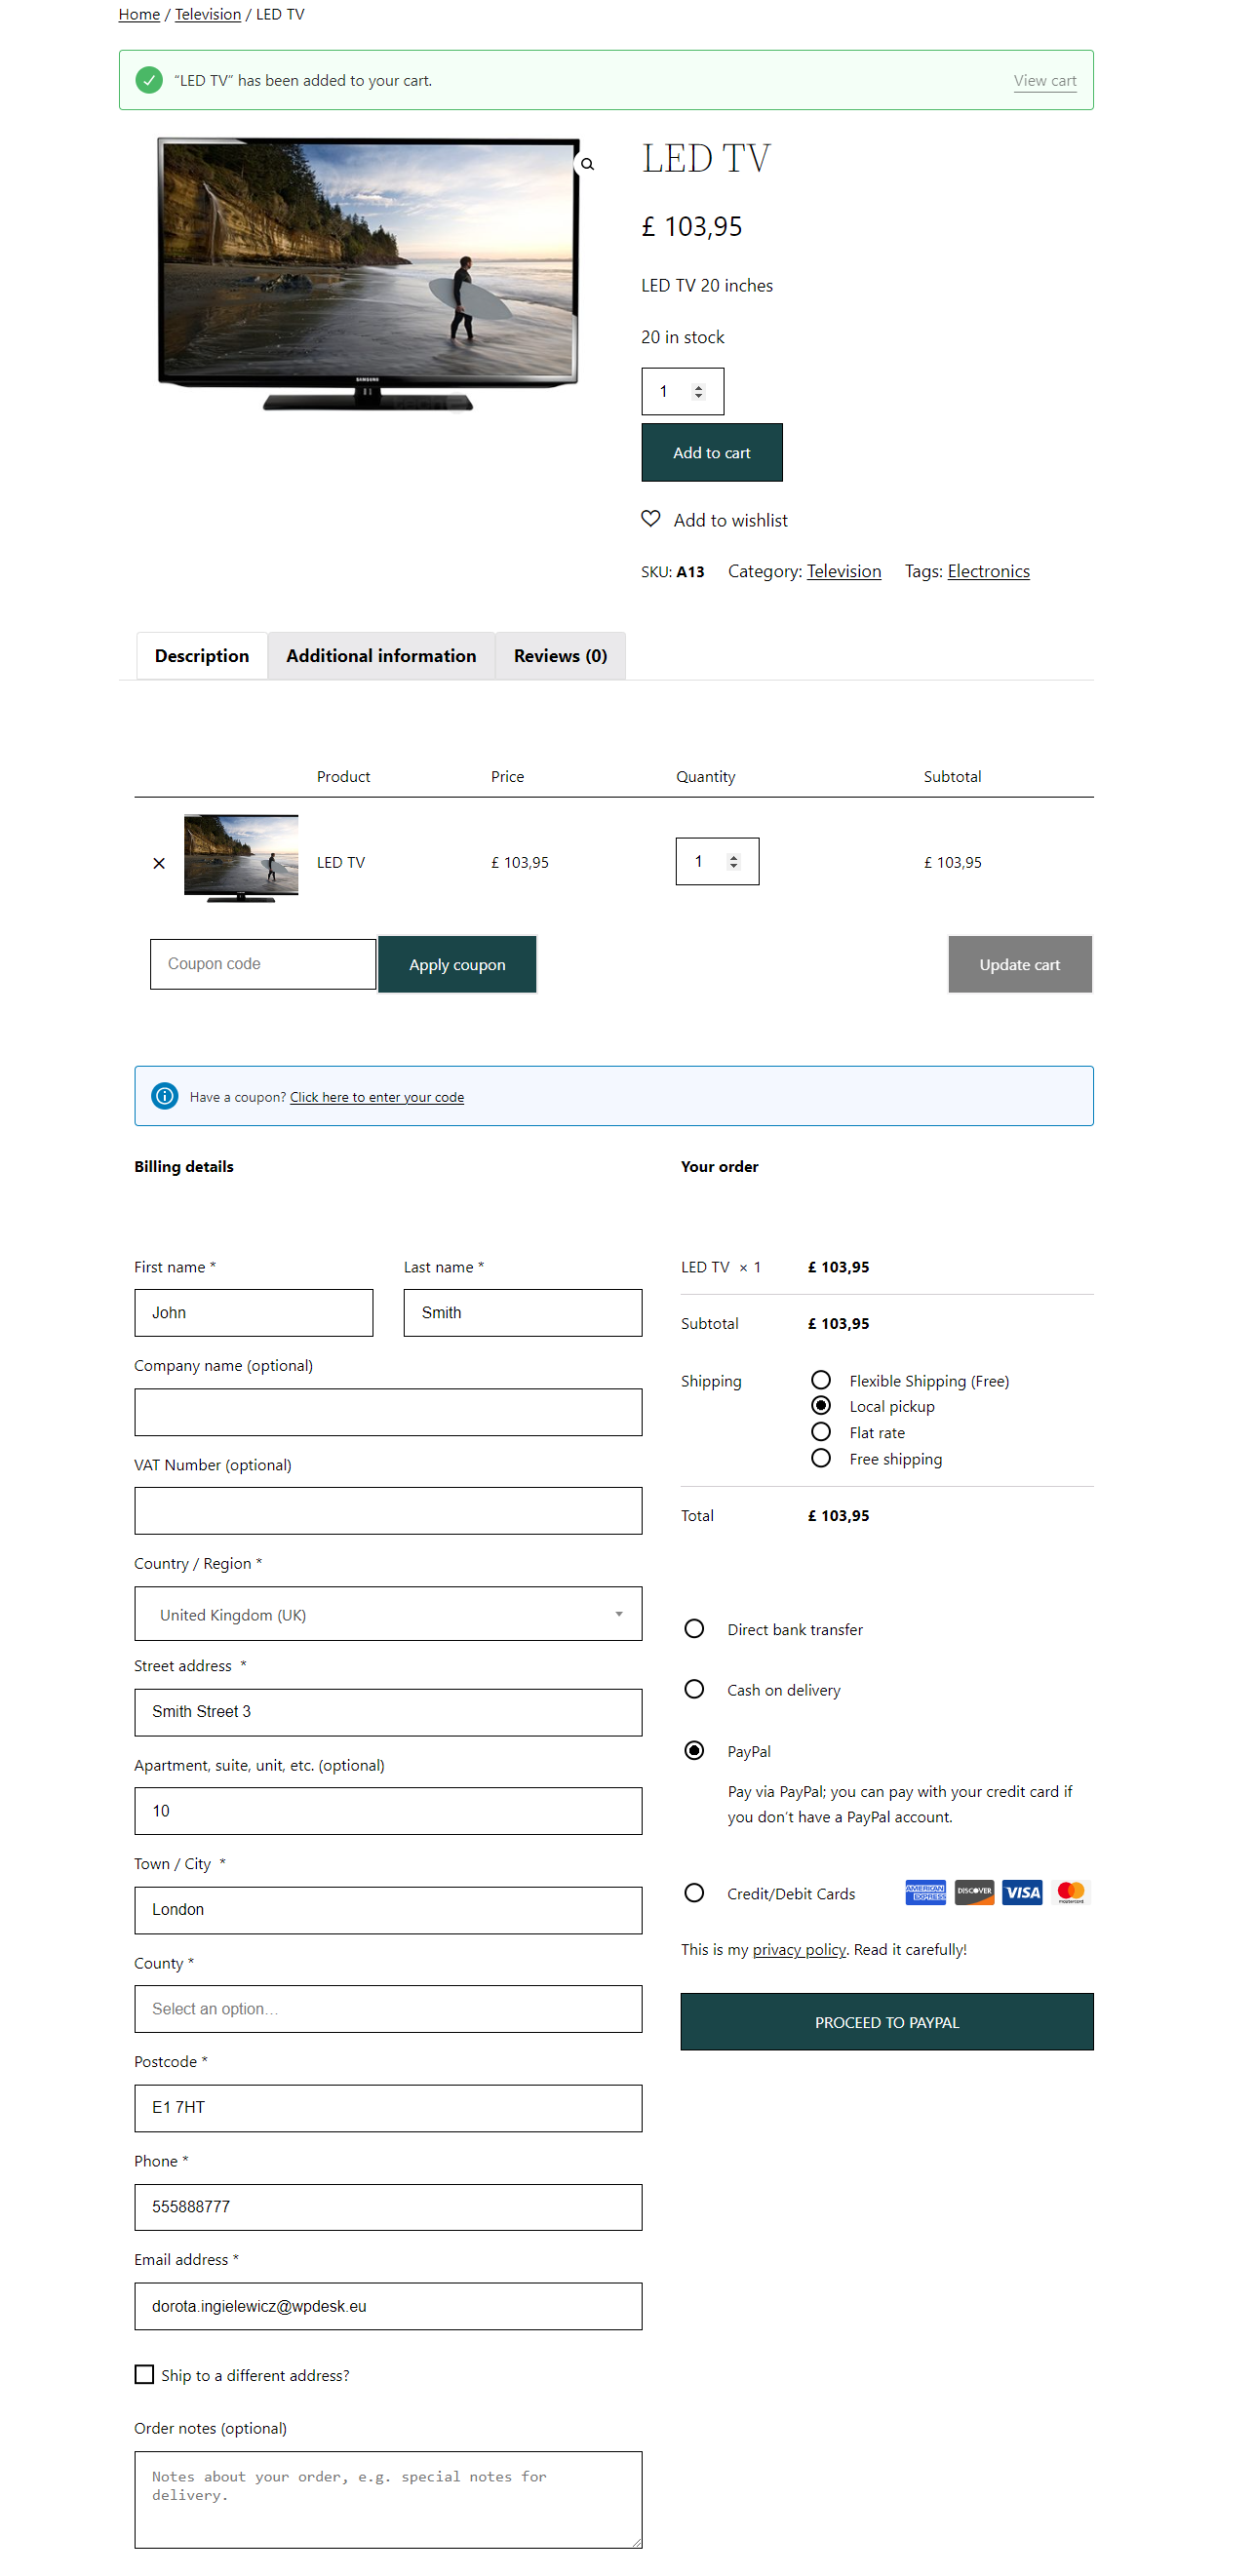
Once your customers are ready to seal the deal, the [ woocommerce_checkout ] shortcode comes into play. This little gem generates the entire checkout form right on the same page. No more jumping around or confusion—just a seamless transition from cart to checkout in the blink of an eye.
Adding this shortcode is done in the same way as I described in the paragraph above. Simply add [ woocommerce_checkout ] in the product description.
👉🏽 The result? See for yourself:
Why use shortcodes?
Shortcodes aren't just tech jargon; they're your secret weapons for a user-friendly experience 🥷. By placing the cart summary and checkout form on the same page, you're simplifying the journey for your customers. It's like having a helpful assistant guiding them through the process, step by step.
Nevertheless, it is advisable to use additional plugins that can make your store even more functional. With extra plugins, your checkout form can be faster and additionally not weigh down your store. Moreover, you can shorten it by removing the fields you want, or make it longer by adding some more.
Introducing Flexible Checkout Fields
Flexible Checkout Fields is more than just a plugin, it's your ticket to creating a checkout page tailored to your brand and customer needs. It is a checkout form editor, and its use is child's play. With Flexible Checkout Fields you can add and remove fields in the checkout form, change their order, edit labels and placeholders, add CSS styles. This is just a glimpse of what you can achieve with this plugin. Check it out for yourself:
Flexible Checkout Fields WooCommerce
Edit, add new or hide unnecessary fields from the WooCommerce checkout form. Add pricing to fields and use conditional logic. It's all about conversions and better user experience. NEW: now you can set multiple conditions (OR) under one or more condition groups (AND).
💾 Active Installations: 80,000+ | WordPress Rating:
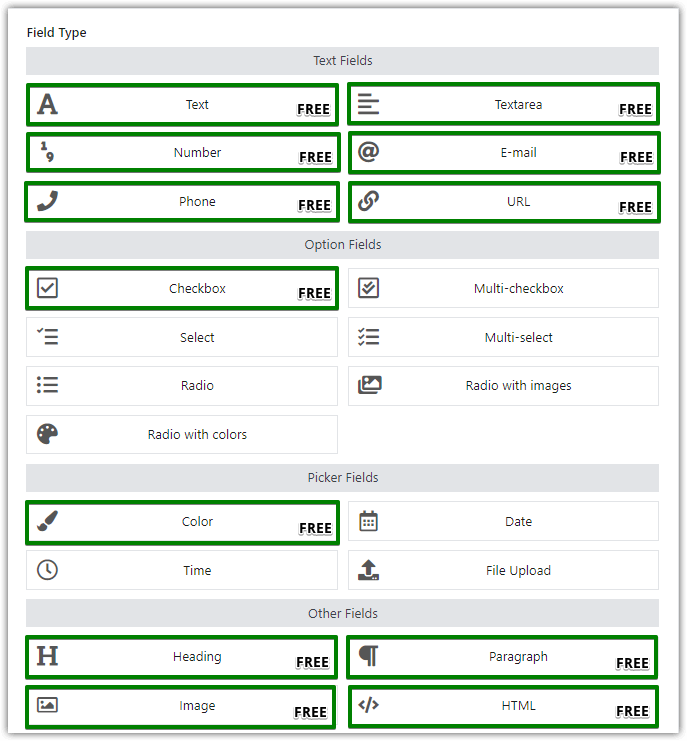
👉🏽 See some screenshots showing the plugin's settings and what it can do:
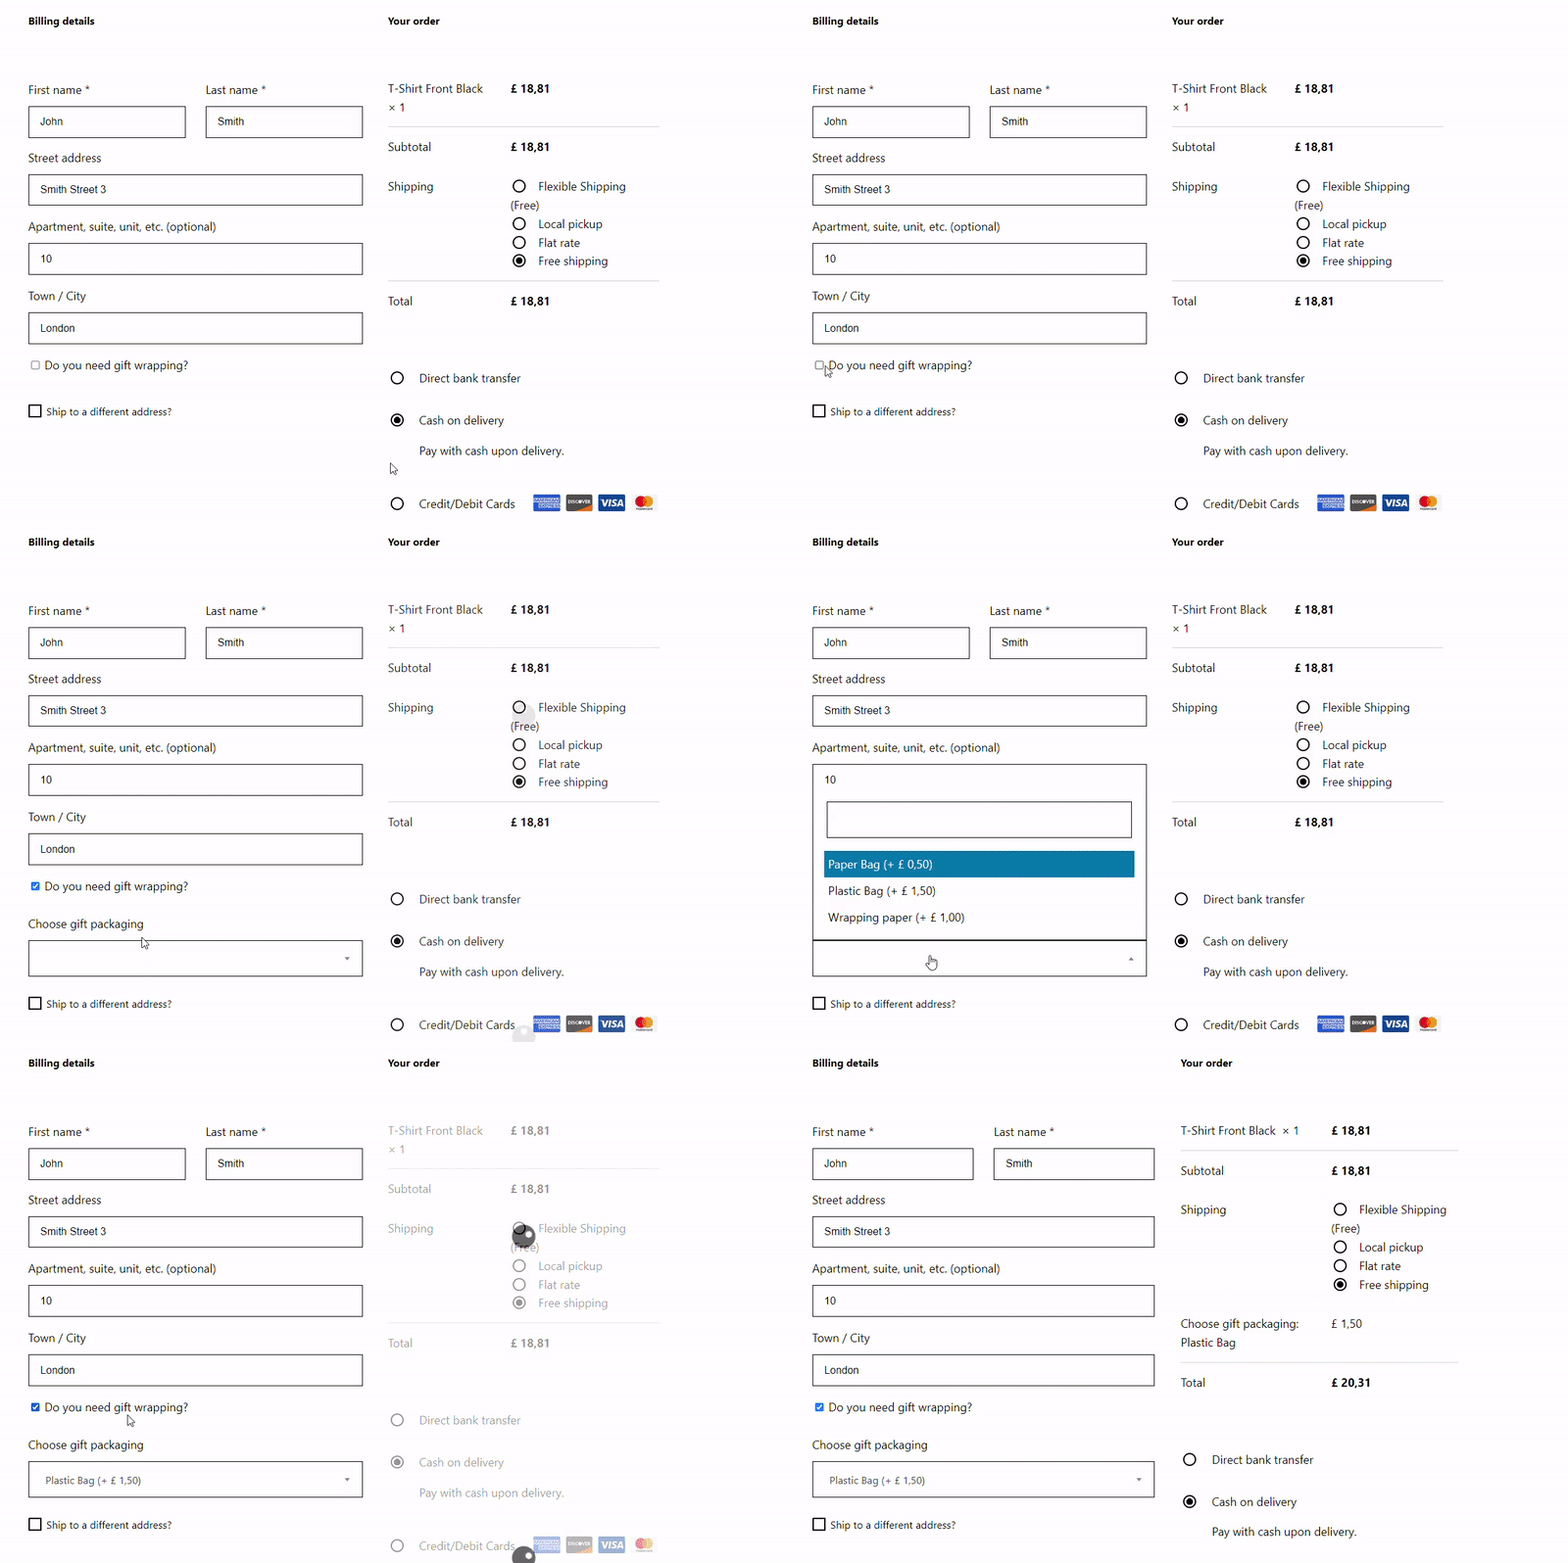
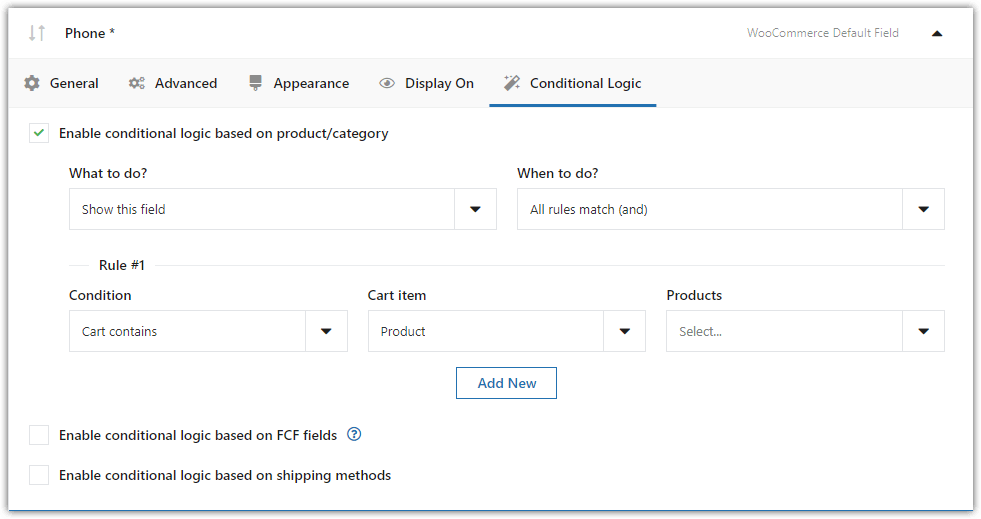
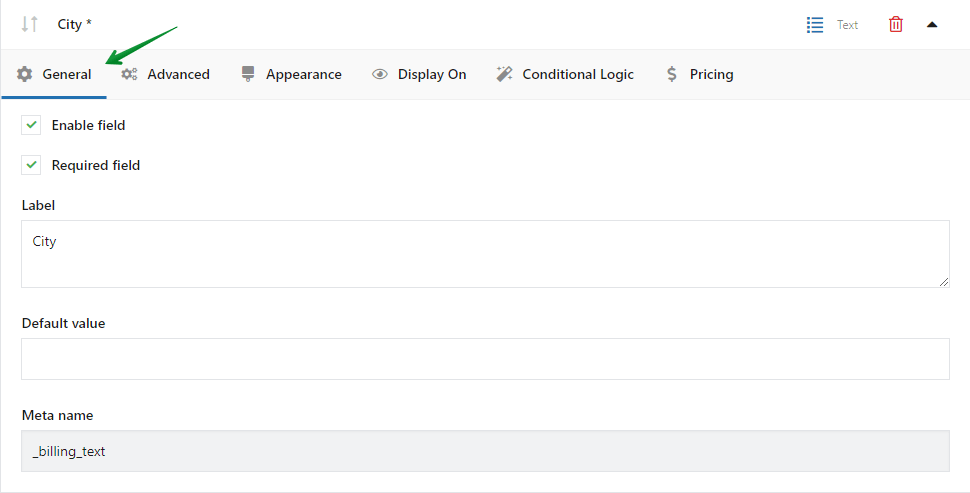
Flexible Checkout Fields in action
Let's paint a picture of what this looks like in action. Your customer clicks on their cart, and voila — the [ woocommerce_cart ] shortcode displays a neat summary of their chosen items. They love what they see and hit that checkout button.
Now, thanks to the [ woocommerce_checkout ] shortcode, the checkout form appears seamlessly on the same page. It's smooth, it's quick, and most importantly, it's a breeze for your customers 🧘🏽.
See how the checkout form can look like using the shortcodes described in the previous paragraphs and also additionally after the customization of the checkout form using the Flexible Checkout Fields plugin.
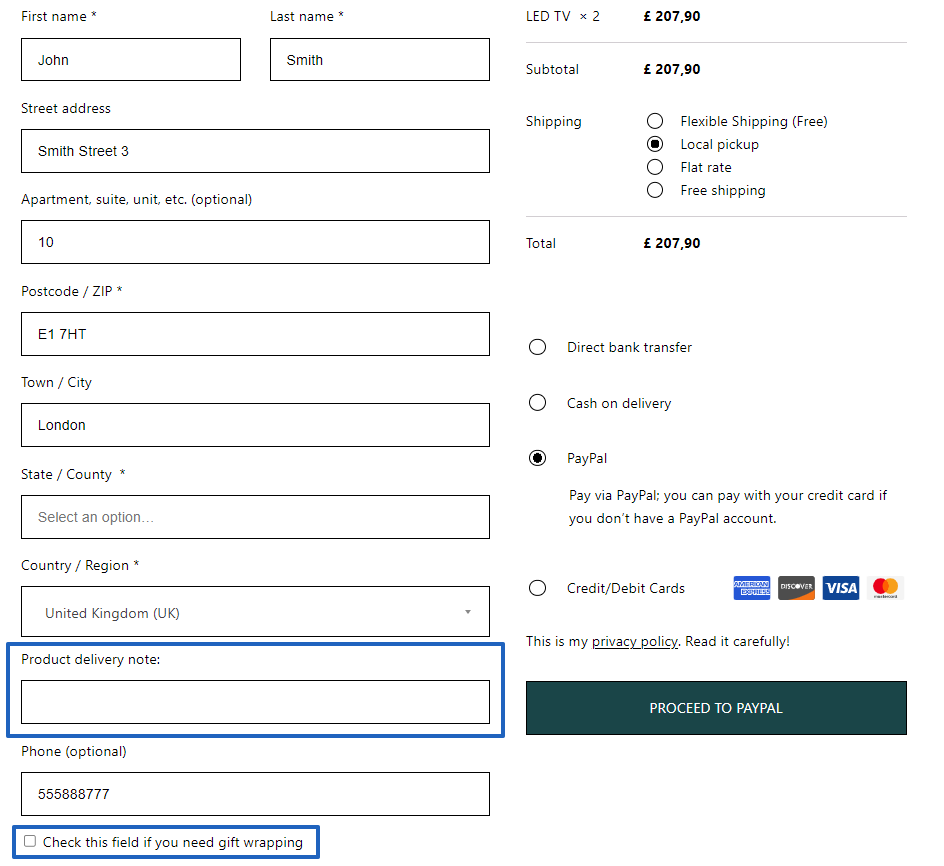
The fields highlighted in blue were added thanks to the Flexible Checkout Fields FREE.
Download Flexible Checkout Fields FREE →
Of course, you can also remove unnecessary fields in the checkout form.
Suppose you are selling a digital product - an E-book, for example. In that case, you may not want to ask the customer for the delivery address in the checkout form. Flexible Checkout Fields will take care of that in just a minute, see:
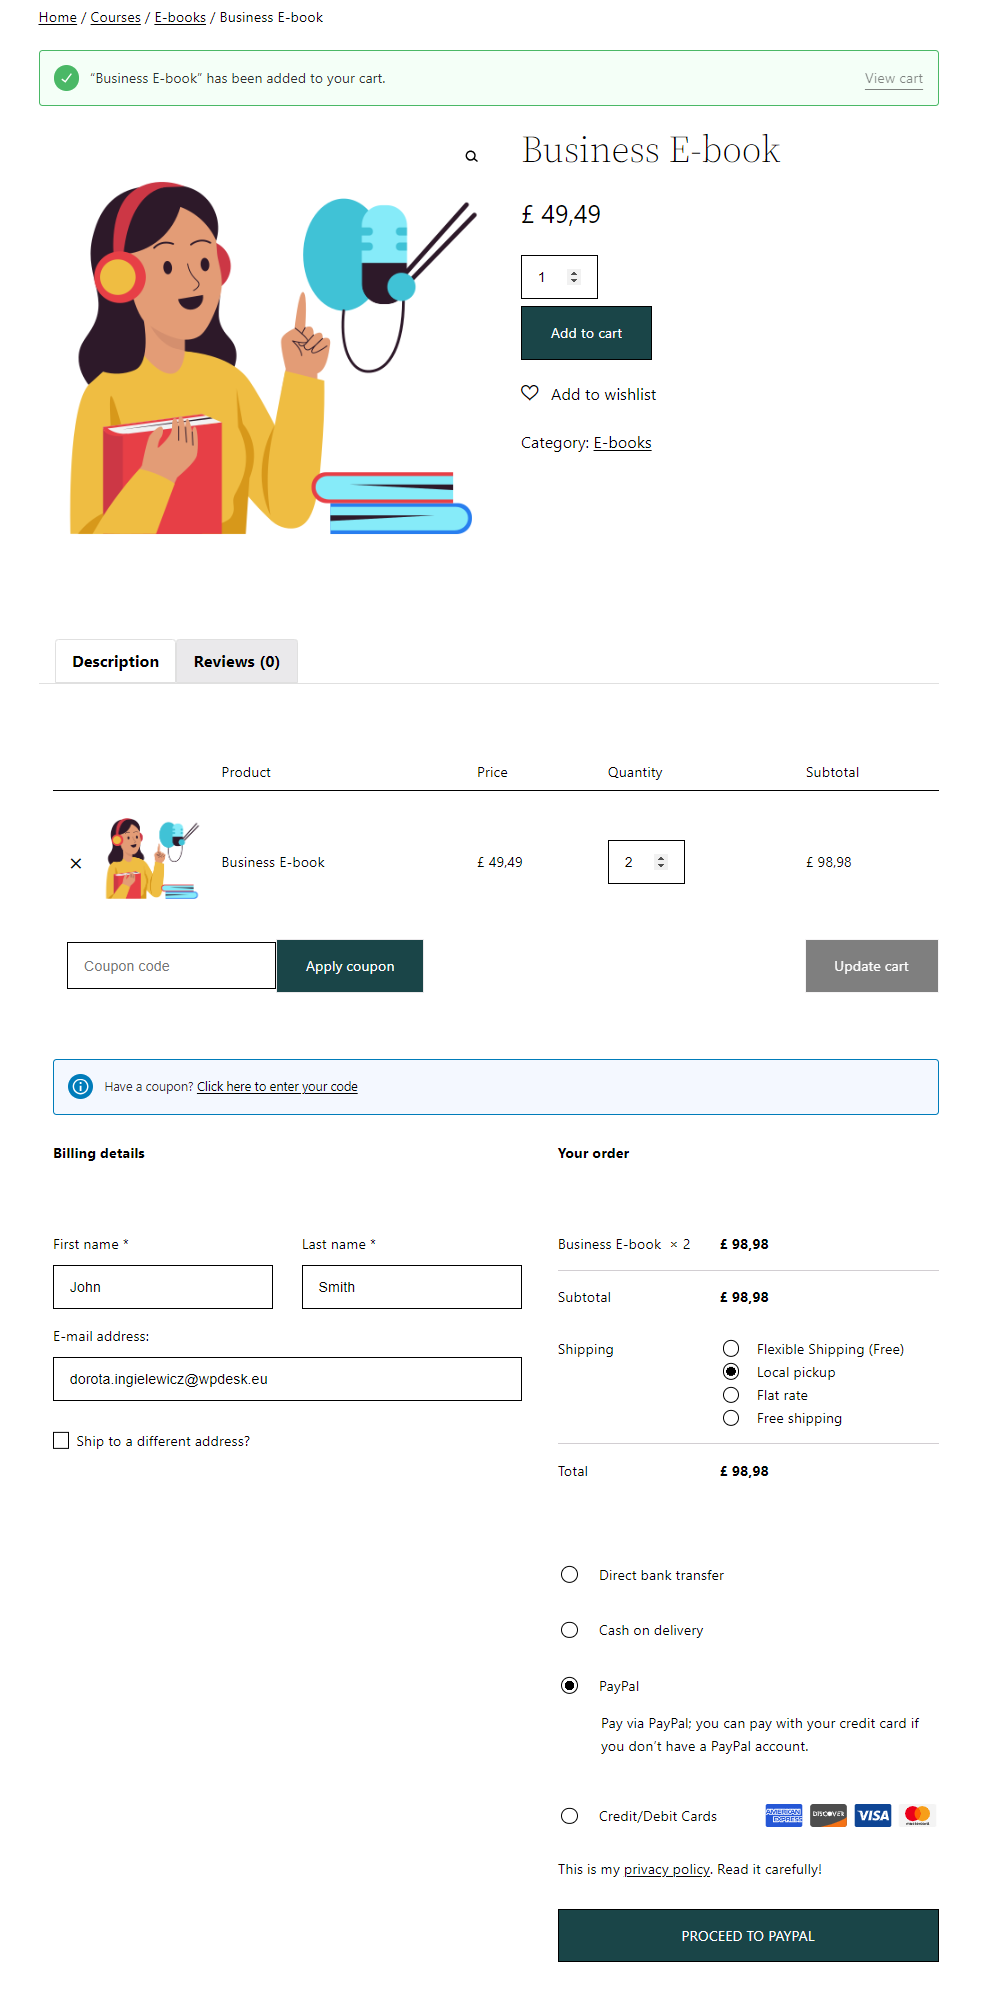
The above order form has been significantly shortened using the Flexible Checkout Fields FREE plugin.
Download Flexible Checkout Fields FREE →The Result? Happier Customers and Increased Conversions
Remember: simplicity is key. Flexible Checkout Fields, combined with the genius of shortcodes, ensures that your customers enjoy a hassle-free checkout experience. The result? Happy customers who are more likely to complete their purchase and become repeat buyers 🛍️.
Conclusion
Remember that the steps provided here are specific to the Flexible Checkout Fields plugin. If you're using a different plugin, the steps may vary. Always refer to the documentation provided by the specific plugin for detailed instructions tailored to its features. Additionally, if you encounter any issues during the process, reaching out to the plugin's support or community forums can be a valuable resource.

