

In this quick guide, I'll show you how to set the My Account page in WooCommerce using built-in settings and a shortcode. You will also see how to add custom fields to the page in WooCommerce. You can set up the page with built-in options and display custom fields with a free plugin, without editing templates. The field examples below use the classic WooCommerce checkout.
Use the plugin’s Display On settings to show supported checkout fields in the address or order sections of My Account.
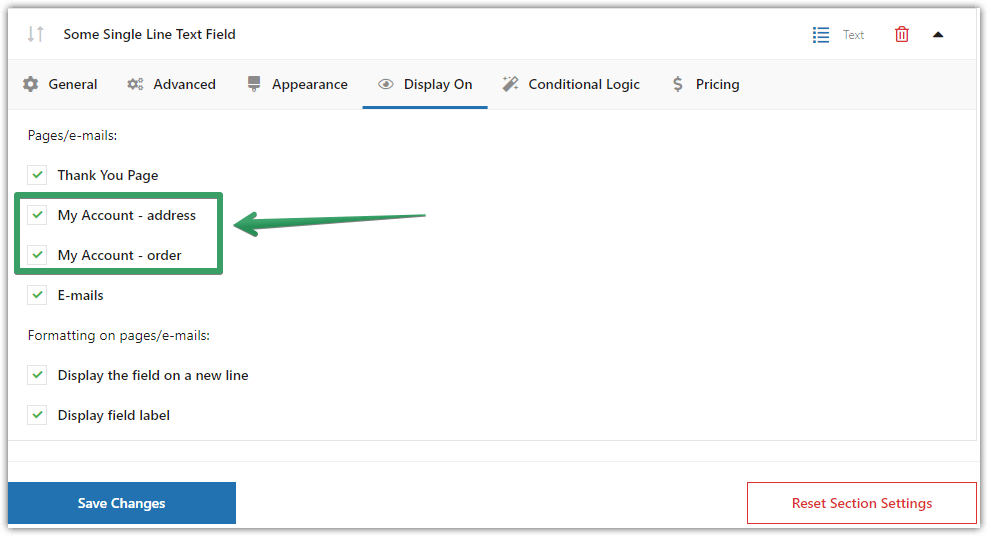
As you can see, the plugin can show the new custom checkout fields on the My Account page, but also in emails and WooCommerce orders.
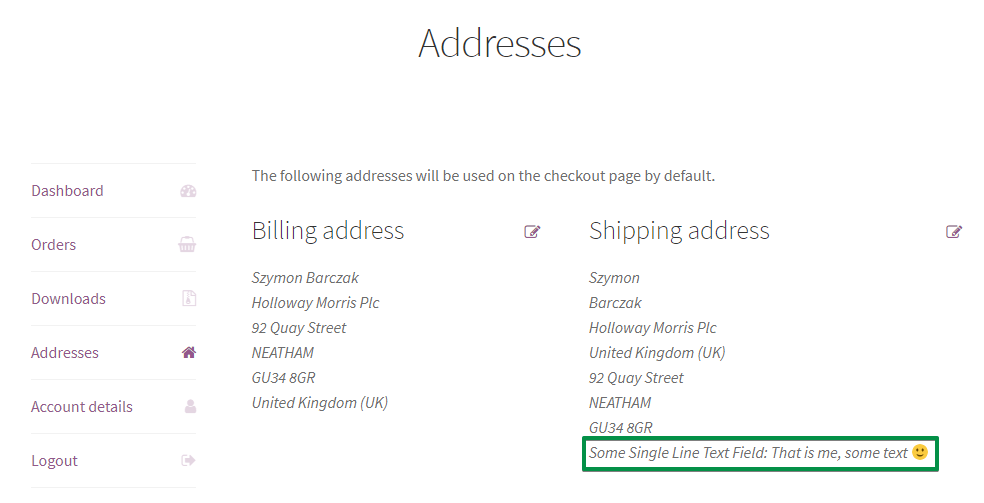
The plugin offers multiple field types for the WooCommerce checkout form.
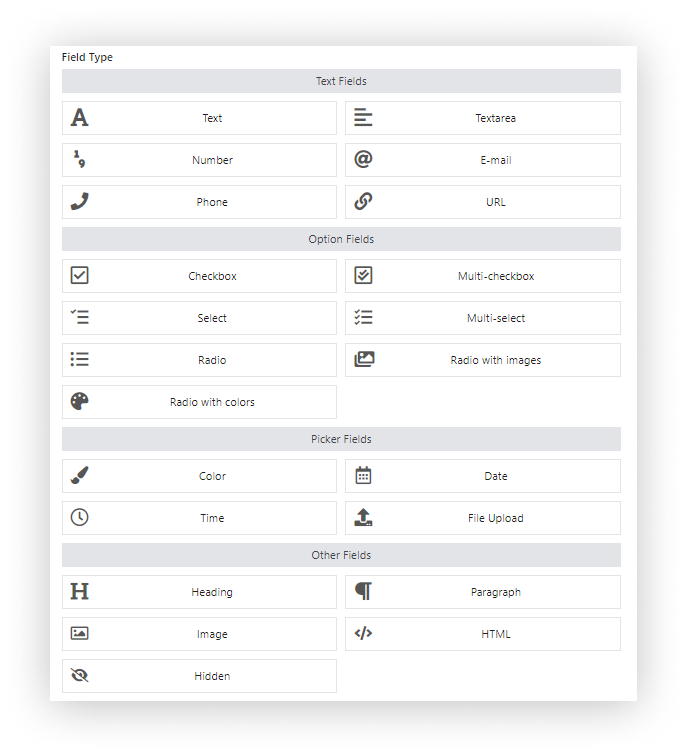
And the flexible way of managing the fields on the checkout page.
Contents
- WooCommerce My Account Page
- My Account and the block-based checkout
- Customize WooCommerce My Account page - Intro
- My account custom fields in WooCommerce - examples
- Add custom fields to My Account in WooCommerce
- Customize checkout with Flexible Checkout Fields
- FAQ – WooCommerce My Account page
- Summary & more
- WooCommerce Checkout - Settings, Shortcode & Configuration Guide
- Customize the WooCommerce Checkout Page: Tips & Tools for Success
- Customize the WooCommerce Checkout Page: Top Tips for a Seamless Experience
- How to Add and Display WooCommerce Custom Fields on the Checkout & Order Pages
- WooCommerce Checkout Field Editor: How to Add, Edit & Remove Billing Fields
Customize WooCommerce My Account page
Customize the WooCommerce My Account page using settings, custom fields, and the plugin! Personalize the WooCommerce checkout form easily!
💾 Active Installations: 10,000+ | WordPress Rating:
Download for free or Go to WordPress.org👉🏽 I still encourage you to keep on reading. This article is full of useful tips and information about setting the My Account page.
Today you'll see how to set the My Account page, use the [woocommerce_my_account] shortcode, and customize the page with custom fields from the WooCommerce checkout form with a FREE plugin. Let's begin!
Customize WooCommerce My Account page
Customize the WooCommerce My Account page using settings, custom fields, and the plugin! Personalize the WooCommerce checkout form easily!
💾 Active Installations: 10,000+ | WordPress Rating:
Download for free or Go to WordPress.orgWooCommerce My Account Page
The My Account page in WooCommerce is designed for customers with data about their accounts and orders.
I will show you the settings and how to use the [woocommerce_my_account] shortcode to configure My Account in WooCommerce. Then, I will show you how to add custom fields to the page with a free plugin.
But let's first look at the page your customers see.
My account section by default
🏁 Let's start with a quick look at the My Account section.
By default this part of your WooCommerce store looks like this:
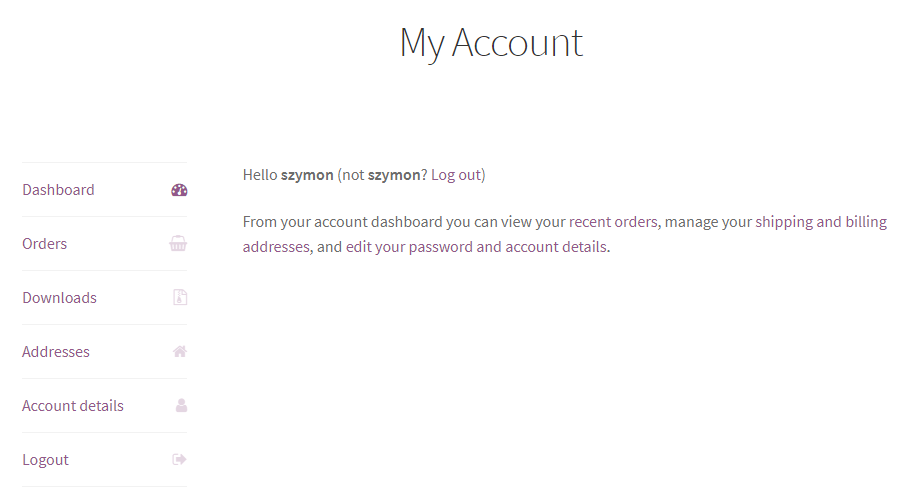
👉🏼 When customers click the Addresses link, they can see all values for the default address fields:
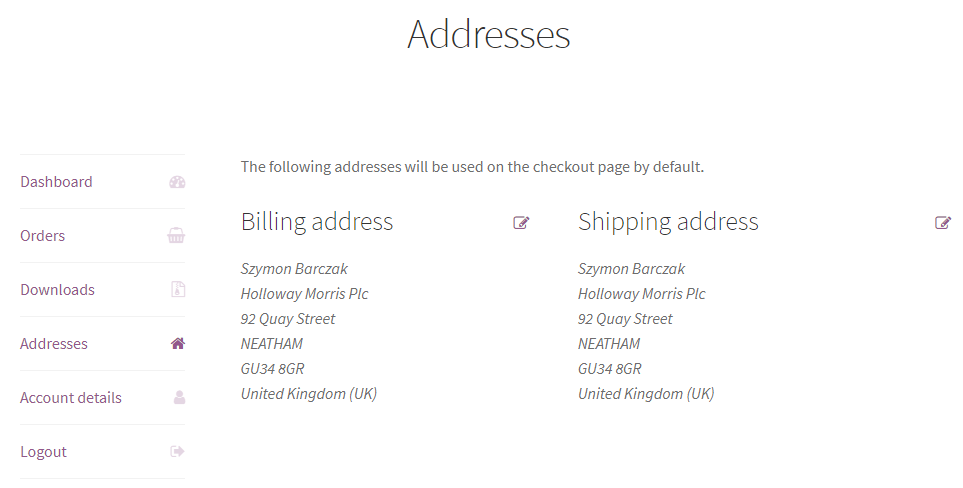
👉🏼 There's nothing magical here now 😉 But this is the place where you want to put WooCommerce My Account custom fields. Go to the example →
How to use the [woocommerce_my_account] shortcode
You can use the [woocommerce_my_account] shortcode to create the My Account page in WooCommerce. That is a standard WooCommerce option that lets your customers check their orders and account details.
Add the [woocommerce_my_account] shortcode to one of your pages:
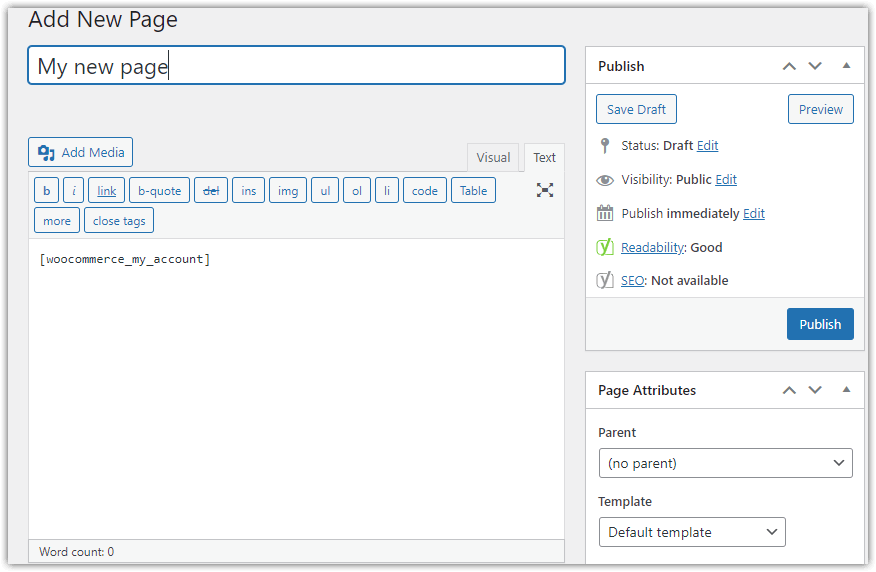
It's also possible to edit the WooCommerce my account page content before or after the shortcode.
Then assign this page under WooCommerce → Settings → Advanced → Page setup → My account page. Adding the shortcode alone does not change the assigned page.
My Account page settings
Now, let's see the basic settings and additional options you can use to customize My Account in WooCommerce.
Accounts & Privacy
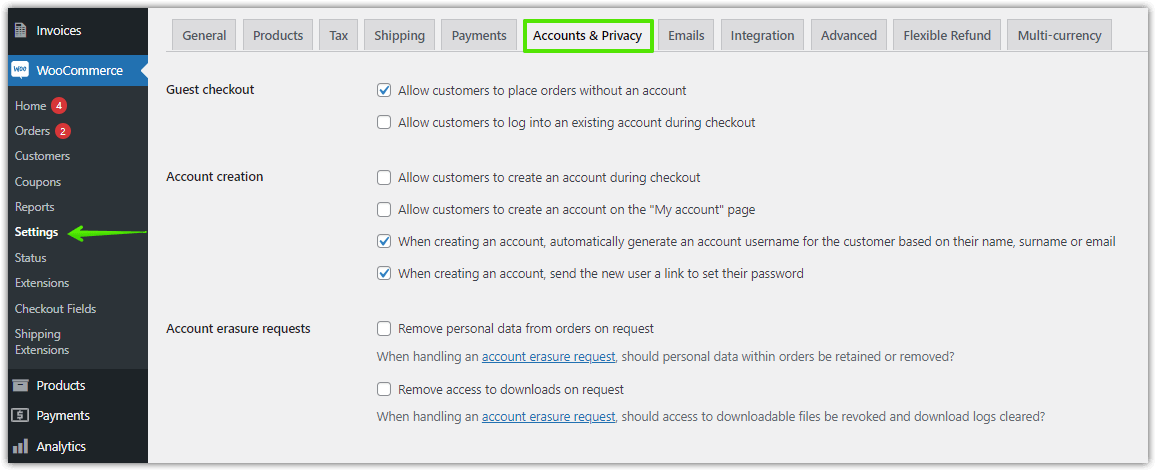
Go to WooCommerce → Settings → Accounts & Privacy to decide about customer accounts in WooCommerce.
For example, you may choose to let your customers create accounts during checkout or allow orders for guests.
Advanced settings
Go to WooCommerce → Settings → Advanced → Page setup to choose the page for My Account and Account endpoints. They are added to the URL for a specific part of the My Account page.
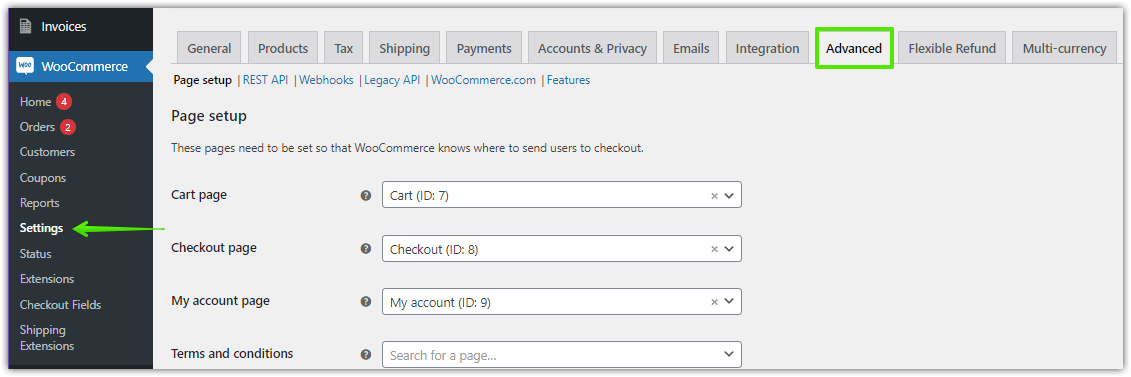
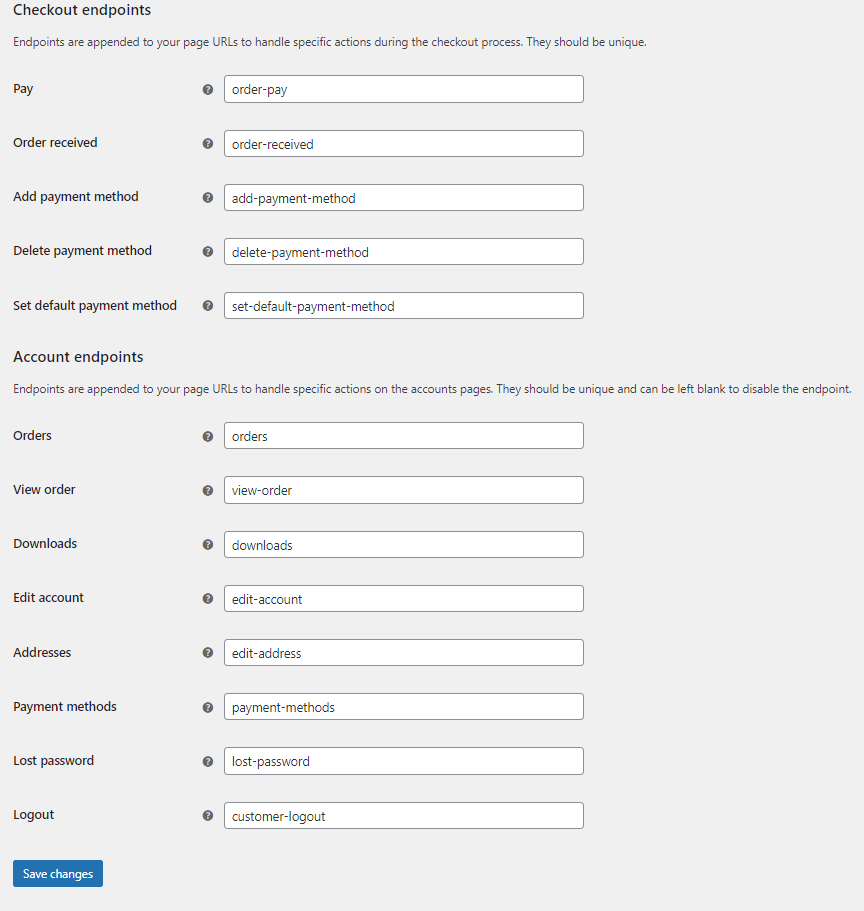
That's it. After following the steps above, the WooCommerce My Account Page is set up. WooCommerce gives standard tabs:
- Dashboard
- Orders
- Downloads
- Addresses
- Account details
- Logout
Some plugins and themes can also add tabs with new options for users. WooCommerce allows adding new tabs for the WooCommerce My Account page with filters and actions or styling it with custom CSS. The rest of this guide shows how to add data from custom checkout fields to these sections:
- → Addresses
- → Orders → a specific order data
My Account and the block-based checkout
WooCommerce supports both the classic shortcode-based checkout and Checkout Blocks. The My Account page can use [woocommerce_my_account] with either checkout, but the way custom fields are created and saved depends on the checkout integration.
This guide uses Flexible Checkout Fields for the classic checkout. WP Desk offers a separate plugin for Checkout Blocks. If your store uses blocks, check the chosen plugin's support for both checkout fields and My Account display; do not assume the classic plugin's Display On workflow applies. A field's appearance at checkout and its storage in customer or order data are separate parts of the integration.
WP Desk telemetry from 19,803 WooCommerce stores in August 2026 reported 87% using the classic checkout and 13.8% using the block cart. These figures refer to different components, checkout and cart, so they should not be treated as complementary percentages of checkout usage.
The same sample found that 86.2% of stores allow guest orders. This describes store settings, not the percentage of shoppers who buy as guests. Guests do not automatically have a My Account area, so prioritise reusable information for registered customers, such as delivery preferences or company details, and keep essential order information available in the order itself.
Customize WooCommerce My Account page - Intro
Let's say you want to add a field to the Shipping address section. I created an exemplary custom field with Flexible Checkout Fields - a free WordPress plugin to manage WooCommerce checkout fields.
Customize WooCommerce My Account page
Customize the WooCommerce My Account page using settings, custom fields, and the plugin! Personalize the WooCommerce checkout form easily!
💾 Active Installations: 10,000+ | WordPress Rating:
Download for free or Go to WordPress.orgI named it Some Single Line Text Field:
Of course, it can have a more interesting name 😉. You can name it however you want. It all depends on your needs. That is me, some text 🙂 is a value of this field.
A customer can edit the value of the field. That's where I provided the That is me, some text :) value for the first time. Just before making a previous screenshot.
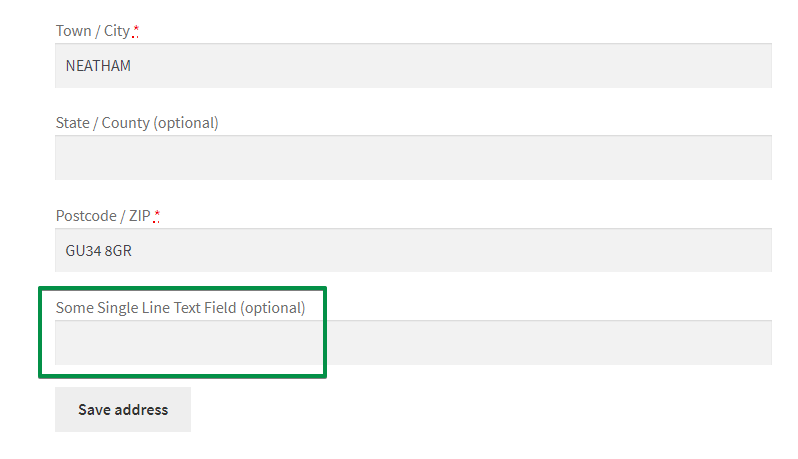
👉🏼 When you add such a custom field to your store, it will appear in the checkout, too:
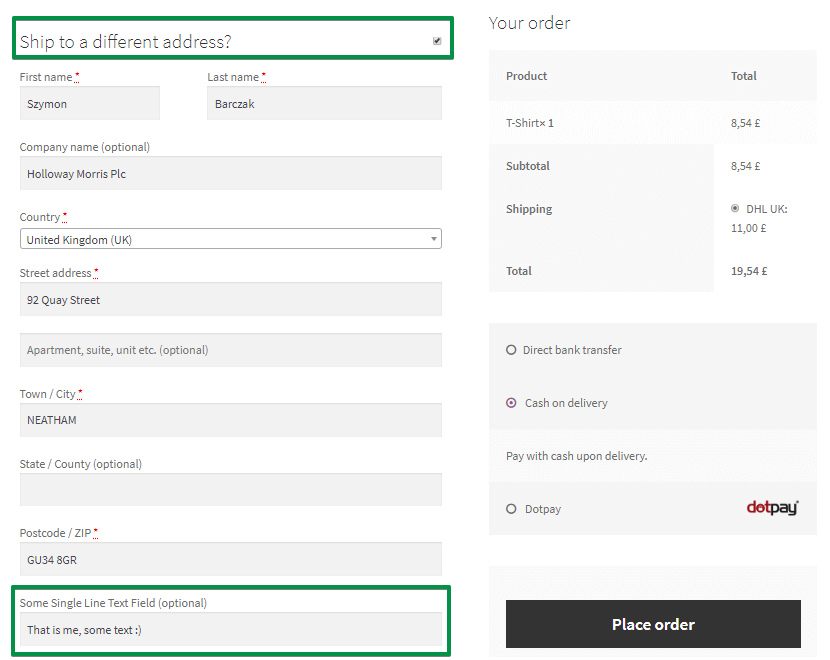
If a customer provided a value before, there will be a value in the field. A field saves its value in the database. Then, a customer can change a value in My Account or while making an order another time.
My account custom fields in WooCommerce - examples
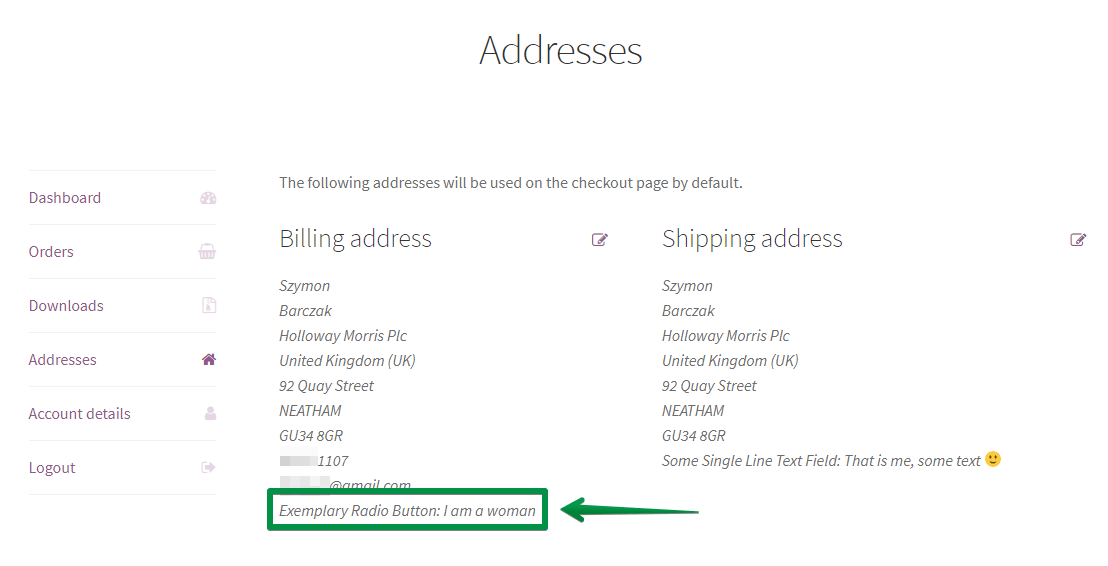
➡️ Here is another example: a radio button field, available in PRO:
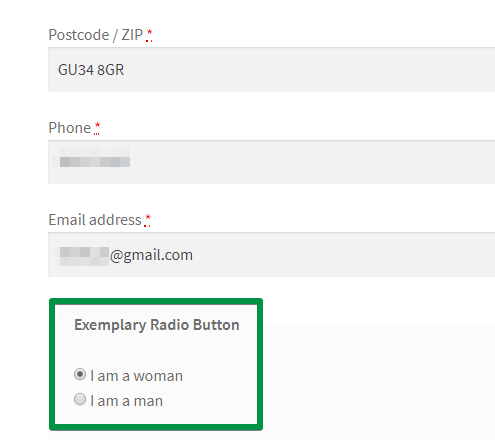
➡️ It works as one of the WooCommerce My Account custom fields, too! It means a customer can see it in the My Account section:
The plugin, which I'll show you next, lets you create 12 field types in the free version and 22 in total with PRO.
Add custom fields to My Account in WooCommerce
-
Get Flexible Checkout Fields
I will use the free plugin to customize the WooCommerce checkout to add fields that will appear on the My Account page.
-
Activate and set the plugin
You can install and activate this plugin in WordPress → Plugins. Then, you can configure it.
➡️ To do that, go to the WooCommerce → Checkout Fields in your WordPress menu.
You'll find the settings screen. By default, it is the Billing section. You can change the section you're editing by choosing the right tab at the top of the screen.
👉🏼 Here you can see the Shipping section:
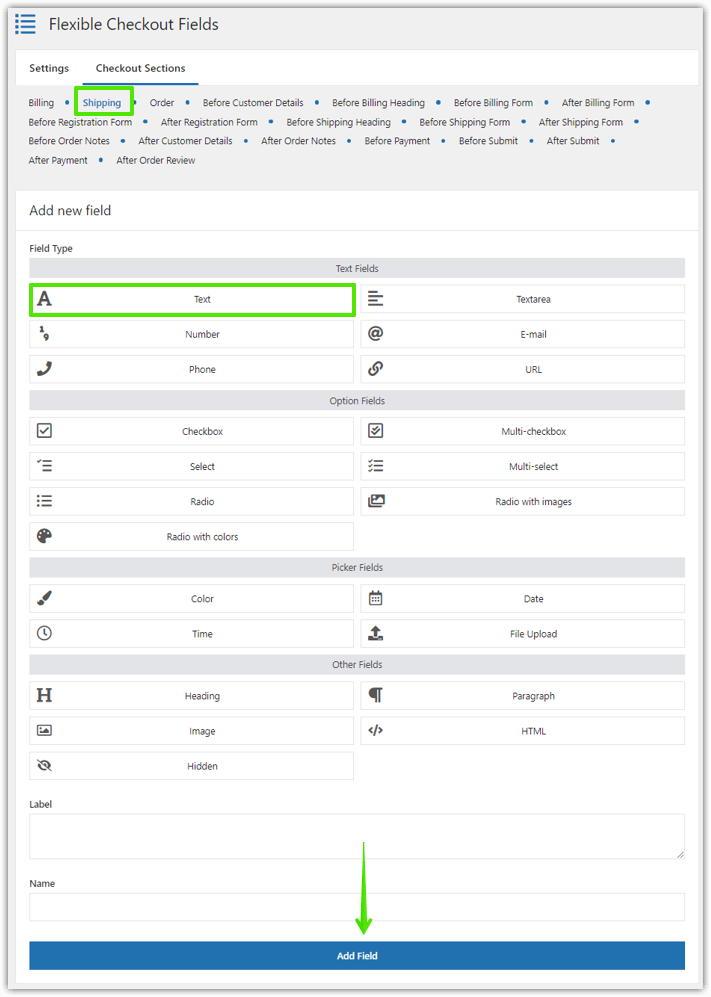
WooCommerce My Account plugin: Add a new custom field with Flexible Checkout Fields -
Add a custom field to My Account
I marked the Add New Field box on the screenshot. Use it to add a new custom field.
Select the Field Type and provide a Label. You can change the Label later.
There is also a Name. You don't need to change anything in here. It is the name of the field in the database. Developers use this option if they need it for their projects.
Customize the WooCommerce My Account page - Choose where to display the new custom field -
Show the field in My Account
➡️ Once you add a field, you can change the Display On settings. Review the selected locations for each field.
The selected display locations determine where the field value appears. Address-field editing and order-detail display are different uses, so check the field section and its Display On options. You can choose to display fields in the Thank You Page, Address and/or Order section of My Account page, or emails:
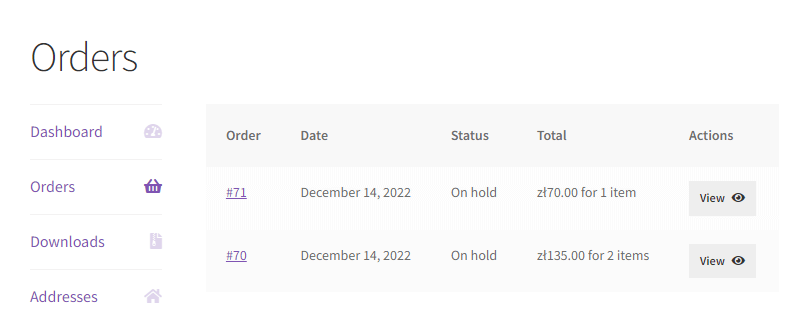
Orders in WooCommerce My Account -
The new field in My Account
The field now appears in My Account with the value the customer provided. Check it with a test customer account and a test order.
My Account with a text field
Customize checkout with Flexible Checkout Fields
✅ You may use the plugin to add custom fields to My Account. However, that's not all!
You can also:
- easily add 12 types of custom fields to the checkout in the free version of the plugin
- easily add 22 types of custom fields to the checkout in the PRO version of the plugin
- edit or hide the default ones,
- rearrange existing fields in the checkout.
80,000+ active installations are reported for the plugin on WordPress.org.
As of October 2026, the plugin has a 4.7 out of 5 stars rating on WordPress.org.
✅With the free version you can add:
- Single Line Text
- Paragraph Text
- Textarea
- Number
- Phone
- URL
- Checkbox
- Color
- Headline
- Image
- HTML
Watch this video to get familiar with what the plugin can offer you in the free version:
The video walks through adding a field, choosing its type and setting where it should appear, which is the same path described in the steps above.
✅The Flexible Checkout Fields PRO lets you adds 10 more field types to the 12 free types:
- Multi-checkbox
- Radio button
- Select (Drop Down)
- Multi-Select
- Radio button with images
- Date
- Radio button with colors
- Time
- File Upload
- Hidden
FAQ – WooCommerce My Account page
How do I create the My Account page in WooCommerce?
Create a page, add the [woocommerce_my_account] shortcode to it, then assign the page under WooCommerce → Settings → Advanced → Page setup. Check whether the page already exists before creating another one.
Can I add custom fields to the My Account page without code?
Yes. With Flexible Checkout Fields for the classic checkout, supported fields can be displayed in the Addresses and Orders sections through the Display On setting, without template edits. Check compatibility separately if you use Checkout Blocks.
Why is my custom field not showing in My Account?
Check that Display On includes the intended My Account location, that the field belongs to an appropriate billing or shipping section, and that a value was saved for the customer or order you are viewing. If these settings are correct, test for account-template overrides on a staging copy using a default theme.
Can customers edit the custom field value themselves?
Yes, for supported billing or shipping fields in the address-edit form. The saved customer value can be reused at checkout. Displaying a value in a past order does not make that order field editable, and changing a saved address should not be treated as updating previous orders.
How do I add a new tab to My Account?
A new account tab needs endpoint and menu integration, implemented with code or a dedicated plugin. This guide adds data inside existing account sections; it does not create new tabs.
Summary & more
You have learned how to add custom fields to My Account. However, the plugin has much more to offer. First, it lets you create 12 field types for free and 22 in total with PRO. PRO also includes conditional logic.
We're looking for your feedback! Did this guide help you? Is our plugin useful for you? Let us know in the comments section below.





Leave a Reply