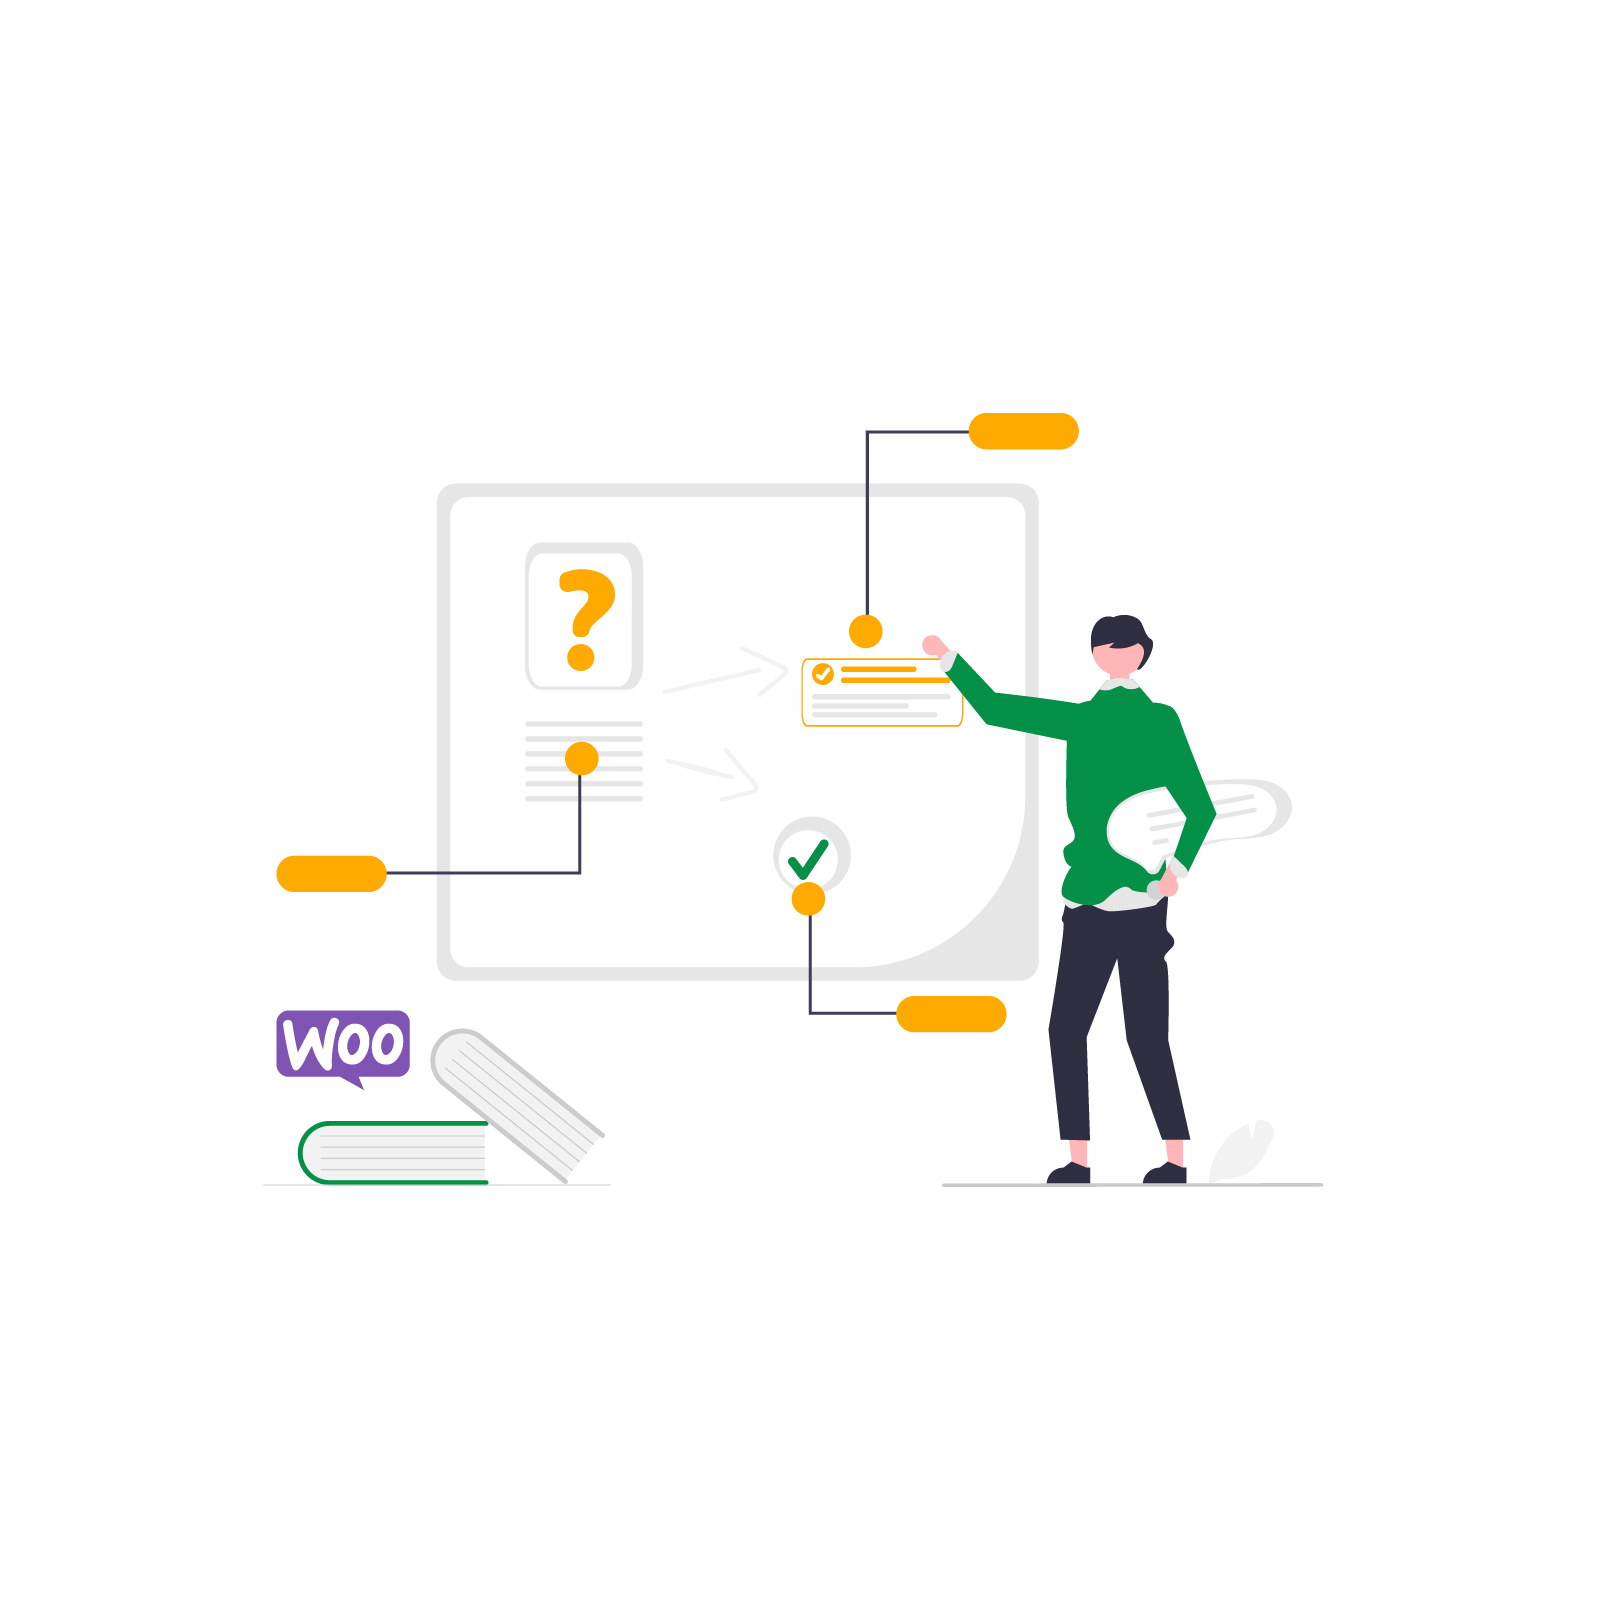
We have prepared a complete guide for people who want to start online store in the dropshipping model. By using the WooCommerce platform and our Dropshipping XML plugin, you will quickly start an online store without your own physical inventory. The store will import the products from a wholesaler which is selling pet supplies products.
Contents
- Dropshipping - an online store without inventory
- Configuring the online store without inventory in WooCommerce
- Step 1 - File Import
- Step 2 - XMl element selection
- Step 3 - Mapping
- Your online store without inventory is already working
- Dropshipping XML WooCommerce - import products to your store
- New WooCommerce XML Dropshiping plugin
- How to start dropshipping in WooCommerce with a free plugin?
- Faster WooCommerce with the bulk import of products (free plugin)
- WooCommerce XML import is simple with this plugin. Just try!
All Plugins Bundle €99
20 plugins included! 1 Site for each plugin Regular updates and support Priority 1-on-1 Support 30-day money back guarantee
Add to cart or View DetailsDropshipping - an online store without inventory
In a store based on the dropshipping model, you do not run a physical warehouse. Don't spend money on stocking up your store and you can focus on marketing and customer service. You use the offer prepared by the wholesaler you cooperate with.
You run an online store without your own inventory. Just transfer the obligation to fulfill the order to the contractor - thanks to this, you do not have to deal with sending parcels yourself.
Final effect
From our guide, you will learn how to create a ready-to-use online pet store. You do not need a physical warehouse because you use dropshipping model:
The pet supplies industry - a good choice
In the current pandemic situation, we spend more time at home. Finally, we have time to deal with the pets that we have always wanted to have. Many people are now choosing their first pet because they know they can give it adequate attention. A pet is a commitment for many years, so you can be sure that customers will come back to you.
During the pandemic, online pet stores record continuous growth. The industry is developing and customers are getting new habits.
In this guide, we will show you how to sell Happet pet supplies products. It is a leading brand on the Polish pet products market. It offers a wide range for both pet and garden stores. The range of products offered includes: aquarium accessories, articles for dogs, cats, birds, rodents and terrariums.
Configuring the online store without inventory in WooCommerce
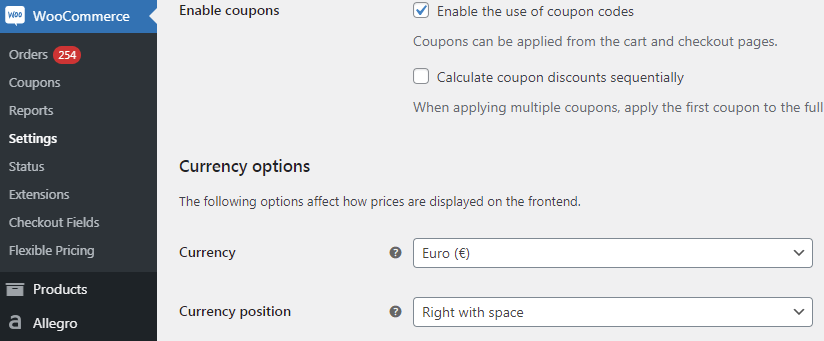
I assume that you already have an active WooCommerce installation. Go to the main settings of the store and make sure the parameters of the store match the parameters of your XML file:
Currency
Weight
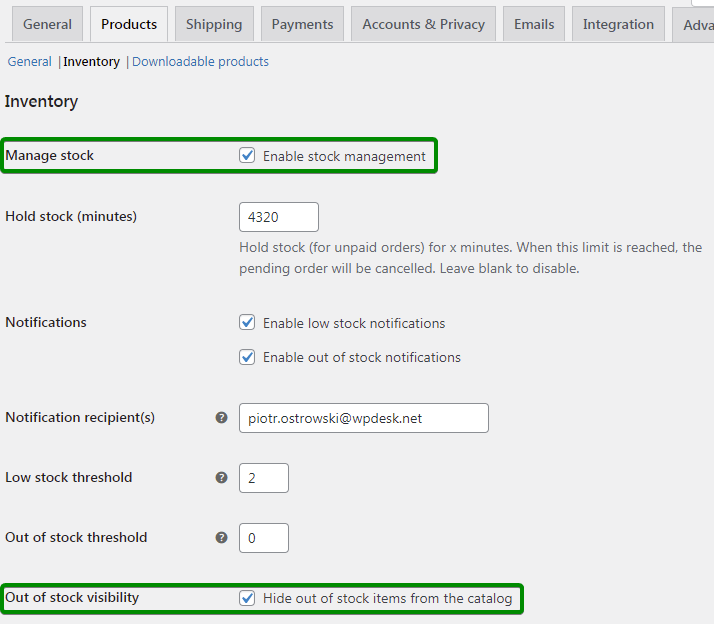
Warehouse uses the kilogram (kg) unit to denote the weight in the XML file, so you need to set it in the configuration. Go to the Settings section Products:

Inventory
Make sure you have inventory management turned on in the Inventory section.
Taxes
Check out our guide on taxes in WooCommerce and set up taxes in your store: WooCommerce Taxes.
Plugin Installation
We assume that your WordPress admin account allows you to install plugins. The next step is to install a plugin that serves as a tool for automated, continuous integration with wholesalers. The plugin is available for purchase in our store:
Install and activate the plugin in WordPress according to the manual installation instructions from the admin panel. Don't forget to activate your API key to access updates and support.
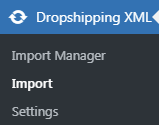
Adding a product file
After activating the plugin, you will see a new menu: Dropshipping XML. Use it to proceed with the process of adding a new import. Click on Import to add a new file.
Step 1 - File Import
Paste the URL into the XML file you received in the warehouse email. Press the import button to download the file.
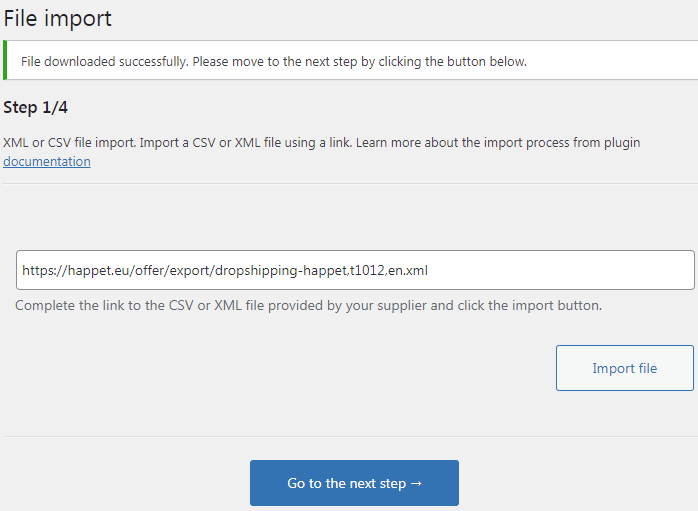
When you see the success message, go to the next step.
Step 2 - XMl element selection
In this step, you select the branch in the XML file that contains information about the products. For your Happet XML file, this will be product - first on the list. Click on this element and go to the next step.
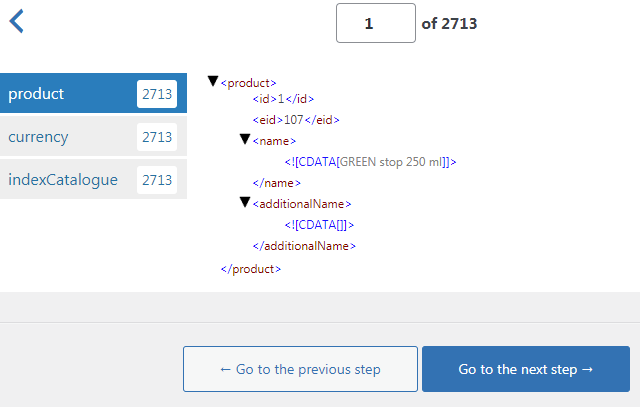
The number displayed is the total number of entries in the XML file. It includes both available and unavailable products (out of stock).
Step 3 - Mapping
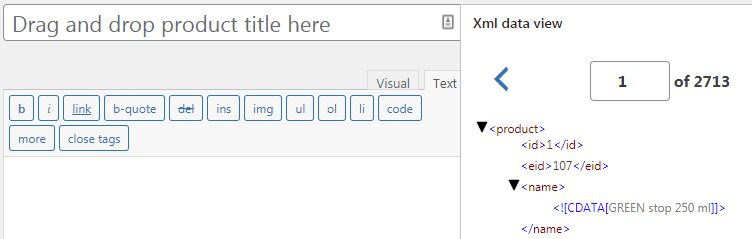
In this step you will map all the product parameters found in the XML file with the WooCommerce product fields. Thanks to this, the plugin will automatically fill in these fields for all products during import. We have prepared a convenient interface to make the whole process friendly and transparent.
On the right side there is a preview of your XML file. There are markers there. To map a tag and a field, grab the tag and drag it to the appropriate field:
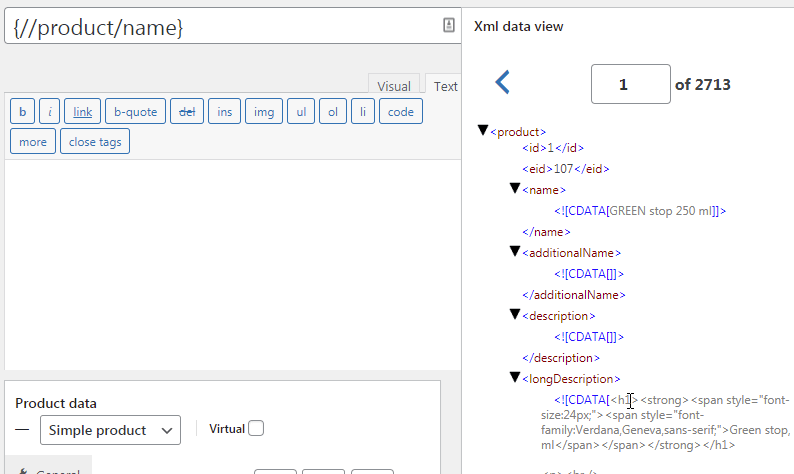
Product name
The parameter contains the product name. Drag it to the WooCommerce product name field:
Product description
Inside the tag there is a product description. Place a tag in place of the WooCommerce product description. Make sure you enter the description in Text mode as the description is in HTML format.
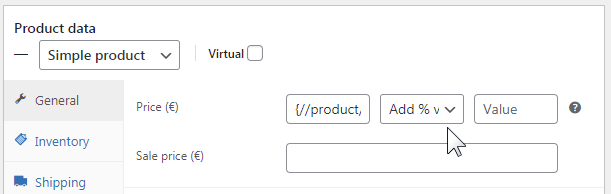
Product price
Put a tag containing the price of the product in the Price field:
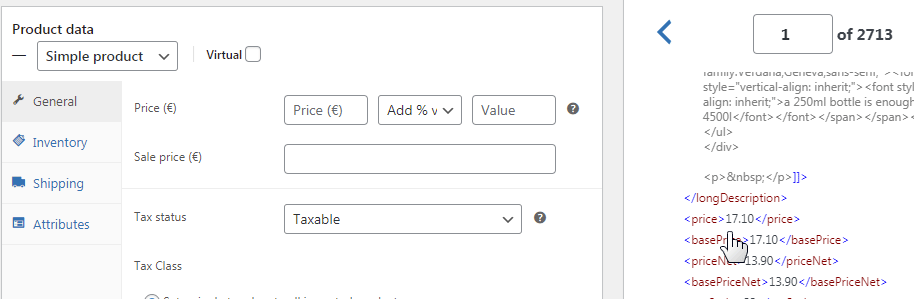
Make prices in your shop higher than in the XML file
Prices in your store should be higher than wholesale prices. The difference in price will be your sales profit.
To increase the prices on the fly by (for example), 20%, select Add % value from the drop-down list and enter the value in the field 20.
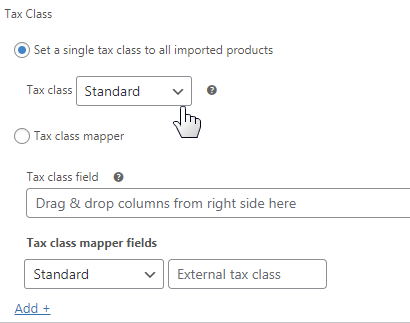
Taxes
In this example, you import products with a Standard VAT rate. Set a single tax class to all imported products and in the Tax class field, indicate the class that corresponds to the Standard rate.
SKU
In order for the products in the store to be easily identified, add a unique string to each of them to distinguish them from the others. To do this, use the SKU field, to which drag the tag <indexCatalogue>.

Inventory
The product's stock is in the <availabilityCount> field. Click Enable stock management at product level and map the <availabilityCount> field:
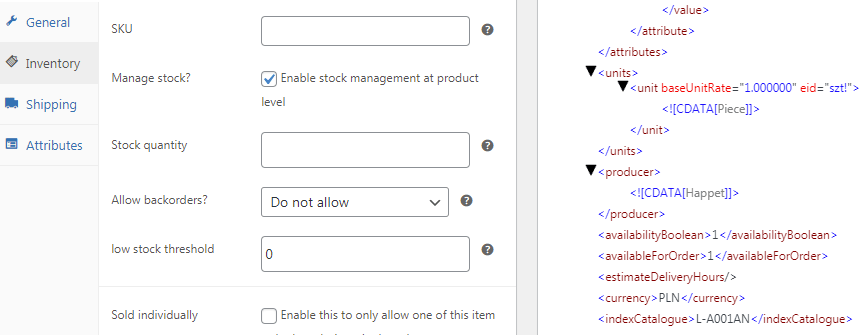
Weight
The product feed also includes the weight value of the packed product. Use the Package weight field for product weight:

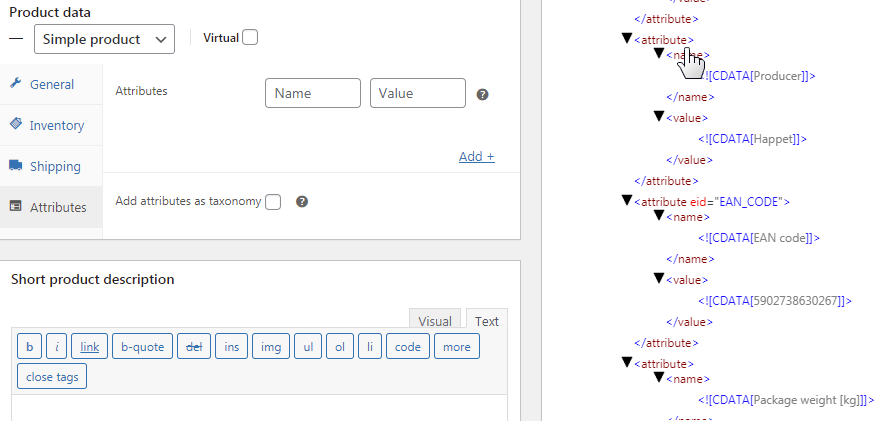
Attributes
The attributes of each product in the XML file are:
- <indexCatalogue> - label given to the product in the warehouse
- <![CDATA[Producer]]> - product producer
- <attribute eid="EAN_CODE"> - barcode
Go to the Attributes section and map the names and values of each attribute:
Images
Time to add your product photo gallery to WooCommerce. Go to the Images metabox on the import screen and paste the following tag path list into the text field:
{//product/imageUrl},{//product/allImages/imageUrl[1]},{//product/allImages/imageUrl[2]},{//product/allImages/imageUrl[3]},{//product/allImages/imageUrl[1]},{//product/allImages/imageUrl[4]},{//product/allImages/imageUrl[5]},{//product/allImages/imageUrl[6]},{//product/allImages/imageUrl[7]},{//product/allImages/imageUrl[8]}
Thanks to this, images will be downloaded to WooCommerce products . The plugin automatically downloads images to the store from the indicated locations.
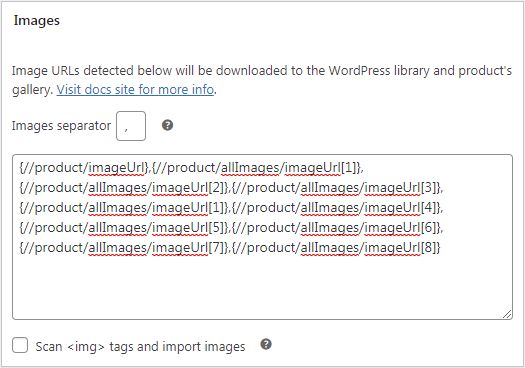
The images are downloaded to the WordPress Media Library and added to the product gallery. The first image is set as the Main Image of the product.
Categories
The last step in the mapping process is to configure the category mapping so that new products are automatically assigned to the categories you have created.
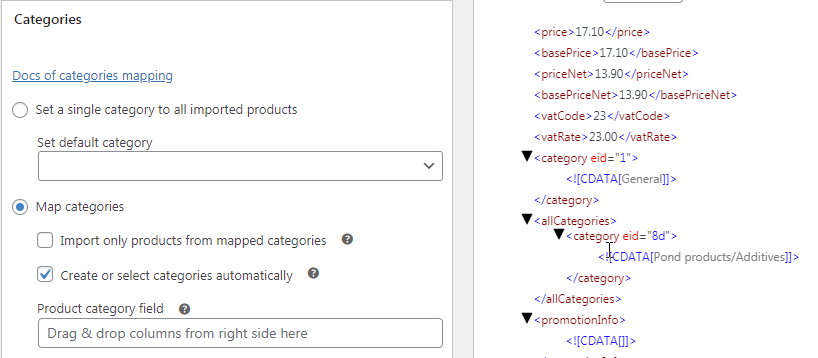
- Click Map categories
- Click Create or select categories automatically
- Drag the field to the Product category field
Go to the next step.
Step 3 - Import options
In the Import options screen, use the following parameters:

-
- Import into products on the basis of: SKU - products will be identified based on the SKU field you have mapped earlier.
- No product in XML/CSV file: Change shop products stock to 0 - in this case, the warehouse does not remove unavailable products from the XML file, so you do not have to worry about offering goods that the warehouse does not have in stock.
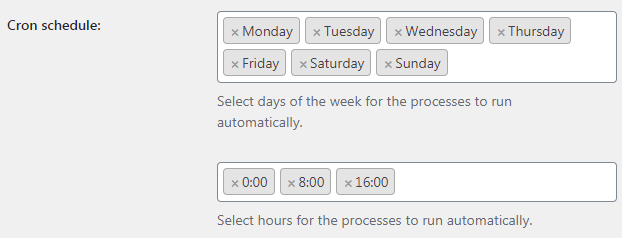
- Cron schedule: the warehouse updates the file 2-3 times a day, so it is a good choice to refresh the file every day, at intervals:
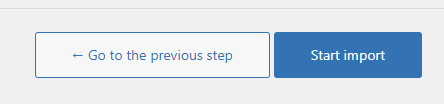
Start the import by clicking the Start Import button:
The import process has started. Watch the progress. If you start the import process manually, the event log will be displayed on the screen, allowing you to monitor the process progress.
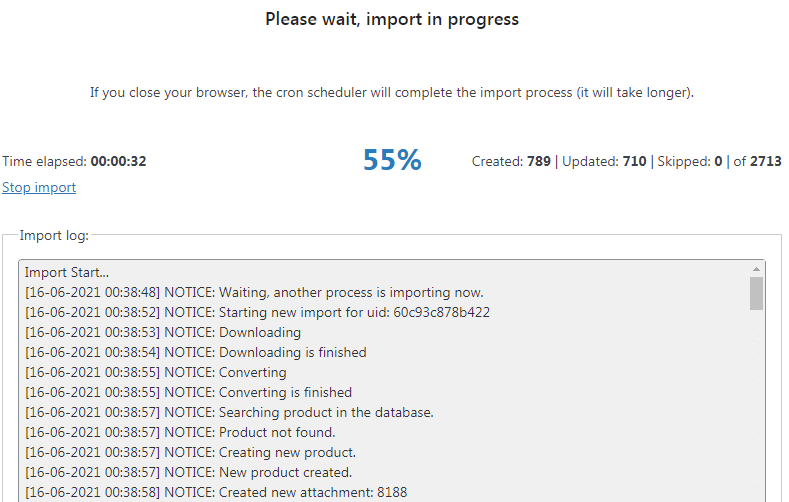
Keep the browser tab open - the import will be faster. After closing the browser tab, the process will continue in the background.
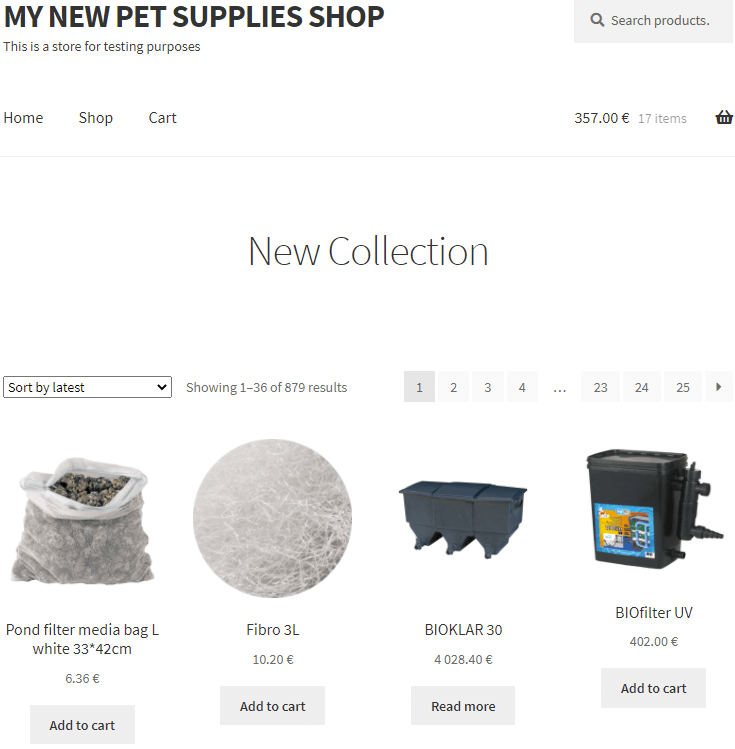
Product list in your shop after import process
After the import is completed, go to the list of products in WooCommerce and preview the imported products on the list:
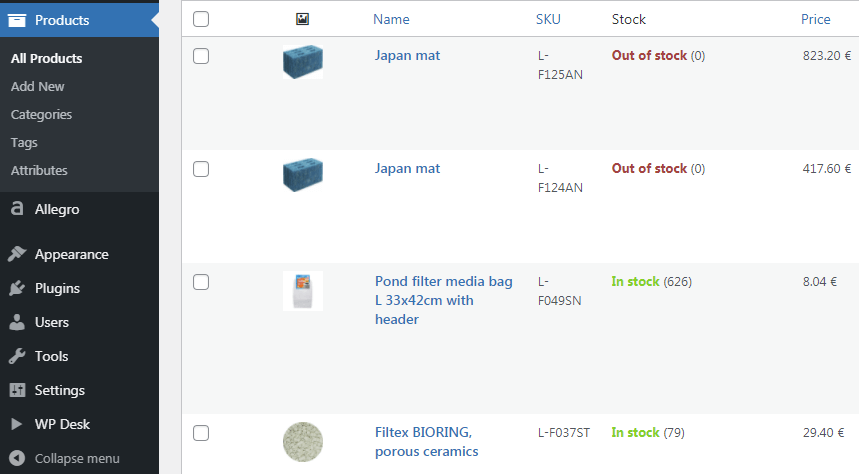
Cool! You successfully imported pet supplies products into your WooCommerce store.
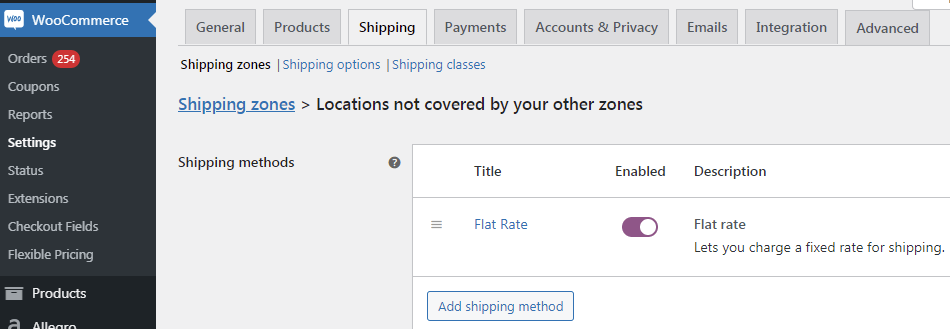
Shipping
Now you need to allow your customers to place orders with the option to choose a shipping method. Happet wholesaler deals with the shipping of orders, so all you need to do is transfer the shipping cost to the buyer.
Add a new shipping method and set its cost (WooCommerce shipping cost is always entered as a net value):
Your online store without inventory is already working
Done! Your store is up and running. Products are periodically downloaded from the wholesaler's servers. Your customers can place orders and pay for them. Buyers also pay for the shipping of orders, so you don't suffer any losses. In this guide, you learned how to open an online store without inventory.
See all options and functionalities in the plugin documentation and video tutorials below.
Implementing your business model
With minimal effort and no investment in stocking up your store, you have opened a dropshipping online store. You earn from day one, and you will earn profits in the following way:
- Your store's offer is automatically updated based on the warehouse file and
- Buyers place orders in your store and make payments to your bank account.
- After receiving the order, you hand it over to the wholesaler.
- The warehouse sends the product to the target customer.
- The buyer is satisfied with the price and the way the order is fulfilled and stays your customer for longer!
- You only need one tool to create an online store. The Dropshipping XML plugin is available in our store. You may also start with the free version of the plugin.


Leave a Reply