Contents
Plugin FAQ
Requirements
The plugin requires this shortcode:
[ woocommerce_checkout ]
to be present on the page set in WooCommerce as Checkout.
The plugin will not work if the Checkout page is built with the blocks (introduced in WooCommerce 8.3.0). You may find this information in the WooCommerce system status.
Manage checkout fields
Drag&drop to reorder fields. Click a field to expand it.
General settings
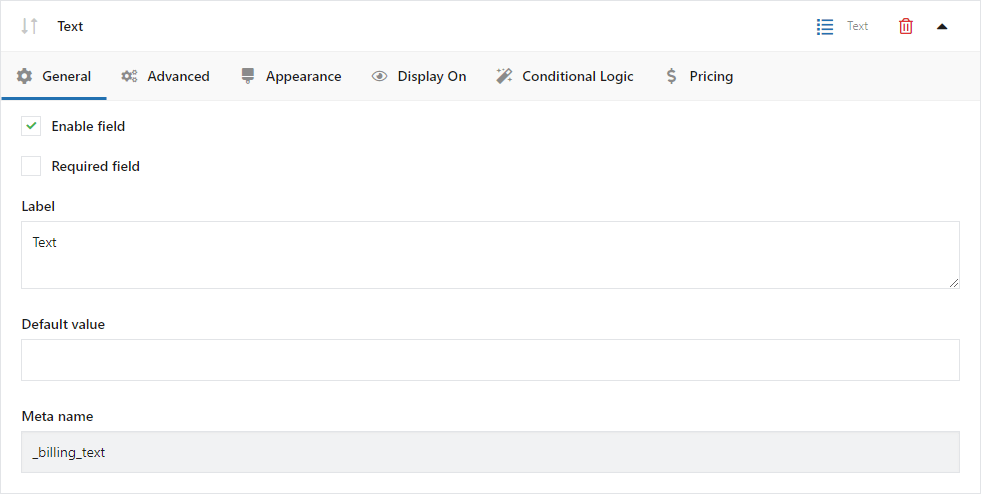
Enable field - check to show a field or uncheck to hide a field.
Required field - check to make a field required, and uncheck to make a field optional.
Label - enter the field's label. You can use HTML here.
Default value PRO - the fields can be preselected or already filled with the custom value by default.
For the field with options, e.g. Radio or Select, enter the Value of the option which should be the default.
Meta name - it's the label's name in the database for developers' purposes.
Advanced settings
This section contains settings specific to a given field type. By default, it also includes the validation settings if the field uses it.
Validation - use WooCommerce validation if needed.
Appearance settings
Placeholder - add or change the text of the field.
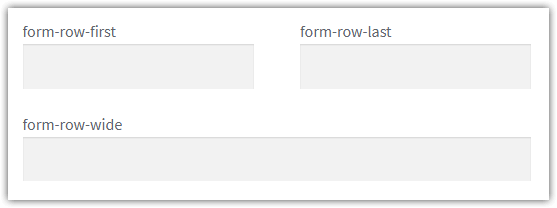
CSS class - add or change the CSS class.
Display On settings
You can select where the field should be displayed in the Display On tab:
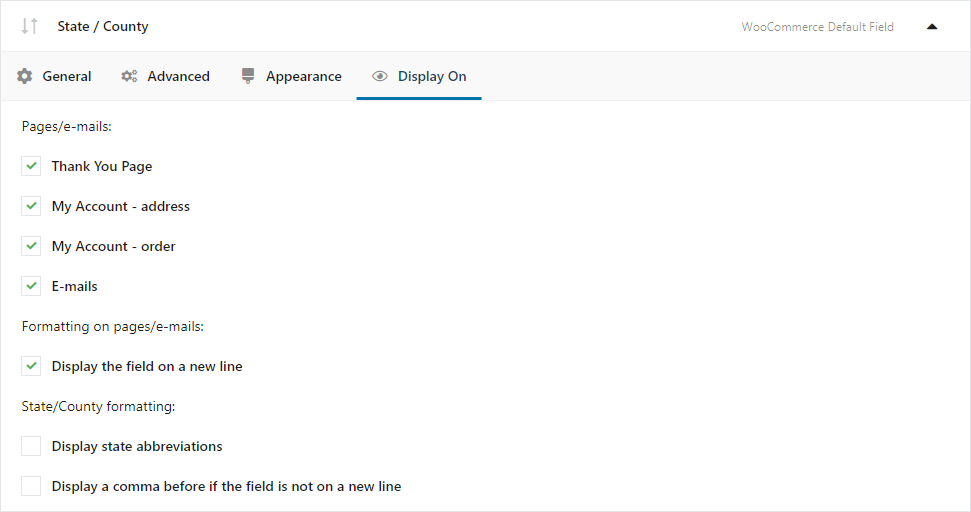
Pages/emails - select where the field should be displayed.
Formatting on pages/e-mails:
Display the field on a new line - it will display the field in a new line, changing the default WooCommerce settings.
Show field label - it will display the field label before the field content. This option is available only for custom fields.
State / County formatting:
Display state abbreviations - for State / County field. It will display a State code instead of the full name.
Display a comma before if the field is not on a new line - for State / County field. It will display a comma before the State field.
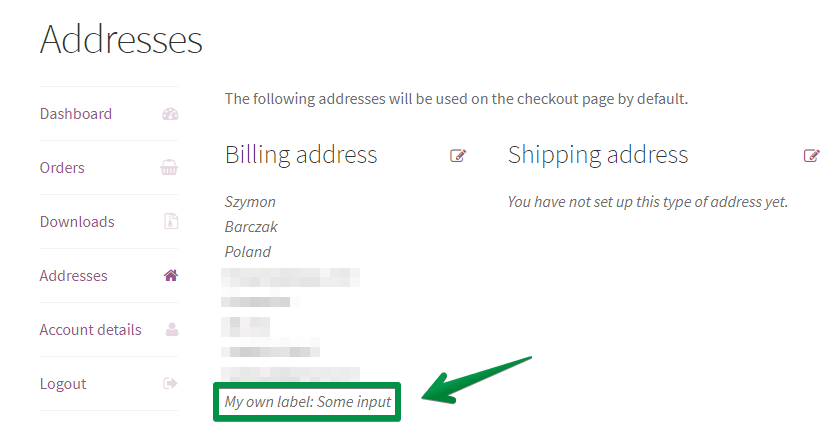
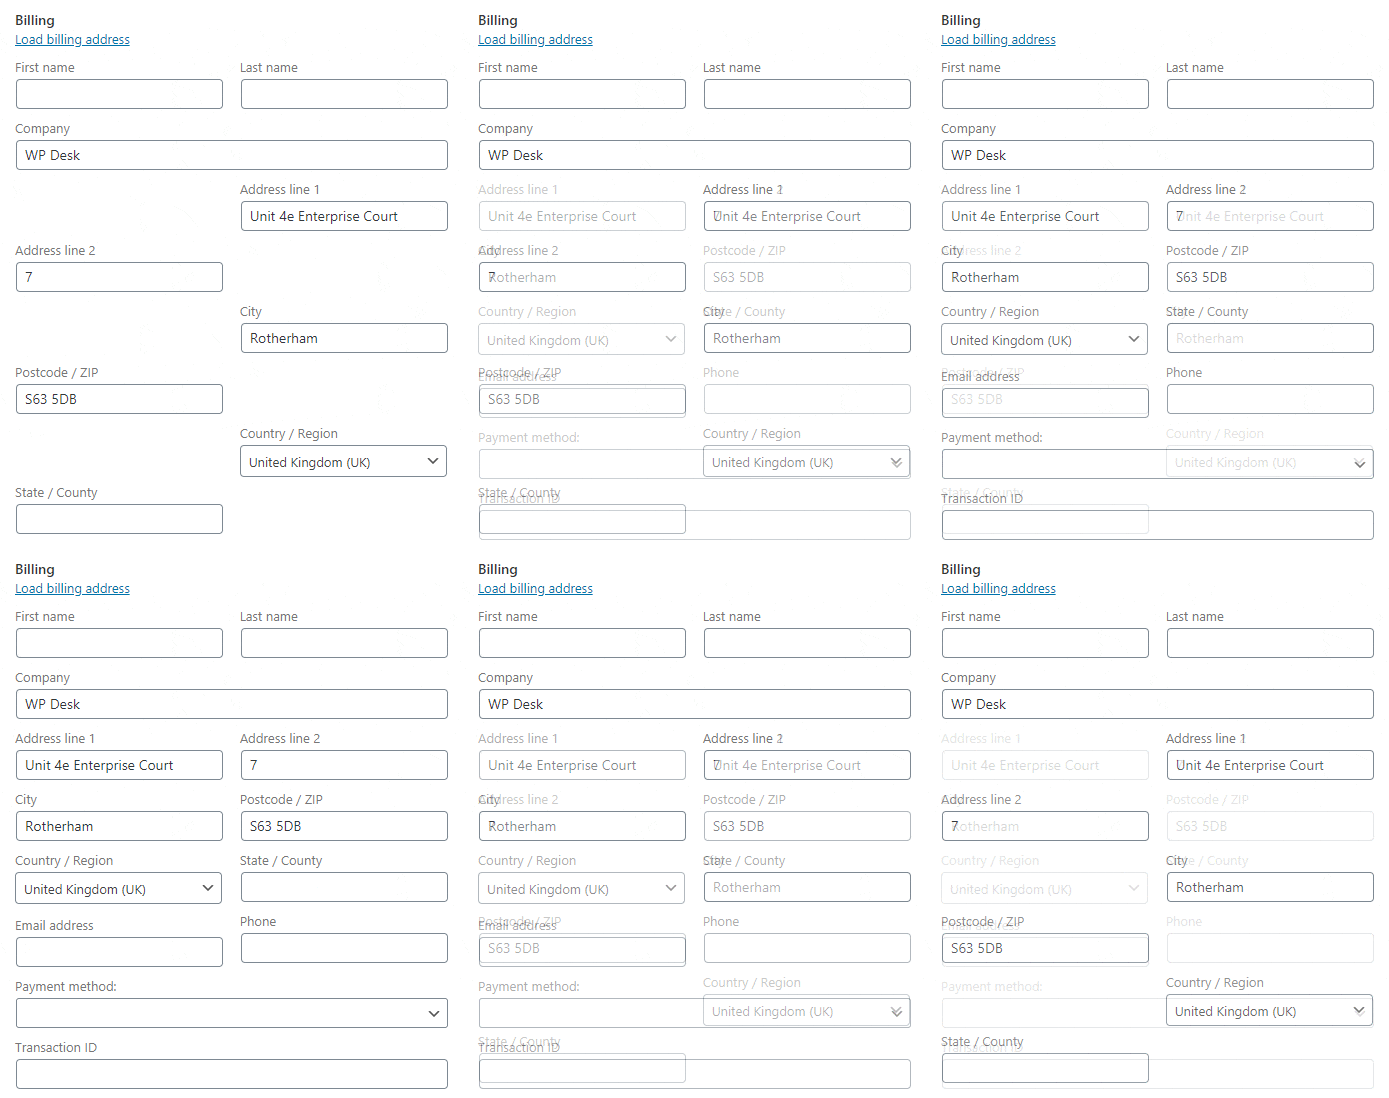
Below, you can see in-action examples of displaying fields:
Adding custom fields
You can add multiple fields to sections of WooCommerce checkout.
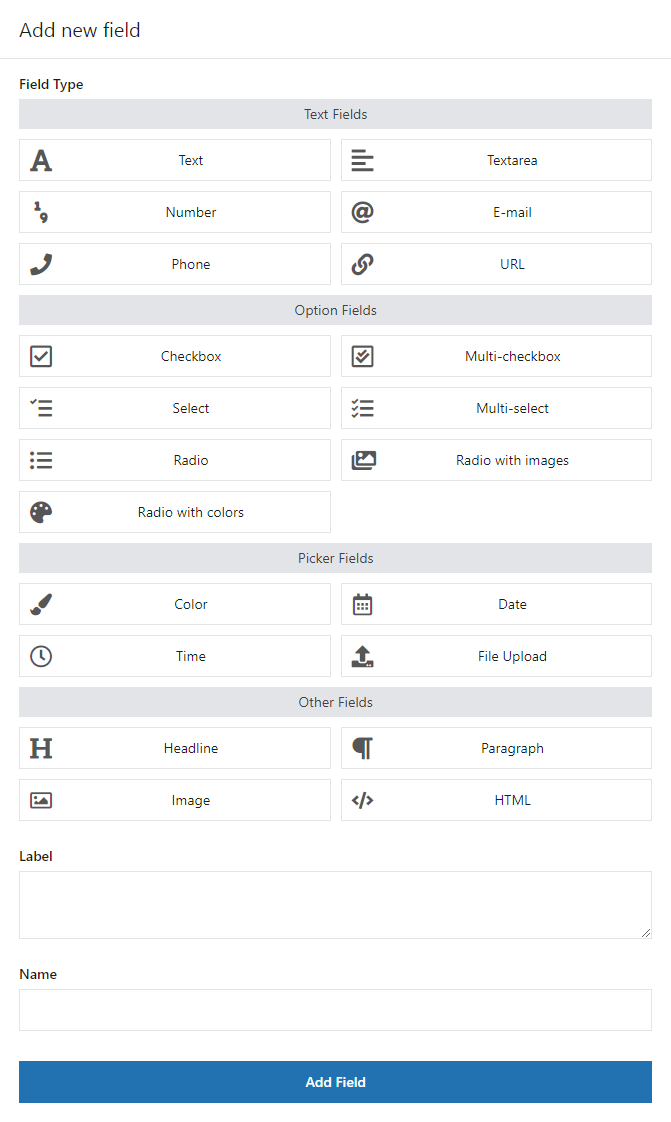
- Go to Add new field box.
- Select field type.
- Enter the field's label.
- Change the field's name (optional for developers)
- Click the Add Field button.
- Click the Save Changes button.
The field will be added to Edit Section. Now you can edit the field. Remember to save changes.
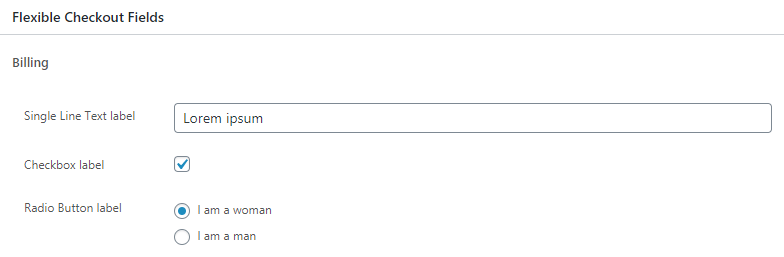
Editing additional fields in the order
Under the order, you can edit the added fields. Changing the settings and saving the order will change the details of the order. Scroll down the order page to show the Flexible Checkout Fields section with fields to edit.
Add this code to the functions.php file if the address fields are not aligned.
add_action( 'admin_head', function() {

?>

<style>

#order_data .order_data_column div.address[style*="display: none"] + div.edit_address {

display: flex;

flex-wrap: wrap;

justify-content: space-between;

}

</style>

<?php

} );
Conditional logic
For any field, it is possible to set rules on when to show or hide the field.
From plugin version 4.0.0, there are eight types of conditional logic configuration:
- WooCommerce default fields conditional logic,
- Flexible Checkout Fields plugin fields conditional logic,
- Flexible Product Fields plugin fields conditional logic,
- Cart conditional logic,
- User conditional logic,
- Shipping method conditional logic,
- Payment method conditional logic,
- Date conditional logic,
Assigning a price to the custom fields
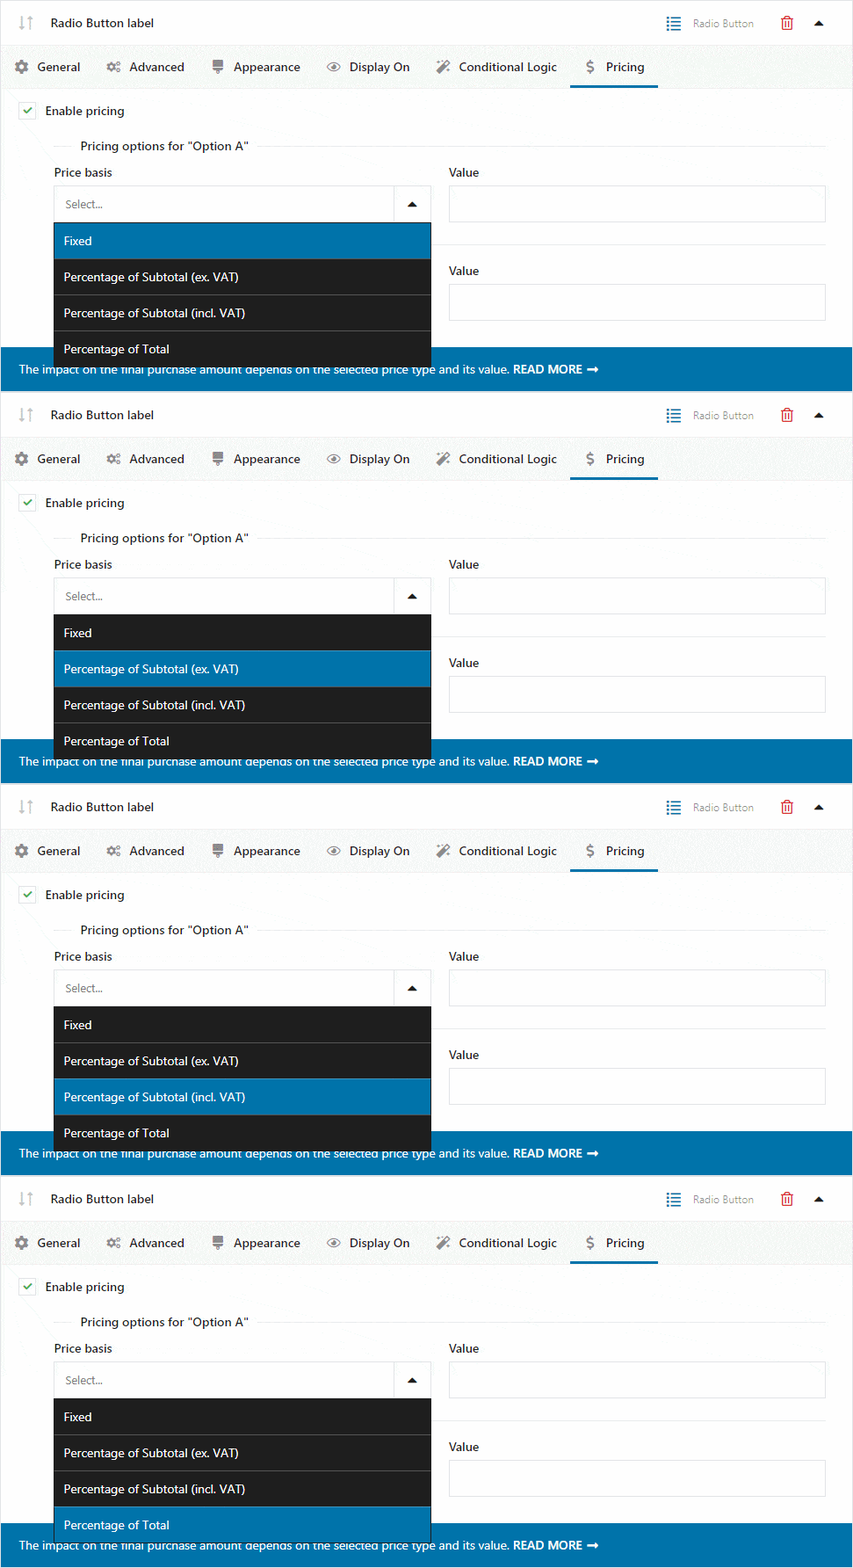
Fields added using FCF have an additional tab "Pricing" with available options for assigning a price.
The impact on the final purchase amount depends on the selected price type and its value.
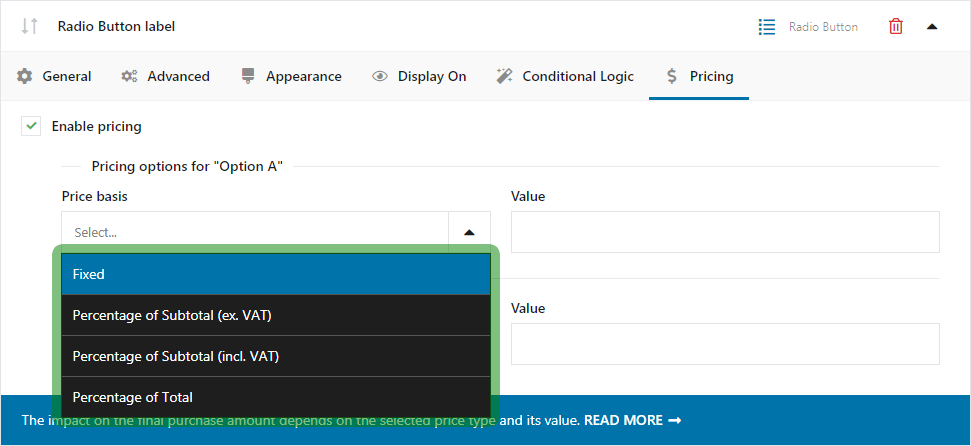
- Fixed - net price set in currency units and independent of the cart.
- Percentage of Subtotal (ex. VAT) - percentage amount related to the net subtotal (cart value).
- Percentage of Subtotal (incl. VAT) - percentage amount related to the gross subtotal (cart value).
- Percentage of Total - percentage amount related to the Total (cart value + coupons + shipping).
The option to add a price is available for:
- Text
- Textarea
- Number
- Phone
- URL
- Checkbox
- Multi-checkbox
- Select
- Multi-select
- Radio
- Radio with images
- Radio with colors
- Color
- Date
- Time
- File Upload
Instructions for adding a price to the field
- Add a new field.
- Add options and other settings - if required by the selected field type (e.g. "Radio" field).
- Select the "Pricing" tab and check the "Enable Pricing" checkbox.
- One line of settings will appear if the selected field has no option (e.g. "Single Line Text").
- There will be separate lines with settings next to each option if the selected field has options (e.g. "Select").
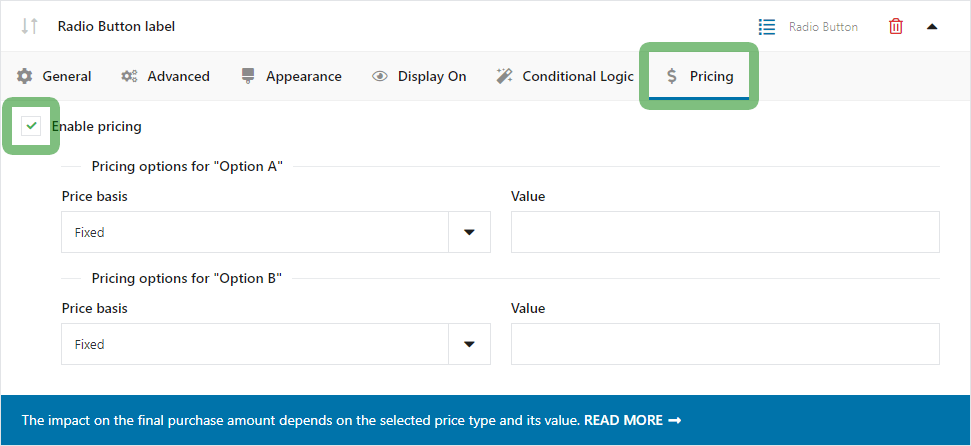
- Assign a price by selecting its type from the "Price Type" list:
- Fixed - enter the net price
- Percentage of Subtotal (ex. VAT) - enter a percentage
- Percentage of Subtotal (incl. VAT) - enter a percentage
- Percentage of Total - enter a percentage
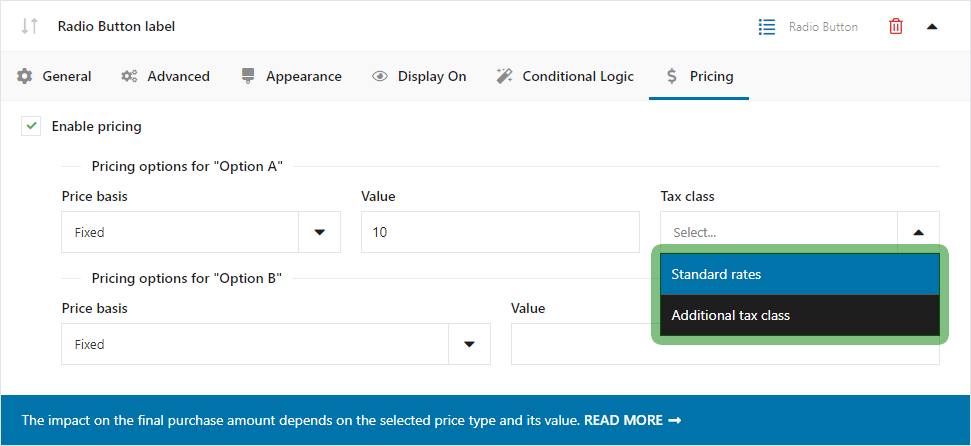
- Indicate the tax class by selecting the class from the "Tax Class" list. Save the changes.
This option will appear when the assigned price is greater than "0" and if the "Enable tax rates and calculations" option is enabled in the WooCommerce > Settings > General tab.
Displaying prices in the store
The price assigned to the field will be shown in the store either as a gross total price or as a percentage.
- Checkout - the price will be shown in brackets next to the field label (or next to an option) and will also appear in the "Order" section.
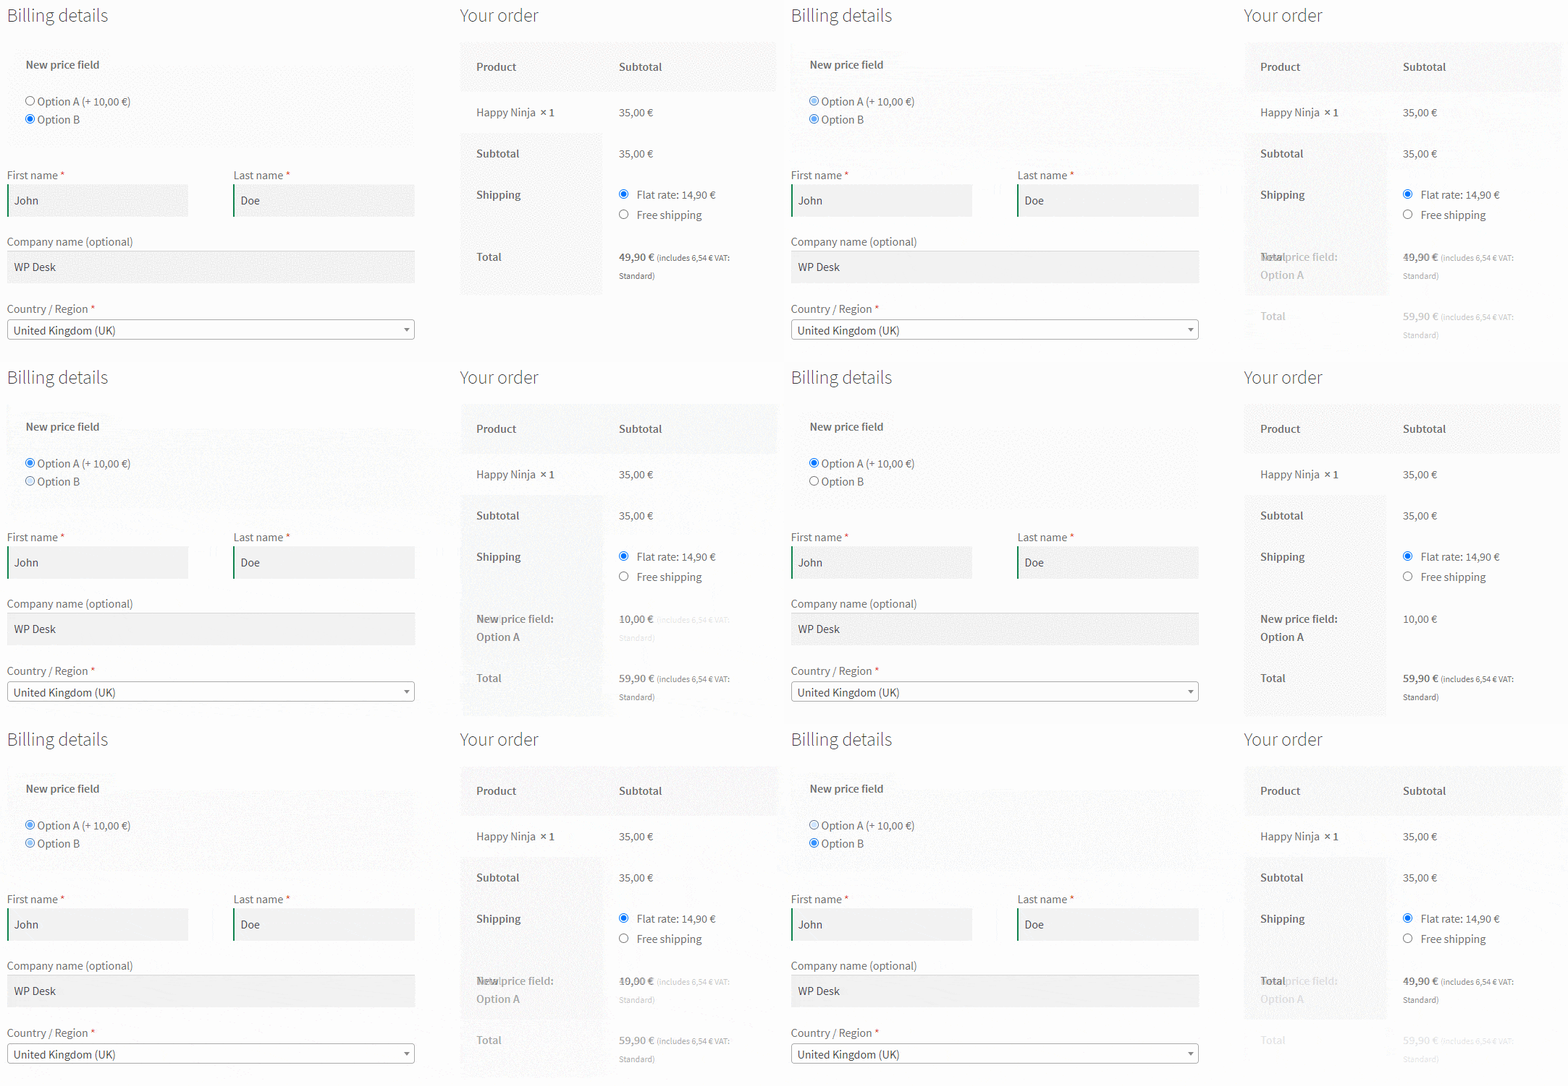
- Order Summary - the price will be shown as the amount included in the purchase.
- WooCommerce > Orders tab - the fields visible there are editable so it is possible to change the label and price or to add tax.
Important information
- Enable the "Rounding" option in the WooCommerce > Settings > Tax tab. This setting is required when more than one price field is added.
- Do not use the same labels.
- The fields added in the "Billing" and "Shipping" sections are cached. These fields are saved and autocompleted during the next purchases.
Field types
Text fields
Text
Field on the checkout page:

Configuration:
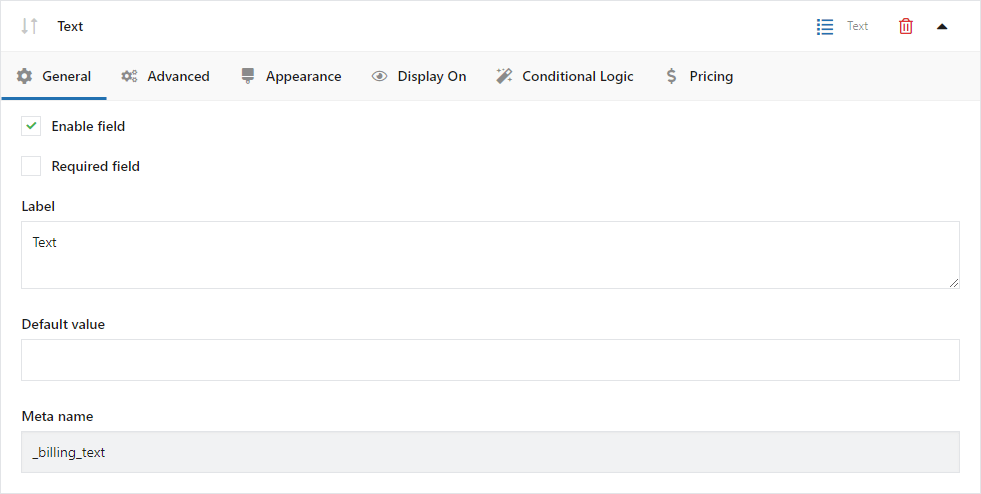
Enable field - check to show a field or uncheck to hide a field.
Required field - check to make a field required, and uncheck to make a field optional.
Label - enter the field's label. You can use HTML here.
Default value PRO - enter the value that the field should be set to as default.
Meta name - it's the label's name in the database for developers' purposes.
Validation - use WooCommerce validation if needed.
Textarea
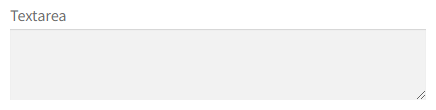
Field on the checkout page:
Configuration:

Enable field - check to show a field or uncheck to hide a field.
Required field - check to make a field required, and uncheck to make a field optional.
Label - enter the field's label. You can use HTML here.
Default value PRO - enter the value that the field should be set to as default.
Meta name - it's the label's name in the database for developers' purposes.
Validation - use WooCommerce validation if needed.
Number
Field on the checkout page:

Configuration:

Enable field - check to show a field or uncheck to hide a field.
Required field - check to make a field required, and uncheck to make a field optional.
Label - enter the field's label. You can use HTML here.
Meta name - it's the label's name in the database for developers' purposes.
Min value - Values below the minimum value will be rejected due to field validation.
Max value - Values below the minimum value will be rejected due to field validation.
Step value - The interval between consecutive acceptable values.
Validation - The default validation is the only one available.
Field on the checkout page:

Configuration:
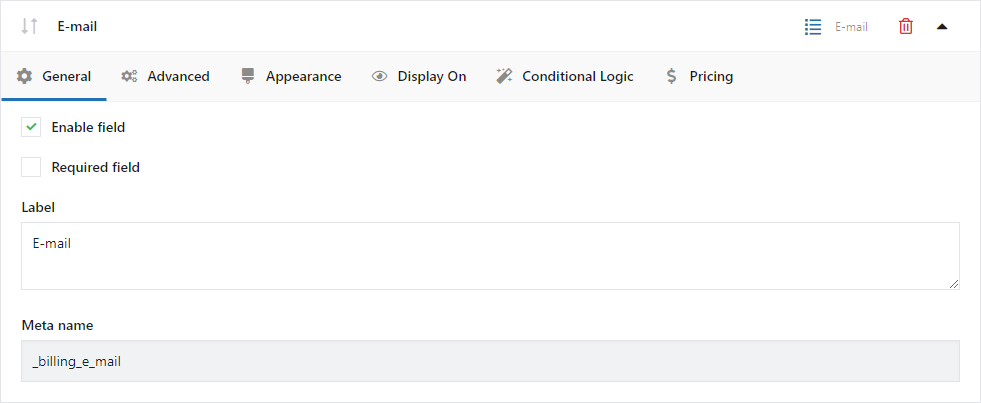
Enable field - check to show a field or uncheck to hide a field.
Required field - check to make a field required, and uncheck to make a field optional.
Label - enter the field's label. You can use HTML here.
Meta name - it's the label's name in the database for developers' purposes.
Min value - Values below the minimum value will be rejected due to field validation.
Max value - Values below the minimum value will be rejected due to field validation.
Step value - The interval between consecutive acceptable values.
Validation - The default validation is the only one available.
Phone
Field on the checkout page:

Configuration:
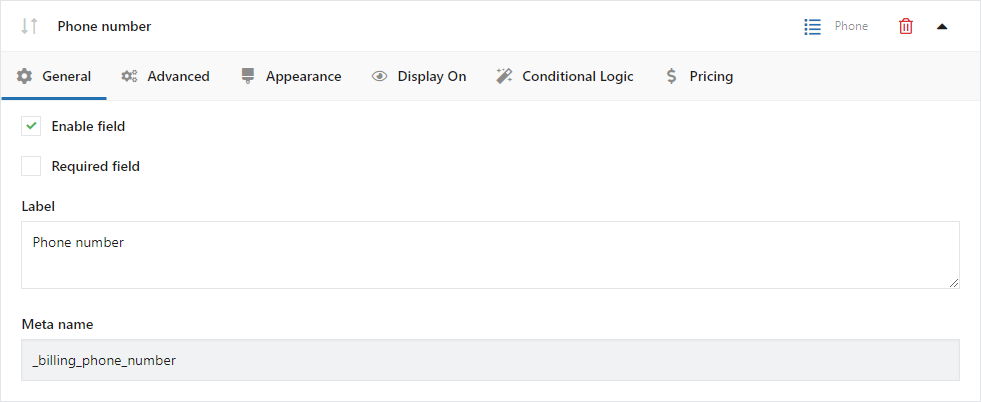
Enable field - check to show a field or uncheck to hide a field.
Required field - check to make a field required, and uncheck to make a field optional.
Label - enter the field's label. You can use HTML here.
Meta name - it's the label's name in the database for developers' purposes.
Validation error message - Enter a message containing information about the correct phone number format.
Validation - The default validation is the only one available.
Validation regex
Enter the number format using the regex code.
The code [0-9]{3}-[0-9]{3}-[0-9]{3} forces the number to be:
- divided into 3 groups
- where each contains 3 digits
- from 0 to 9
- separated by dashes
e.g. 123-456-789.
The code [0-9]{3}\s[0-9]{2}\s[0-9]{2}\s[0-9]{2} forces the number to be:
- divided into 4 groups
- where the first consists of 3 digits and the remaining 2 digits
- from 0 to 9
- separated by spaces
e.g. 123 45 67 89.
URL
Field on the checkout page:

Configuration:
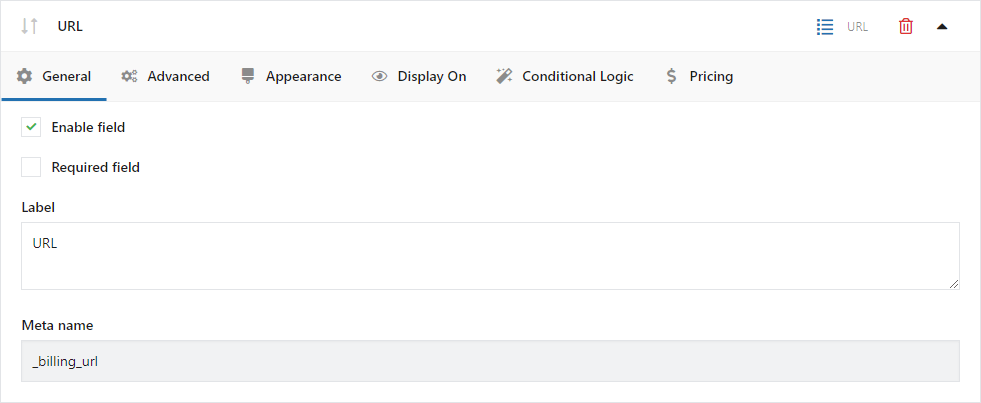
Enable field - check to show a field or uncheck to hide a field.
Required field - check to make a field required, and uncheck to make a field optional.
Label - enter the field's label. You can use HTML here.
Meta name - it's the label's name in the database for developers' purposes.
Validation - The default validation is the only one available.
Option Fields
Checkbox
Field on the checkout page:

Configuration:
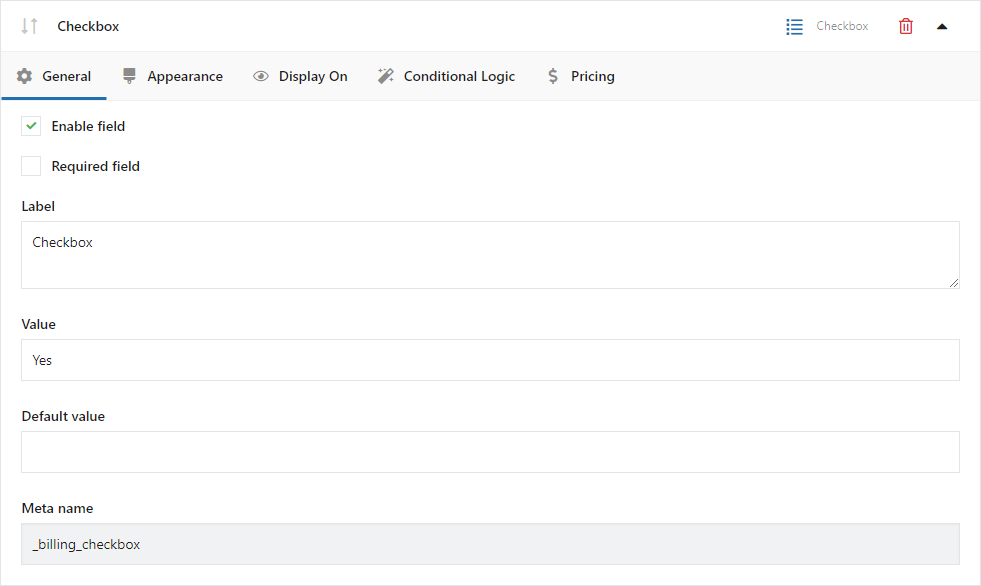
Enable field - check to show a field or uncheck to hide a field.
Required field - check to make a field required, and uncheck to make a field optional.
Label - enter the field's label. You can use HTML here.
If the value of the field is to be visible (on the Thank You page and others) also when it is not filled - then please add the following snippet to the functions.php file of an active theme.
add_filter( 'flexible_checkout_fields_user_meta_display_value', 'flexible_checkout_fields_print_value', 20, 2 );

add_filter( 'flexible_checkout_fields_print_value', 'flexible_checkout_fields_print_value', 20, 2 );

function flexible_checkout_fields_print_value( $meta_value, $field ) {

if (

'' === $meta_value &&

isset( $field['type'] ) &&

\WPDesk\FCF\Free\Field\Type\CheckboxType::FIELD_TYPE === $field['type']

) {

$meta_value = __( 'No' );

}

return $meta_value;

}
Value - value displayed in the order details if a user checks the checkbox.
Default value - enter the text set as Value to make the field checked by default.
Meta name - it's the label's name in the database for developers' purposes.
Multi-checkbox
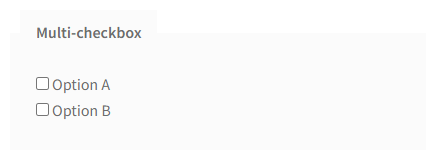
Field on the checkout page:
Configuration:
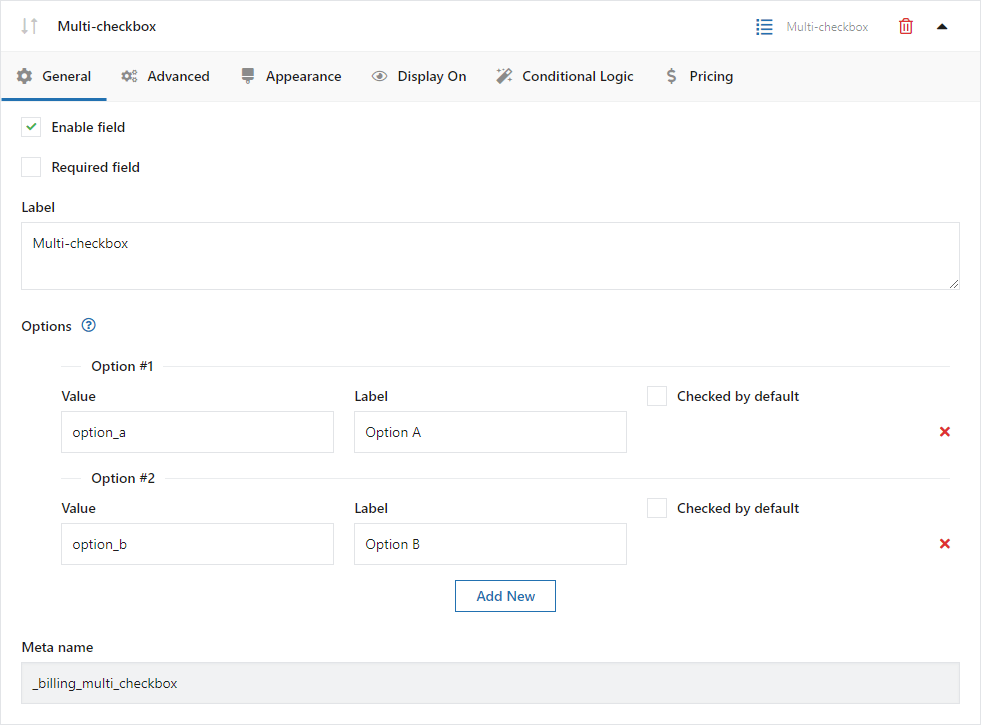
Enable field - check to show a field or uncheck to hide a field.
Required field - check to make a field required, and uncheck to make a field optional.
Label - enter the field's label. You can use HTML here.
Option Value - Enter a value and a label for each field option. The value will not be visible on the form.
Option Label - Enter a value and a label for each field option. The label will be visible on the form.
Checked by default - Select this option to have the checkbox checked by default.
Meta name - it's the label's name in the database for developers' purposes.
Minimum of selected values - Set the minimum number of selections required. Check the "Required field" option in the "General" tab for the following setting to work.
Maximum number of selected values - Set the maximum number of selections allowed. Check the "Required field" option in the "General" tab for the following setting to work.
Validation - The default validation is the only one available.
Select
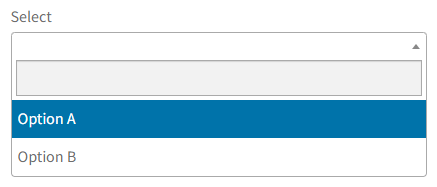
Field on the checkout page:
Configuration:
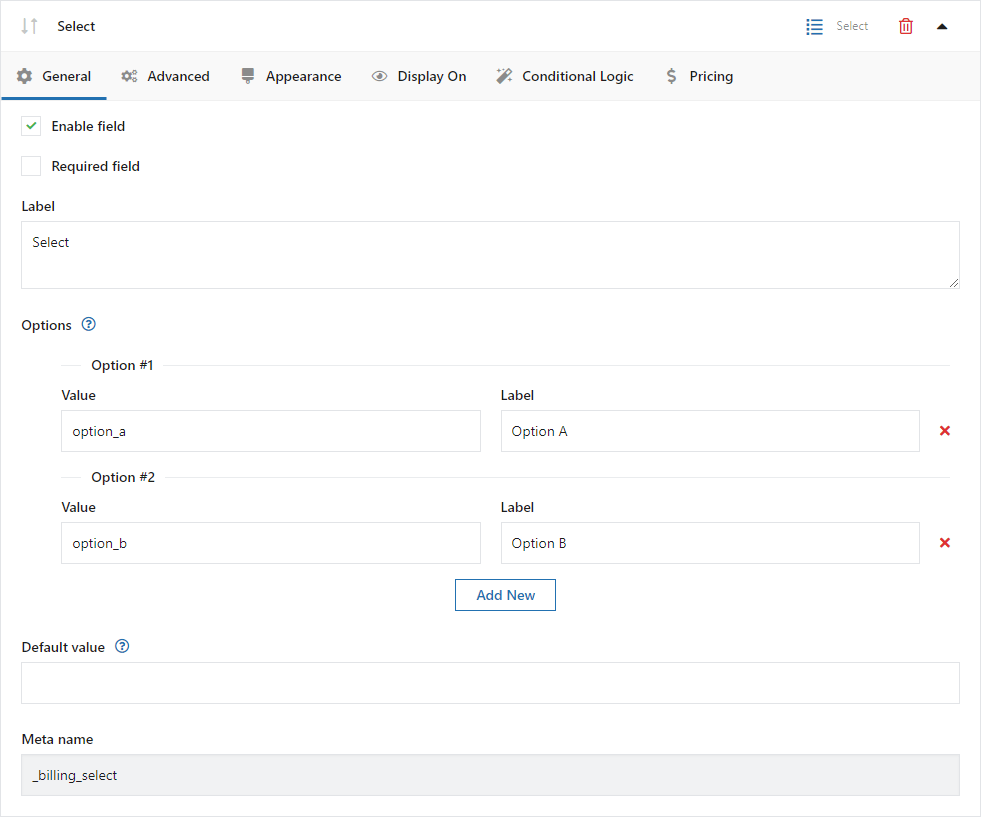
Enable field - check to show a field or uncheck to hide a field.
Required field - check to make a field required, and uncheck to make a field optional.
Label - enter the field's label. You can use HTML here.
Option Value - Enter a value and a label for each field option. The value will not be visible on the form.
Option Label - Enter a value and a label for each field option. The label will be visible on the form.
Options added here are not sorted. It is also not possible to swap them using the drag & drop method to arrange them in alphabetical order. This requires editing the functions.php file and pasting the following code there. Please replace billing_select with meta_name of the appropriate field.
add_filter( 'flexible_checkout_fields_field_args', function ( $args, $key ) {

if ( ! in_array( $key, [ 'billing_select' ] ) || ! isset( $args['options'] ) ) {

return $args;

}

usort( $args['options'], function( $a, $b ) {

return $a['value'] <=> $b['value'];

} );

return $args;

}, 10, 2 );
Default value PRO - enter the Value of the option which should be the default.
Meta name - it's the label's name in the database for developers' purposes.
Validation - The default validation is the only one available.
Multi-select
Field on the checkout page:

Configuration:
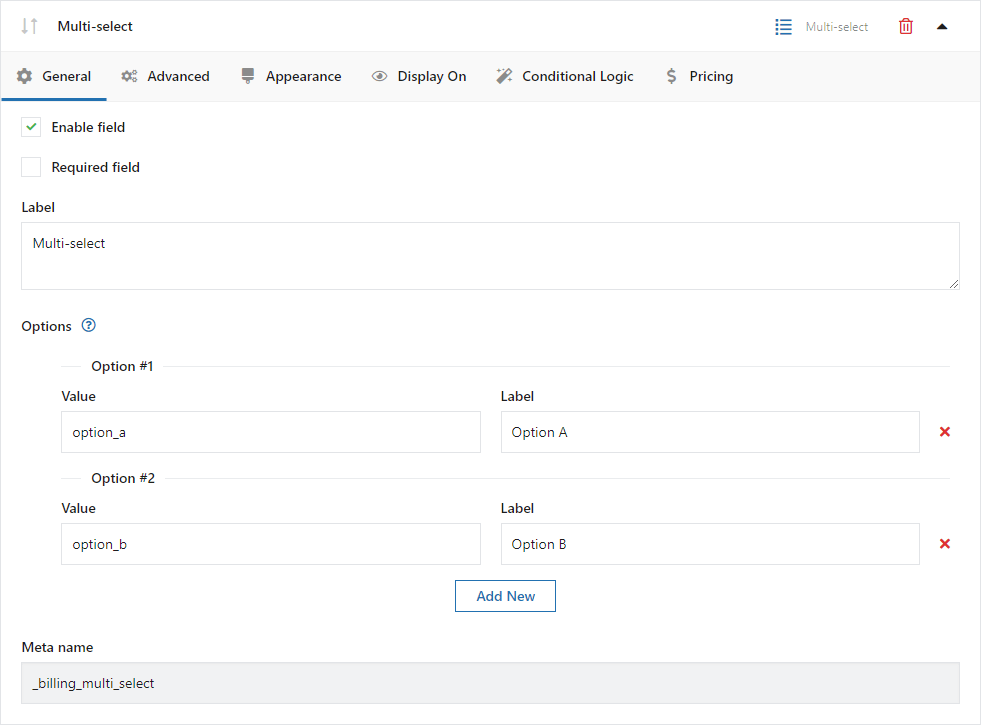
Enable field - check to show a field or uncheck to hide a field.
Required field - check to make a field required, and uncheck to make a field optional.
Label - enter the field's label. You can use HTML here.
Option Value - Enter a value and a label for each field option. The value will not be visible on the form.
Option Label - Enter a value and a label for each field option. The label will be visible on the form.
Options added here are not sorted. It is also not possible to swap them using the drag & drop method to arrange them in alphabetical order. This requires editing the functions.php file and pasting the following code there. Please replace billing_multi_select with meta_name of the appropriate field.
add_filter( 'flexible_checkout_fields_field_args', function ( $args, $key ) {

if ( ! in_array( $key, [ 'billing_multi_select' ] ) || ! isset( $args['options'] ) ) {

return $args;

}

usort( $args['options'], function( $a, $b ) {

return $a['value'] <=> $b['value'];

} );

return $args;

}, 10, 2 );
Default value PRO - enter the Value of the option which should be the default.
Meta name - it's the label's name in the database for developers' purposes.
Validation - The default validation is the only one available.
Radio
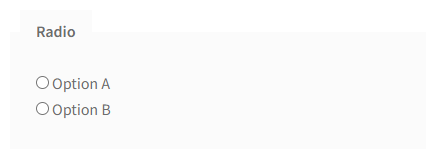
Field on the checkout page:
Configuration:
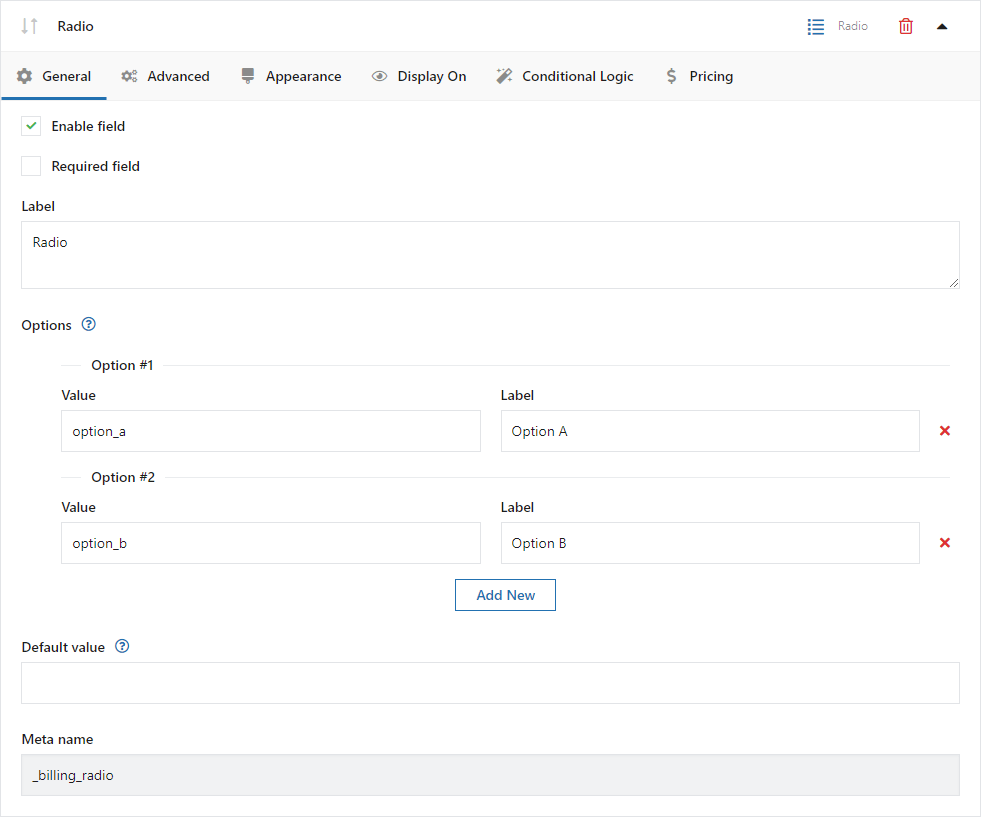
Enable field - check to show a field or uncheck to hide a field.
Required field - check to make a field required, and uncheck to make a field optional.
Label - enter the field's label. You can use HTML here.
Option Value - Enter a value and a label for each field option. The value will not be visible on the form.
Option Label - Enter a value and a label for each field option. The label will be visible on the form.
Options added here are not sorted. It is also not possible to swap them using the drag & drop method to arrange them in alphabetical order. This requires editing the functions.php file and pasting the following code there. Please replace billing_radio with meta_name of the appropriate field.
add_filter( 'flexible_checkout_fields_field_args', function ( $args, $key ) {

if ( ! in_array( $key, [ 'billing_radio' ] ) || ! isset( $args['options'] ) ) {

return $args;

}

usort( $args['options'], function( $a, $b ) {

return $a['value'] <=> $b['value'];

} );

return $args;

}, 10, 2 );
Default value PRO - enter the Value of the option which should be the default.
Meta name - it's the label's name in the database for developers' purposes.
Validation - The default validation is the only one available.
Radio with images
Field on the checkout page:
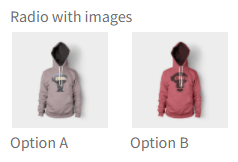
Configuration:
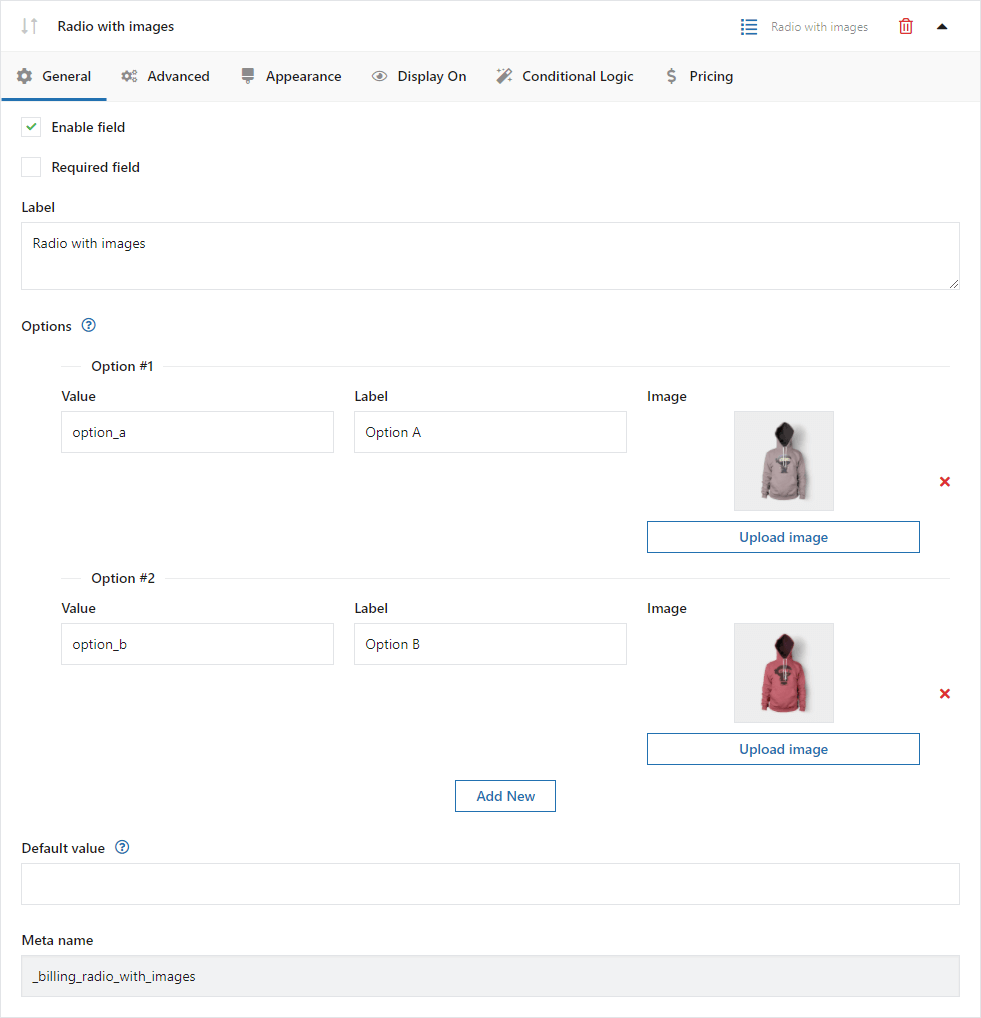
Enable field - check to show a field or uncheck to hide a field.
Required field - check to make a field required, and uncheck to make a field optional.
Label - enter the field's label. You can use HTML here.
Option Value - Enter a value and a label for each field option. The value will not be visible on the form.
Option Label - Enter a value and a label for each field option. The label will be visible on the form.
Upload Image - This button adds an image.
Options added here are not sorted. It is also not possible to swap them using the drag & drop method to arrange them in alphabetical order. This requires editing the functions.php file and pasting the following code there. Please replace billing_radio_with_images with meta_name of the appropriate field.
add_filter( 'flexible_checkout_fields_field_args', function ( $args, $key ) {

if ( ! in_array( $key, [ 'billing_radio_with_images' ] ) || ! isset( $args['options'] ) ) {

return $args;

}

usort( $args['options'], function( $a, $b ) {

return $a['value'] <=> $b['value'];

} );

return $args;

}, 10, 2 );
Default value PRO - enter the Value of the option which should be the default.
Meta name - it's the label's name in the database for developers' purposes.
Single item width in px - Set the size of a single element representing a color.
Hide labels for Options - Check this box to hide option labels with colors.
Validation - The default validation is the only one available.
Radio with colors
Field on the checkout page:
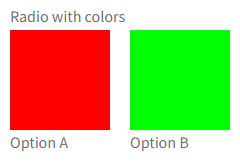
Configuration:
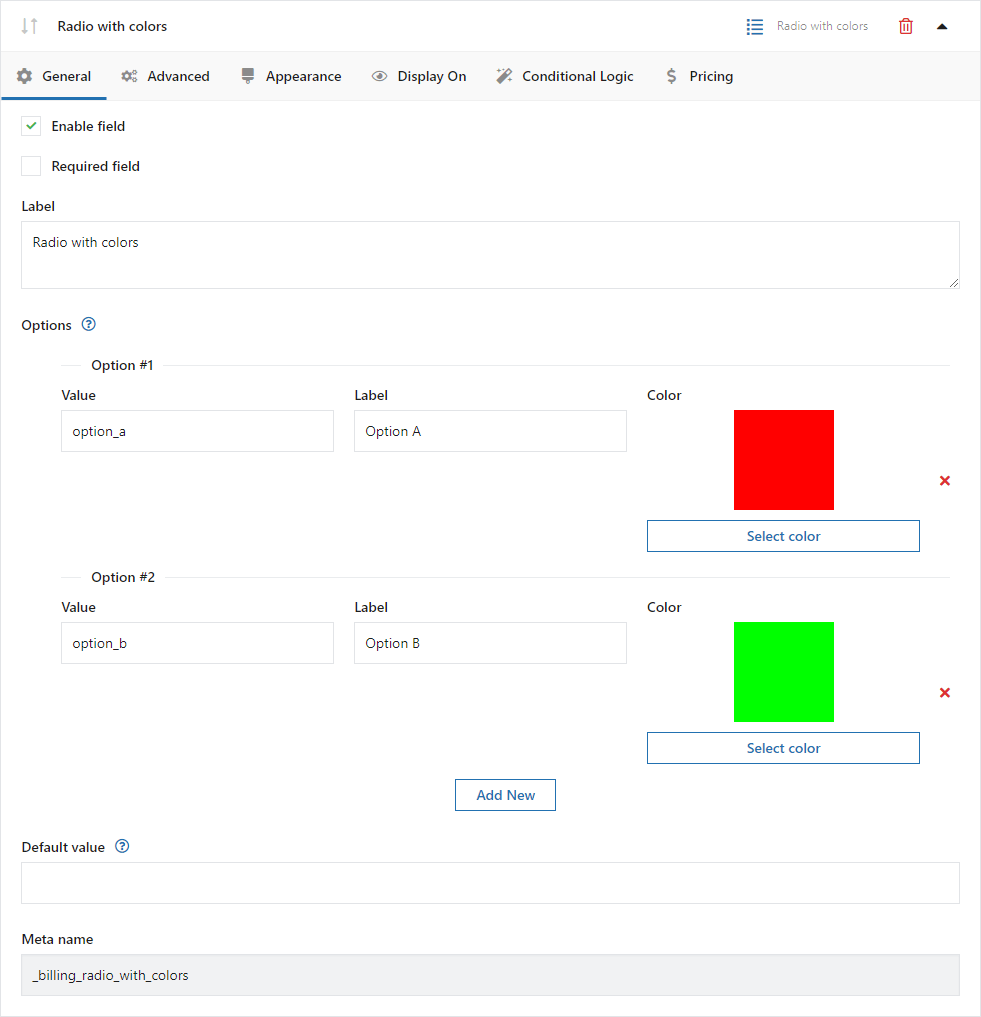
Enable field - check to show a field or uncheck to hide a field.
Required field - check to make a field required, and uncheck to make a field optional.
Label - enter the field's label. You can use HTML here.
Option Value - Enter a value and a label for each field option. The value will not be visible on the form.
Option Label - Enter a value and a label for each field option. The label will be visible on the form.
Options added here are not sorted. It is also not possible to swap them using the drag & drop method to arrange them in alphabetical order. This requires editing the functions.php file and pasting the following code there. Please replace billing_radio_with_colors with meta_name of the appropriate field.
add_filter( 'flexible_checkout_fields_field_args', function ( $args, $key ) {

if ( ! in_array( $key, [ 'billing_radio_with_colors' ] ) || ! isset( $args['options'] ) ) {

return $args;

}

usort( $args['options'], function( $a, $b ) {

return $a['value'] <=> $b['value'];

} );

return $args;

}, 10, 2 );
Default value PRO - enter the Value of the option which should be the default.
Meta name - it's the label's name in the database for developers' purposes.
Single item width in px - Set the size of a single element representing a color.
Hide labels for Options - Check this box to hide option labels with colors.
Validation - The default validation is the only one available.
Picker Fields
Color
Field on the checkout page:
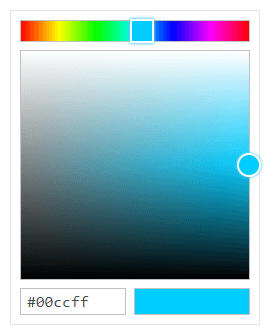
Configuration:
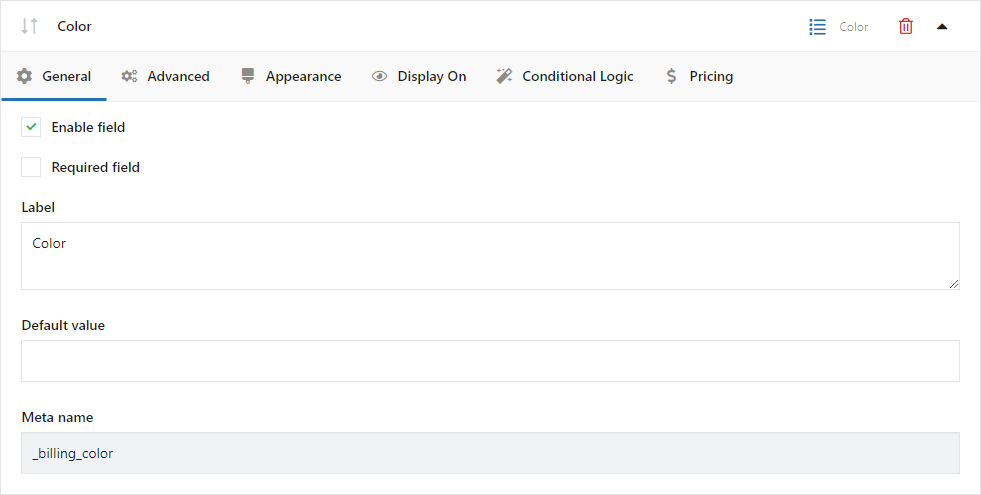
Enable field - check to show a field or uncheck to hide a field.
Required field - check to make a field required, and uncheck to make a field optional.
Label - enter the field's label. You can use HTML here.
Default value PRO - enter the Value of the option which should be the default.
Meta name - it's the label's name in the database for developers' purposes.
Validation - The default validation is the only one available.
Date
Field on the checkout page:
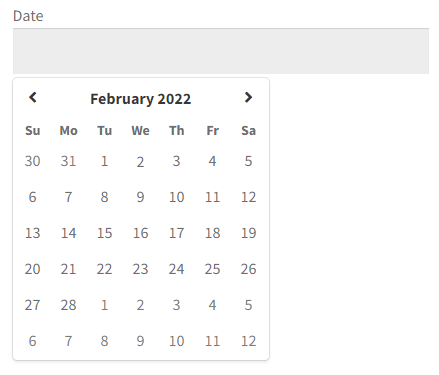
Configuration:
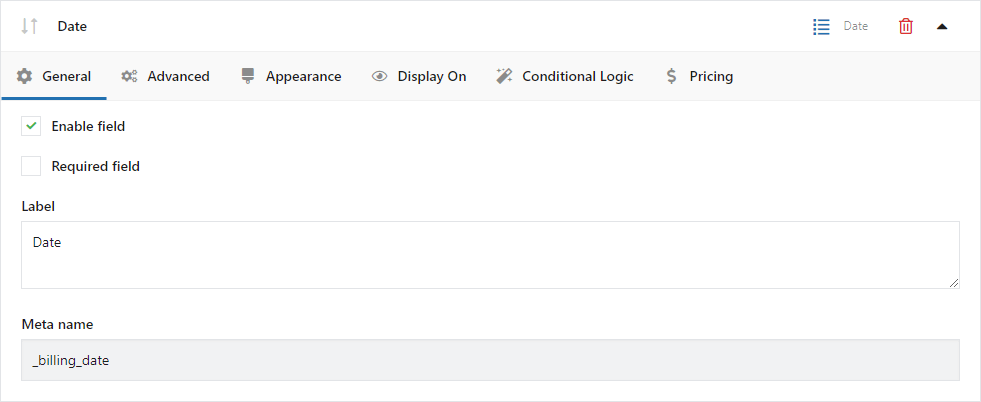
Enable field - check to show a field or uncheck to hide a field.
Required field - Check to make a field required, and uncheck to make a field optional.
Label - Enter the field's label. You can use HTML here.
Meta name - It's the label's name in the database for developers' purposes.
Date format - Enter the WordPress date format.
Days before - Enter the range of days available in the calendar before the current date. Leave blank if the choice is not to be limited. The setting will not skip weekends and holidays.
Set 0 to make present date and future dates available.
Set -1 to make future dates available.
Days after - Enter the range of days available in the calendar after the current date. Leave blank if the choice is not to be limited. The setting will not skip weekends and holidays.
Excluded dates - Enter specific dates separating them with commas. Use the selected date format e.g. dd.mm.yyyy or yyyy-mm-dd.
Excluded days of week - Select days of the week that will not be available in the calendar e.g. weekends.
First day of week - Select the day of the week shown as the first in the calendar e.g. Monday.
Selected days limit - Set the maximum number of days available for selection in the calendar.
Time of day closing - Enter the value in the HH:MM format. Selecting the current date will not be possible after this time is exceeded.
Validation - The default validation is the only one available.
Time
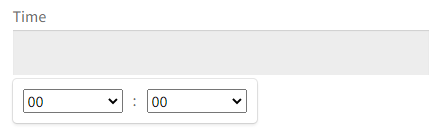
Field on the checkout page:
Configuration:
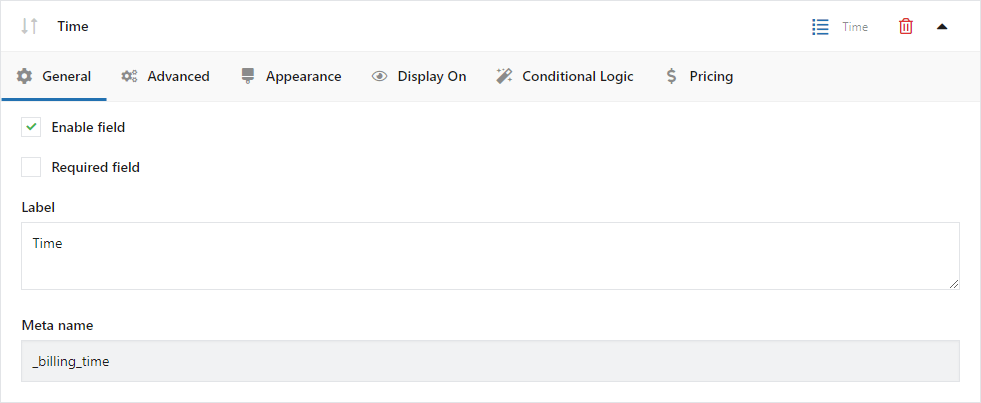
Enable field - check to show a field or uncheck to hide a field.
Required field - check to make a field required, and uncheck to make a field optional.
Label - enter the field's label. You can use HTML here.
Meta name - it's the label's name in the database for developers' purposes.
Use 12-hour clock - Check this checkbox to switch the clock to 12-hour (AM/PM) mode.
Step minute - Enter a value between 1 and 60 to set an interval between minutes to choose from the list.
File Upload
Field on the checkout page:

Configuration:

Enable field - check to show a field or uncheck to hide a field.
Required field - check to make a field required, and uncheck to make a field optional.
Label - enter the field's label. You can use HTML here.
Meta name - it's the label's name in the database for developers' purposes.
Allowed file types - provide file types that will be available to upload
Maximum file size in MB - provide the maximum file size that your customer can upload
wp-content/uploads/woocommerce_uploads/flexible-checkout-fields
Each file has a separate folder with a random name generated there. The name of such a folder is visible in the order in the WP panel. So the files are available either from the server or from the order (after pasting the URL of the file in the browser).
Other fields
Headline
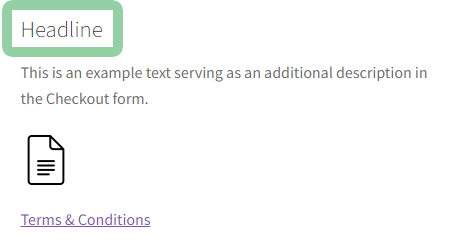
Field on the checkout page:
Configuration:
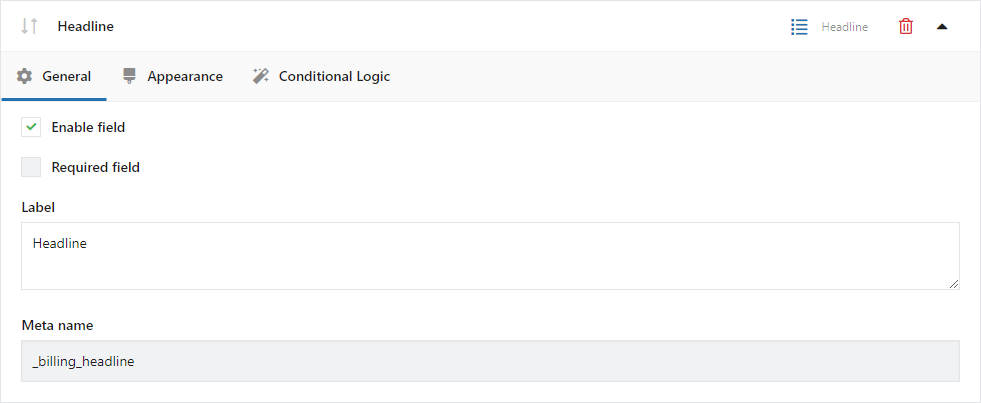
Enable field - check to show a field or uncheck to hide a field.
Label - enter the field's label. You can use HTML here.
Meta name - it's the label's name in the database for developers' purposes.
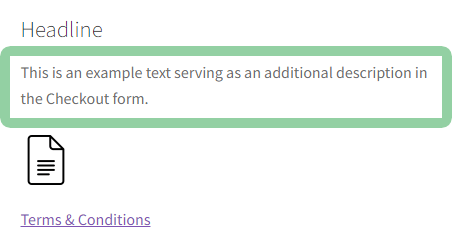
Paragraph
Field on the checkout page:
Configuration:
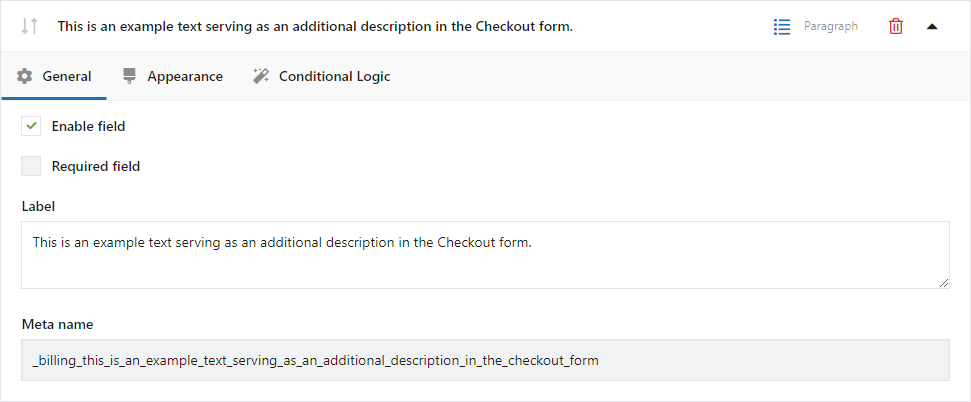
Enable field - check to show a field or uncheck to hide a field.
Label - enter the field's label. You can use HTML here.
Meta name - it's the label's name in the database for developers' purposes.
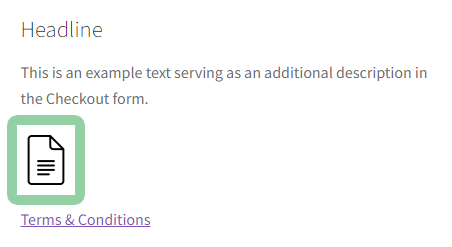
Image
Field on the checkout page:
Configuration:
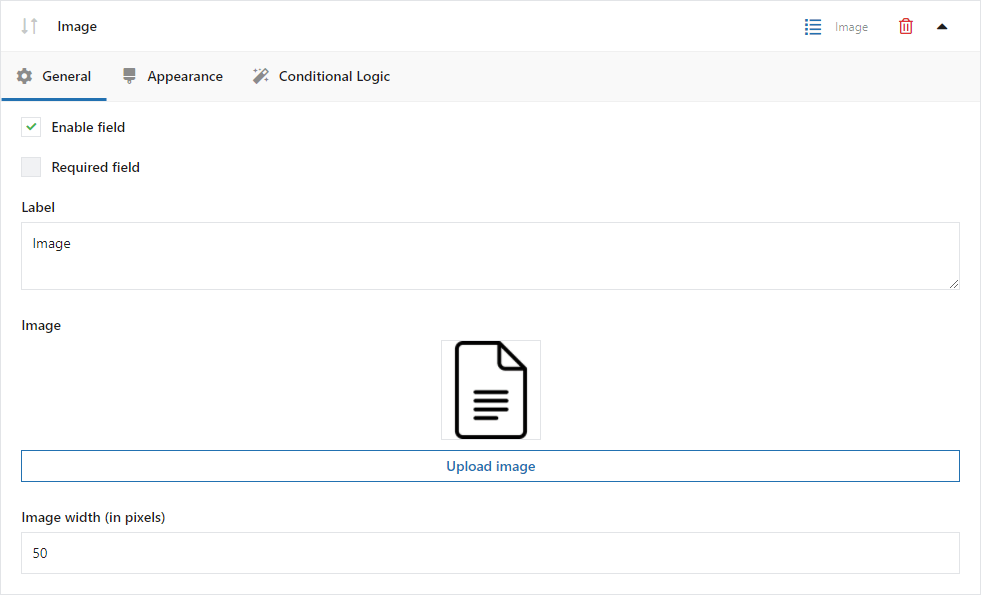
Enable field - check to show a field or uncheck to hide a field.
Label - enter the field's label. You can use HTML here.
Upload image - Click this button to select an image.
Image width (in pixels) - Set the width of the inserted image.
HTML
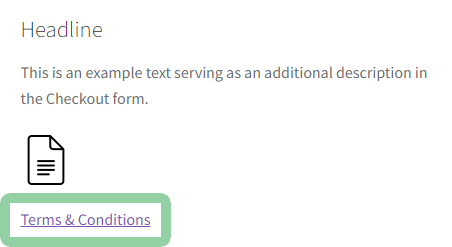
Field on the checkout page:
Configuration:
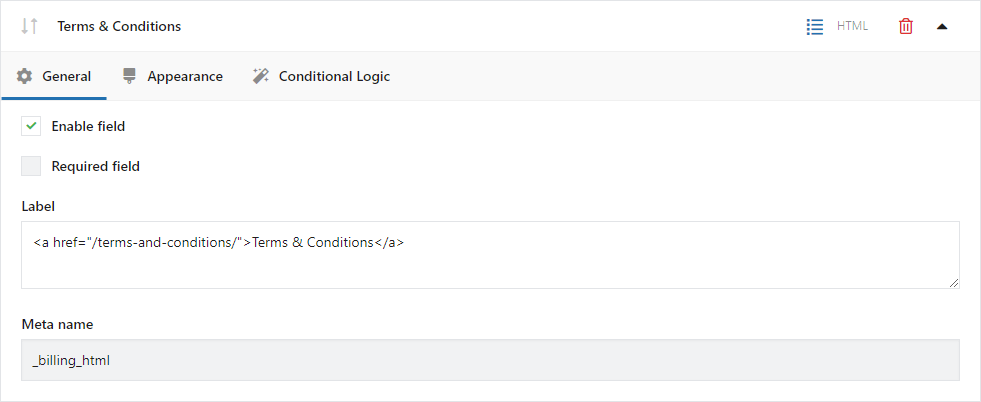
Enable field - check to show a field or uncheck to hide a field.
Label - enter the field's label. You can use HTML here.
Meta name - it's the label's name in the database for developers' purposes.
Hidden
This field is hidden on the form and the user does not complete it. The value of the field is set in the functions.php file (of the page template) using the filter.
The following example shows setting the default_value value for the _billing_my_field field.
add_filter( 'default_checkout_billing_my_field', function( $value = null ) {

return 'default_value';

} );
If the value is not to be overwritten at the next order then the filter will need to be changed.
add_filter( 'default_checkout_billing_my_field', function( $value = null ) {

if ( $value !== null ) {

return $value;

}

return 'default_value';

} );
Settings
Go to menu WooCommerce → Checkout Fields → Settings.
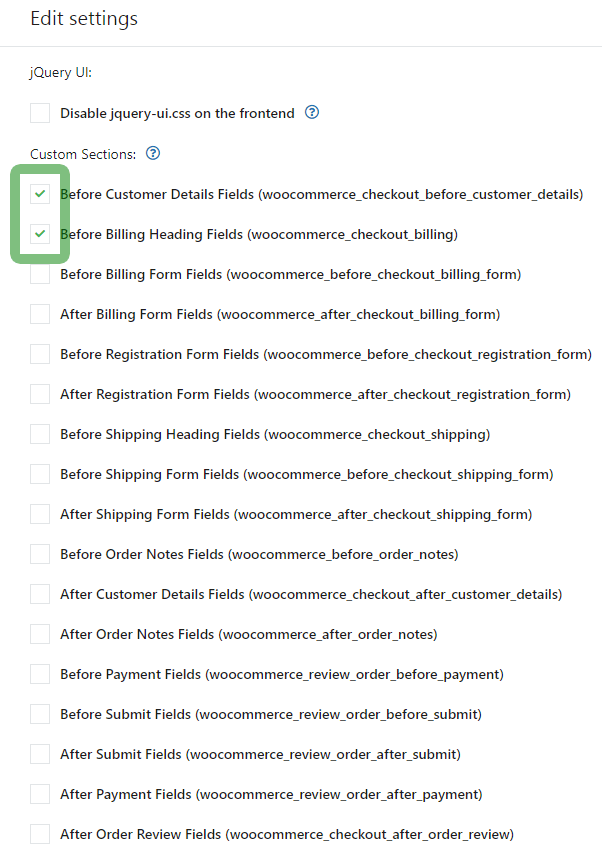
CSS jQuery UI - in the plugin's settings, you can disable the loading of the CSS jQuery UI file. The CSS file is used to style some additional fields in the order (i.e. Date field), but it may cause conflicts with other plugins that also make use of jQuery UI (i.e. to create tabs). If you notice any problems when displaying your shop, try to disable this CSS file.
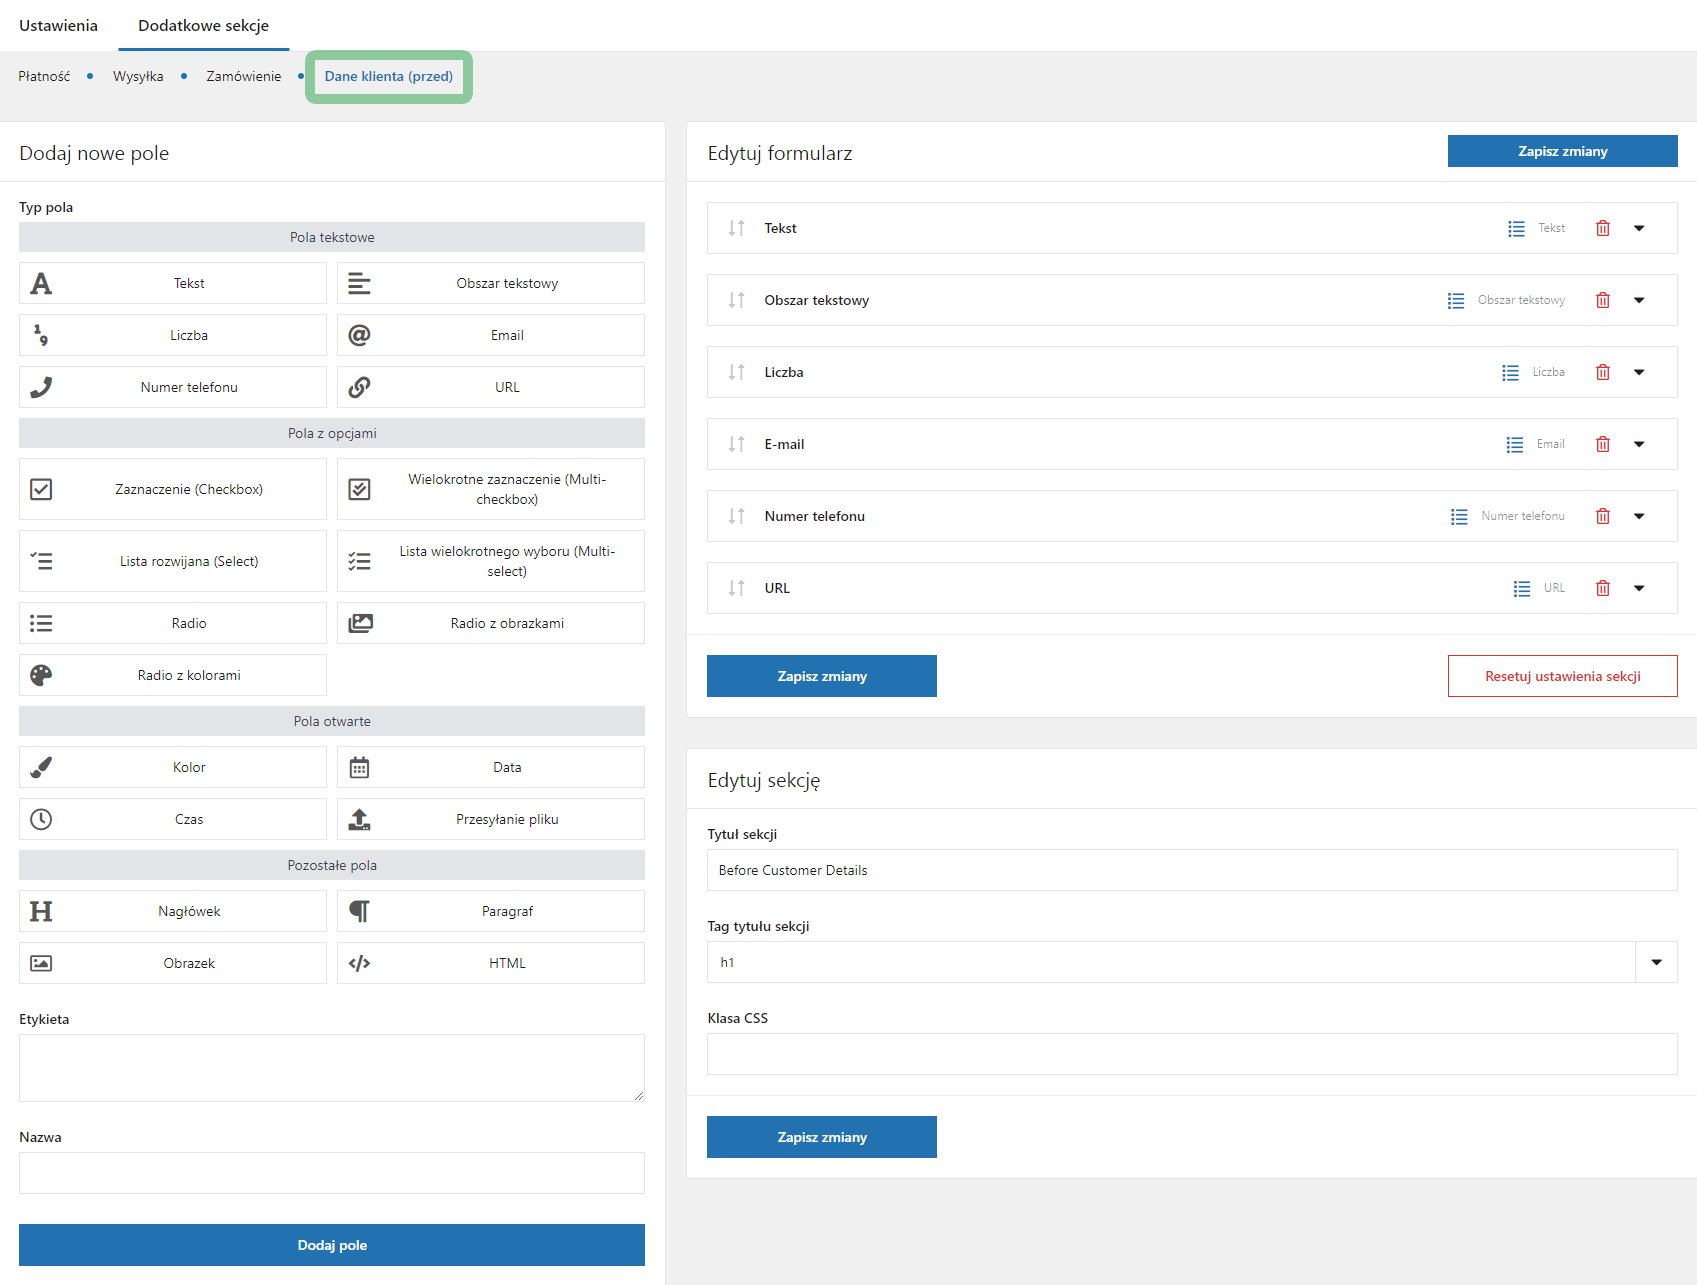
Custom Sections - you can add custom sections to checkout. Check custom sections and click Save changes. New sections will show up in tabs in the plugin menu.

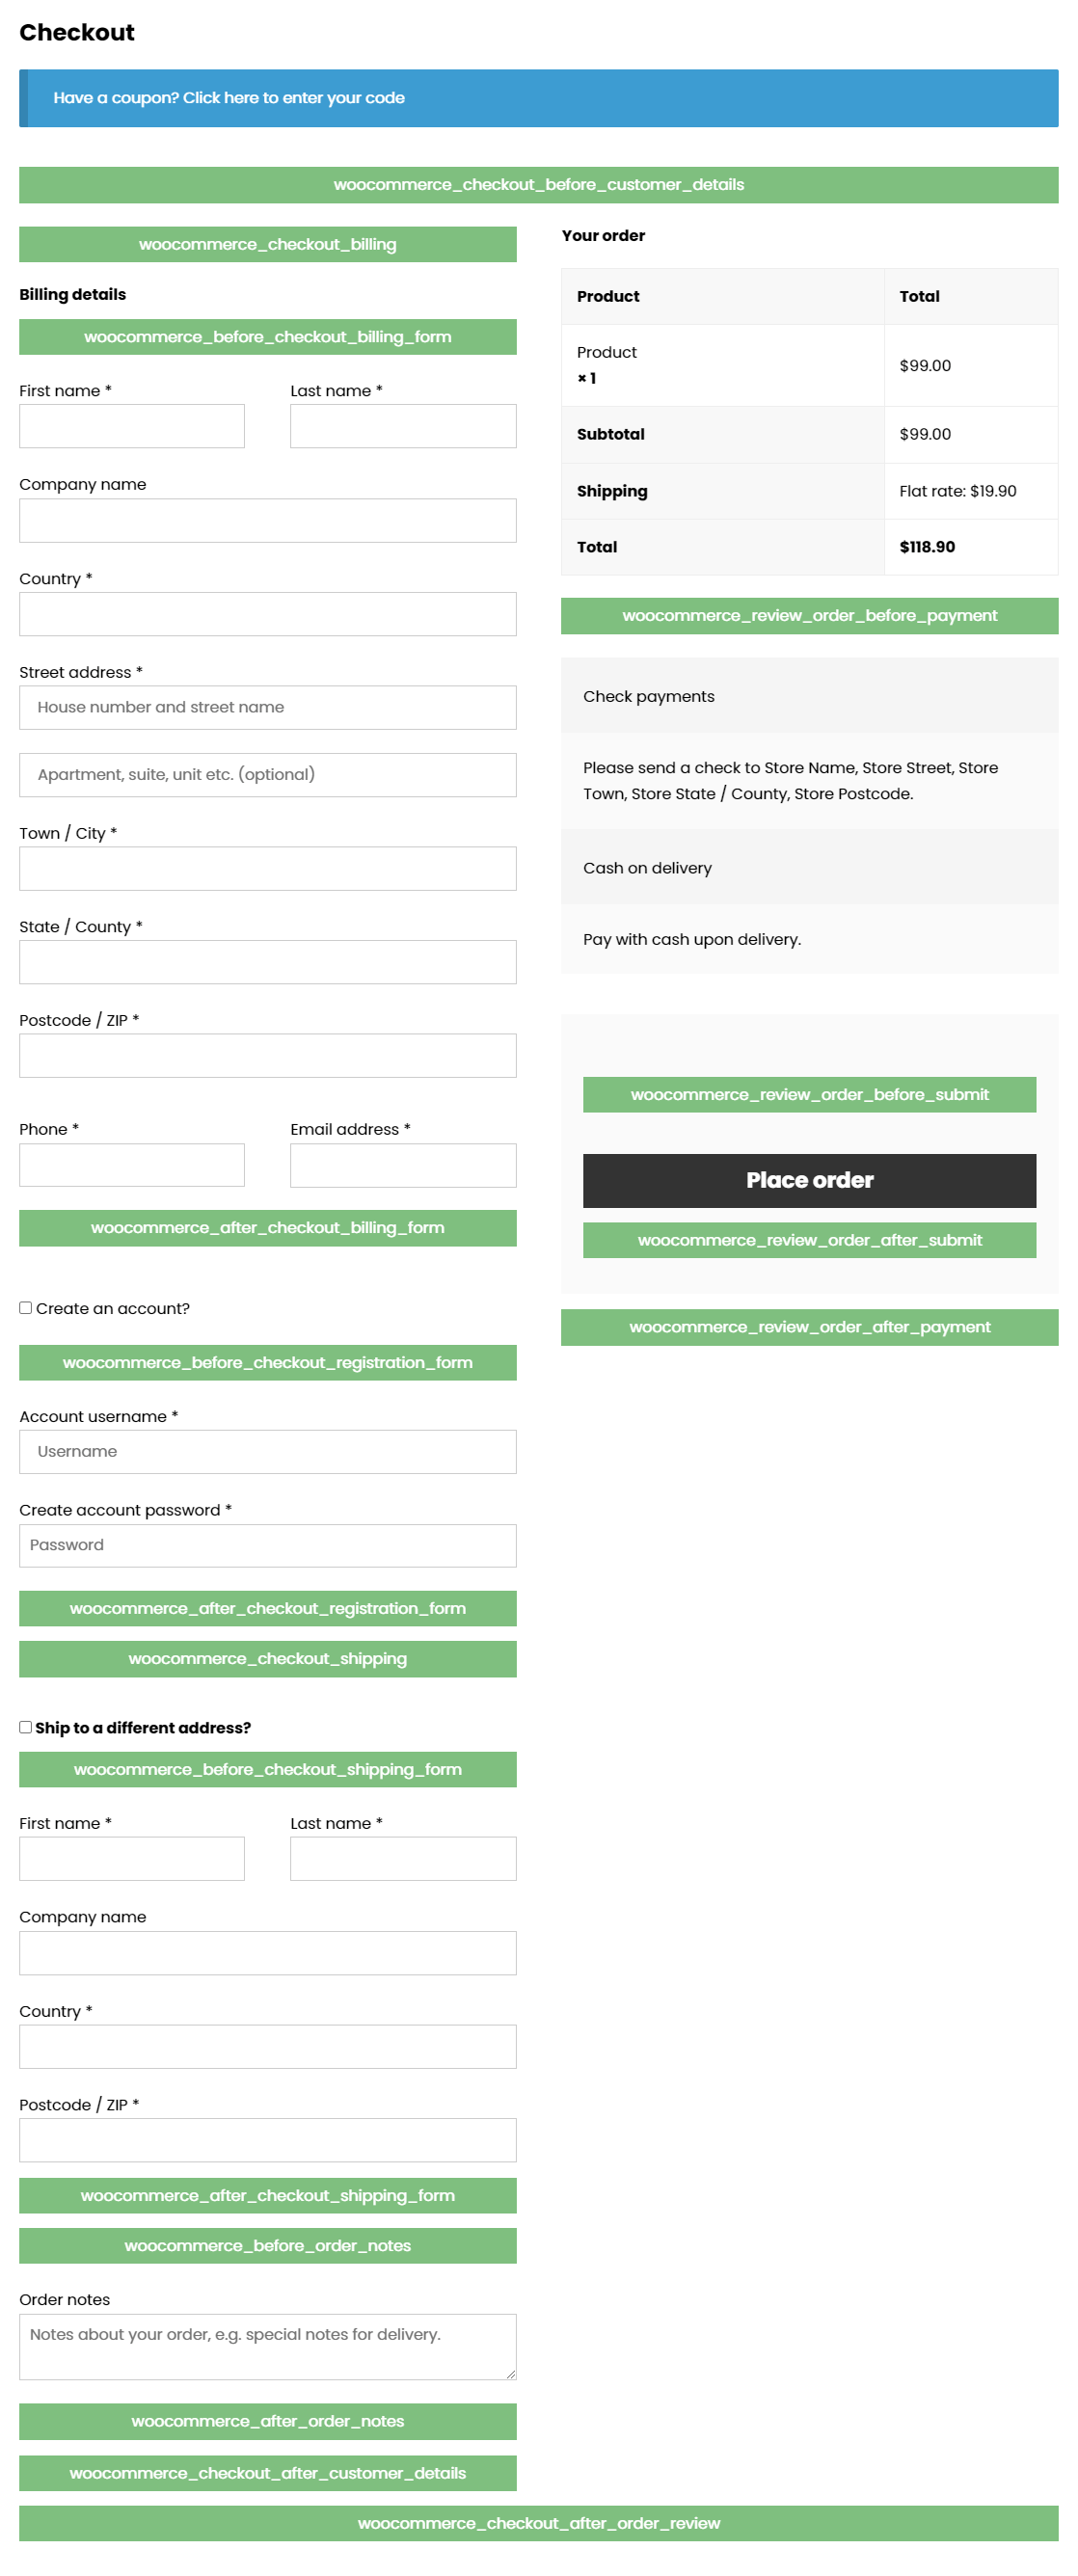
Custom Sections
After adding a custom section go to its tab, add new fields, and edit sections. You can set the Section title, Section title tag, and CSS class.
All fields in the "Billing" and "Shipping" sections are cached, which means that when placing the next order, they will be completed or marked in accordance with the previous order.
Cached sections:
- Before Customer Details PRO
- Before Billing Heading PRO
- Before Billing Form PRO
- Billing
- After Billing Form PRO
- Before Shipping Heading PRO
- Before Shipping Form PRO
- Shipping
- After Shipping Form PRO
- After Customer Details PRO
Non-cached sections:
- Before Order Notes PRO
- Order
- After Order Notes PRO
- Before Payment PRO
- Before Submit PRO
- After Submit PRO
- After Payment PRO
- After Order Review PRO
Usage Examples
Additional Agreements at the Checkout
You can add additional checkboxes that will appear directly over the button used to place an order. Here you can also add options, such as consent to send a newsletter or other sign-ups to which the user should agree. Every added checkbox can be made obligatory or optional.
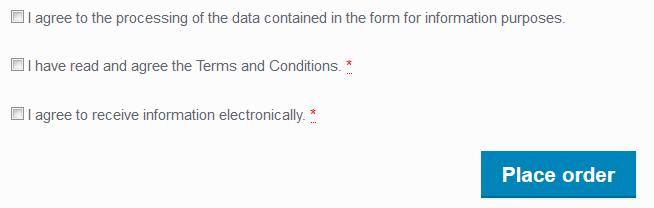
In plugin settings enable the Before Submit section. Next:
- Add field type Checkbox and expand the field to editing.
- Check the Required field if you want to require this option.
- Enter the label of the checkbox.
- Enter the value of the checkbox (e.g. Yes, Selected, etc.). The value will be displayed only in the order preview if the checkbox was selected by the user. It's meant for the administrator only.
- Optionally, enter the CSS class.
- Click Save Changes.

Information on selecting the checkbox in the order
If the checkbox has been selected by the user, the information appears in the details of the order:
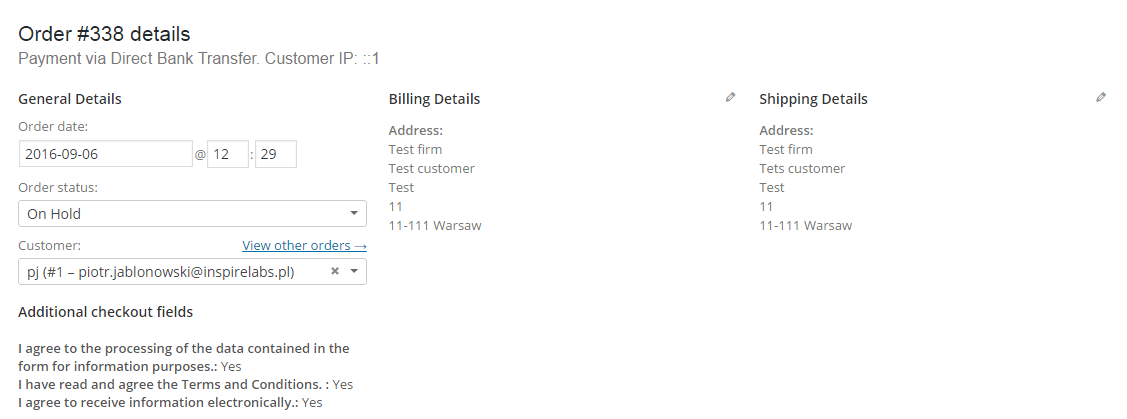
Displaying values of fields using custom PHP code. For advanced users
If you would like to display the value of a specific field entered by your customer in the checkout, use below PHP code:
echo $order->get_meta( 'meta_name');
To learn a meta name (the name that the field is written under in the database), check the field's configuration:
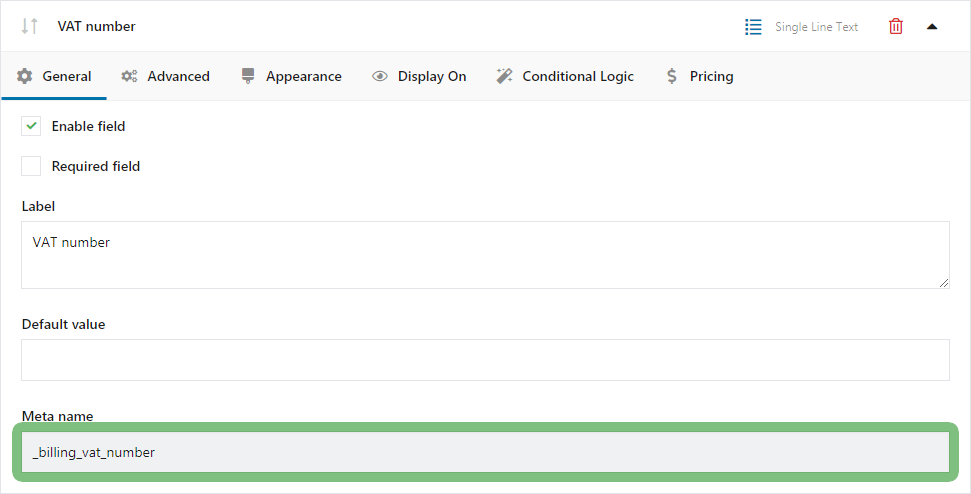
So, in this example: to display the VAT Number field value with meta name _billing_vat_number, use below PHP code:
echo $order->get_meta( '_billing_vat_number');
You can not use this method to retrieve data from the Headline and HTML fields because they do not have a value in the database.
Deleting the changes
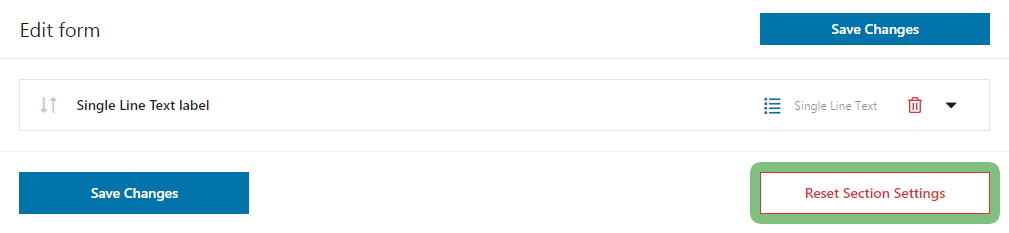
To reset section settings click the "Reset Section Settings" button. For standard sections (Billing, Shipping, Order) custom fields will be deleted and standard fields will be reset to their default state, and for additional sections, all fields will be deleted.
Extra help
💡 How to validate WooCommerce Checkout Fields?
💡 Everything about conditional logic in Flexible Checkout Fields
Free vs. PRO Feature Comparison
To make it even easier for you to see the difference between the free and pro versions of the Flexible Checkout Fields for WooCommerce plugin, we've prepared for you a summary table of all the features. Take a look and decide which version you choose.
| Feature | FREE → | PRO → |
| Custom checkout fields: Text, Textarea, Number, E-mail, Phone, URL, Checkbox, Color, Headline, Paragraph, Image, HTML | ✅ | ✅ |
| Custom checkout fields: Multi-checkbox, Select, Multi-select, Radio, Radio with images, Radio with colors, Date,Time, File Upload, Hidden | ❌ | ✅ |
| Billing, Shipping or Order sections | ✅ | ✅ |
| Extra Field Sections | ❌ | ✅ |
| Enable/Disable checkout fields | ✅ | ✅ |
| Set field as required | ✅ | ✅ |
| Change field label | ✅ | ✅ |
| CSS Class support | ✅ | ✅ |
| Placeholders for fields | ✅ | ✅ |
| Display on Thank you page, My account, E-mails | ✅ | ✅ |
| Conditional logic based on shipping methods | ❌ | ✅ |
| Conditional logic based on payment methods | ❌ | ✅ |
| Conditional logic based on products and categories in cart | ❌ | ✅ |
| Conditional logic based on the cart value | ❌ | ✅ |
| Conditional logic based on the Flexible Checkout Fields plugin fields | ❌ | ✅ |
| Conditional logic based on the default WooCommerce plugin fields | ❌ | ✅ |
| Conditional logic based on the user role | ❌ | ✅ |
| Conditional logic based on date | ❌ | ✅ |
| Pricing per field | ❌ | ✅ |
