Contents
Main settings
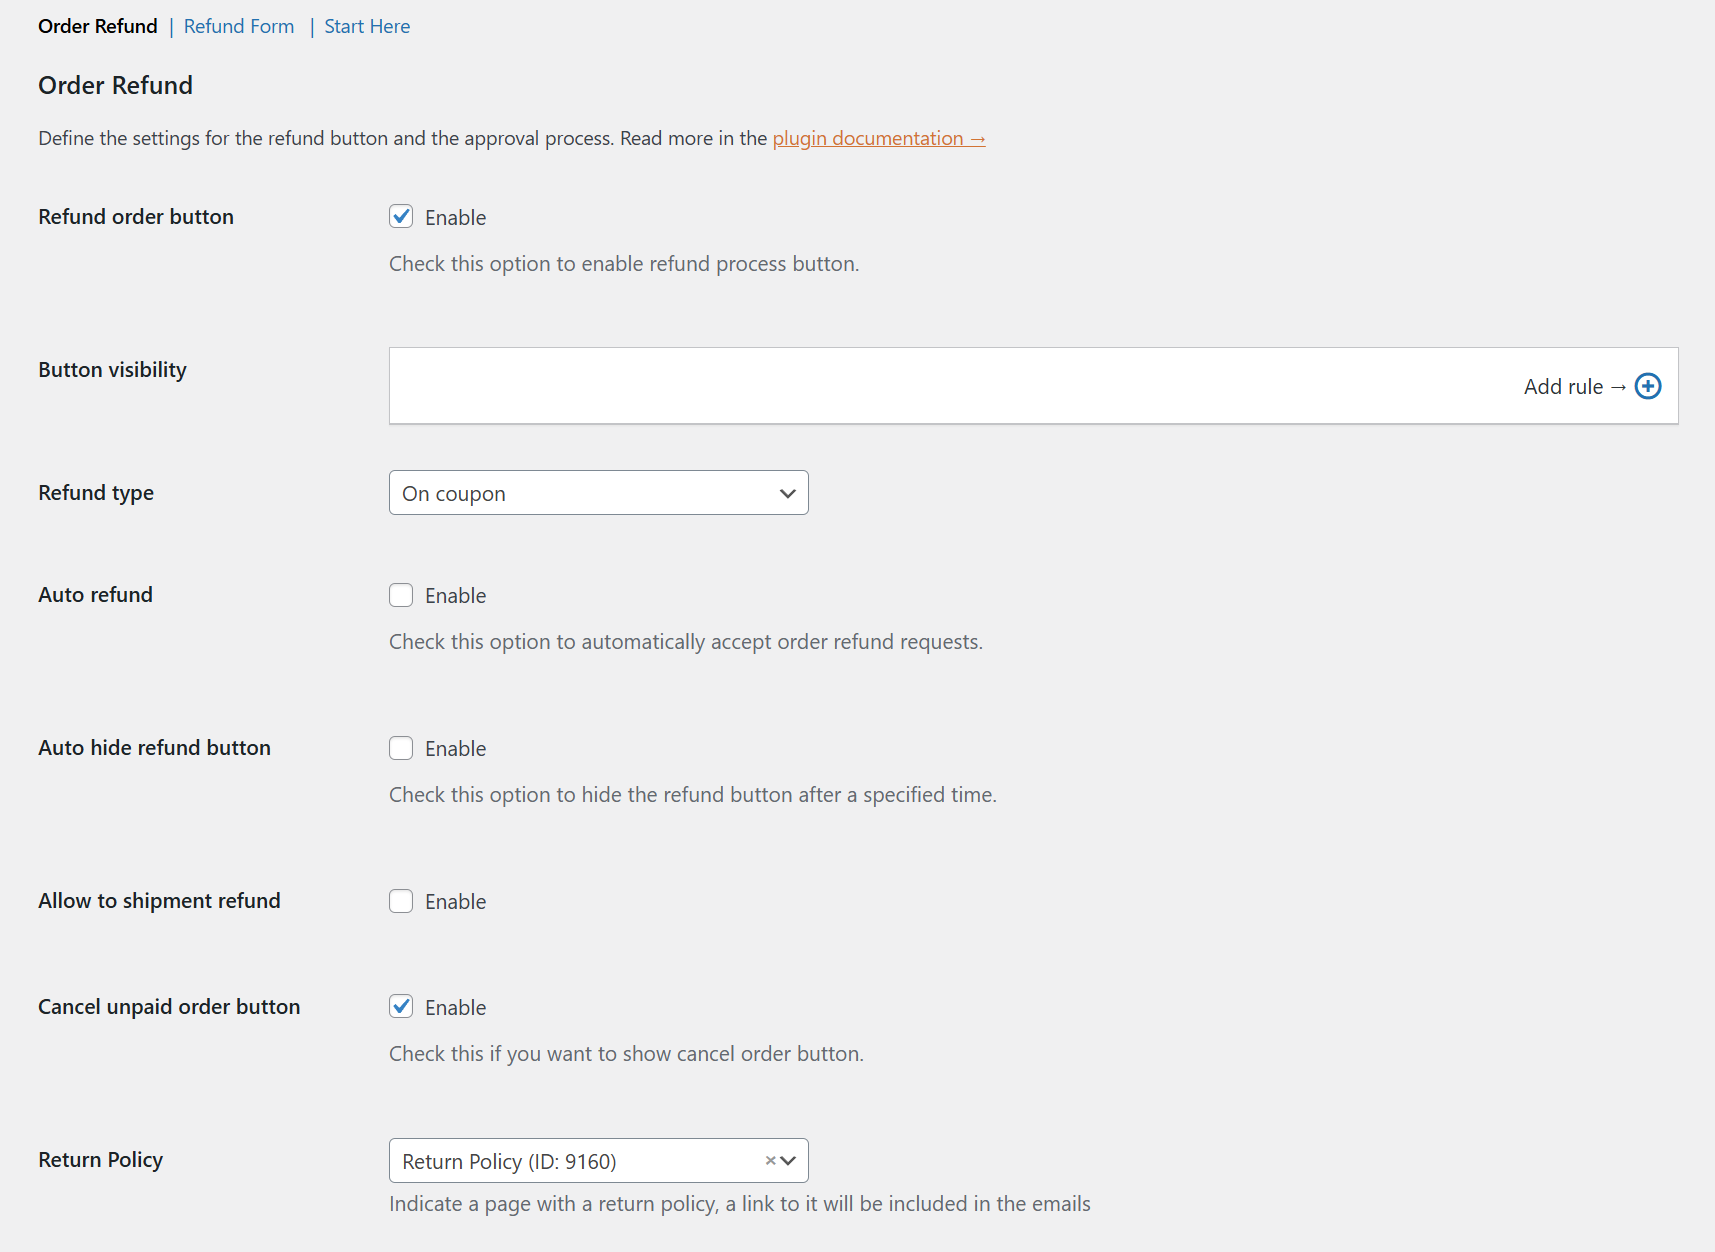
You can find the plugin's main settings in WooCommerce → Settings → Flexible Refund. They contain fields necessary to manage the Refund button visibility. The Refund button will be visible on the My Account page with the Refund order button option enabled in the order list.
Refund order button - enable, if you want the return order button to appear on the My Account page in the Orders tab.
PRO Button visibility - enable conditional logic. You can choose conditions that must be met to display the Refund button. You can set the conditions based on:
- User Role,
- Order Status,
- Payment Method,
- Product,
- Product Category.
Using conditional logic will allow you to display the Return button in clearly defined circumstances. You can use more than one condition. You can choose between two operators: is and is not. Subsequent conditions are combined with the phrase and.
Below you will see an example of the settings that will display the Refund button when the order status is Processing and the payment method is Bank Transfer.

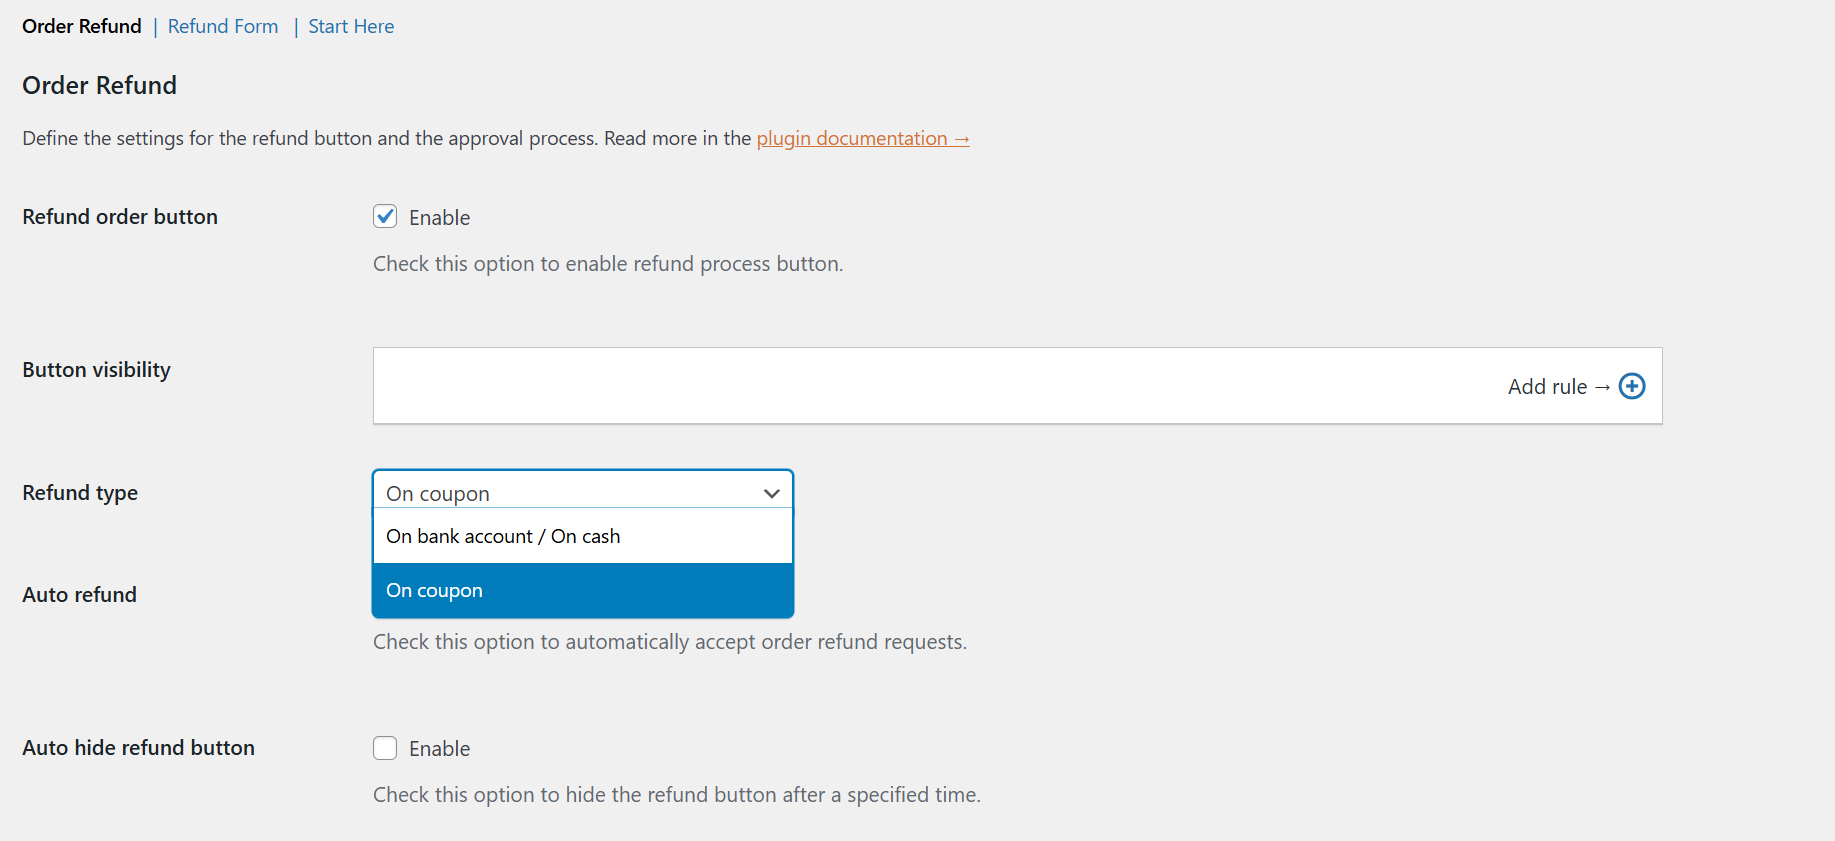
Refund type - Choose a return method for the customer:
On bank account / On cash - with this option, a refund will be made according to the payment method in the order.
PRO On Coupon - Select the option to generate a discount coupon after the Refund is approved. Its value will be equal to the amount of the Refund order. You can send a coupon code to the customer in the e-mail.
{coupon_code}, you can add a discount coupon code to an email template.PRO Auto refund - Check this option to automatically accept order refund requests.
PRO Auto hide refund button - Check this option to hide the refund button after a specified time. You can choose numbers of:
- Hours,
- Days,
- Weeks,
- Months,
- Years.
Allow to shipment refund - enable if you want to add shipping costs to the refund request.
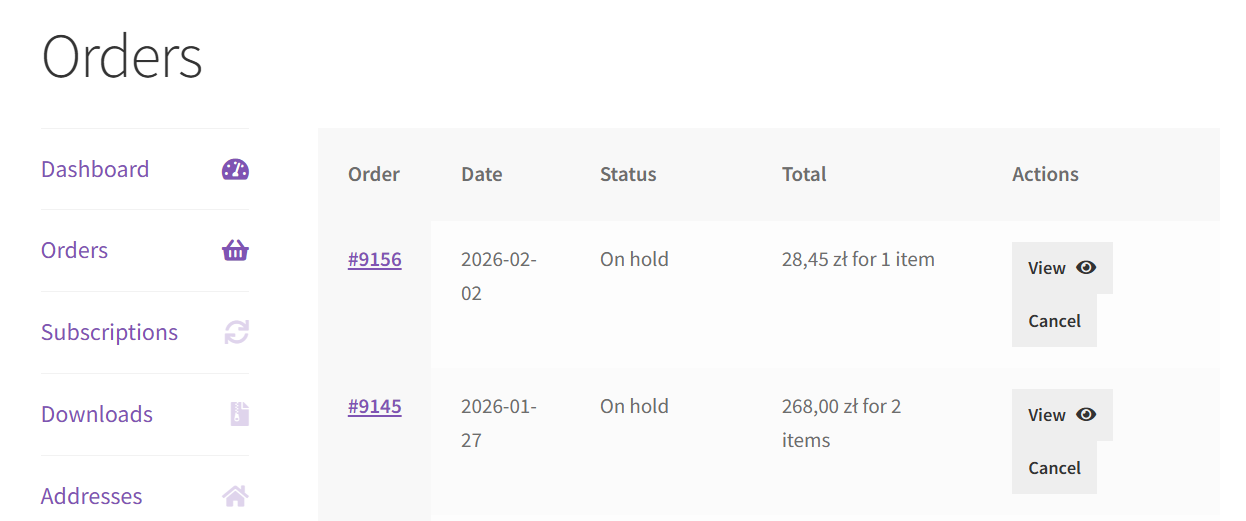
PRO Cancel unpaid order button - select this checkbox to add a button that allows customers to cancel an order. The button will be available in My Account → Orders only for orders with the status "Pending payment".
Return Policy - specify the page containing the returns policy. A link to this page will be included in email messages.
Refund Form
You can add the Refund Form to the Refund Request page. Customers will see it on the My Account → Orders page. For creating Refund Form go to Flexible Refund → Refund Form and choose specific fields.

Refund Form fields:
Text - text field
Text area - text area
Checkbox - selection box
Radio - radio buttons
Select - drop-down list
PRO Multi select - drop-down list with multiple selectable options
PRO Upload - field used to allow users to upload attachments. By default users can upload multiple files. Number of upload files can be limited by shop administrator.
PRO HTML - add HTML code
Refund Form settings
Main settings:
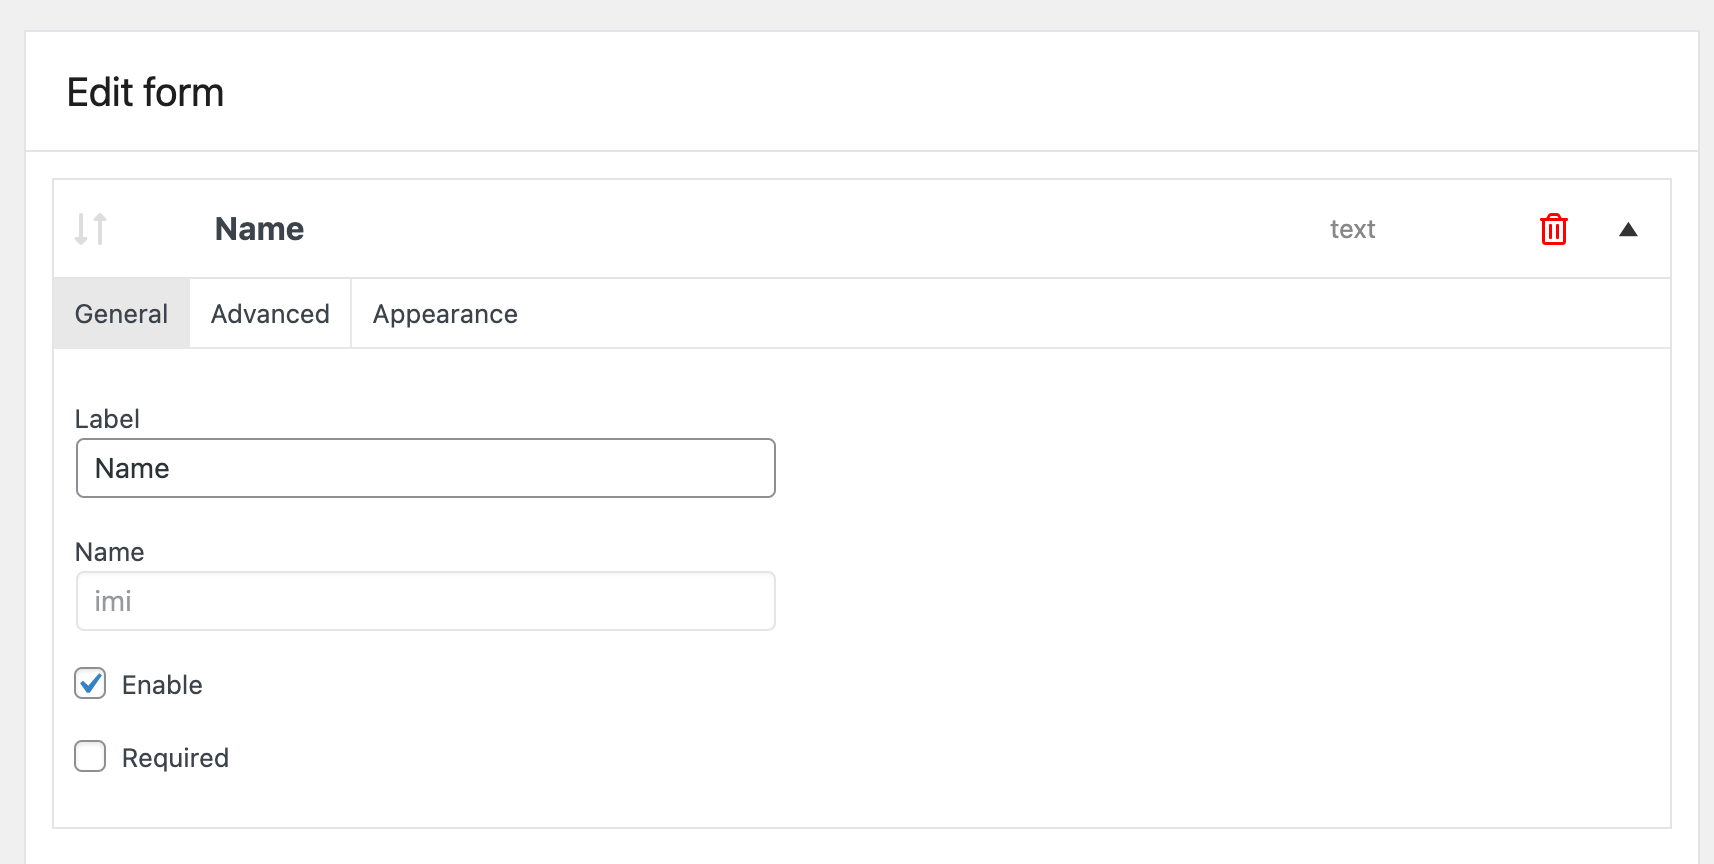
Label - enter the field's label.
Name - it's the label's name in the database for developers' purposes.
Enable - check this option if you want the field to be visible.
Required - forces some fields to be required.
Advanced settings:
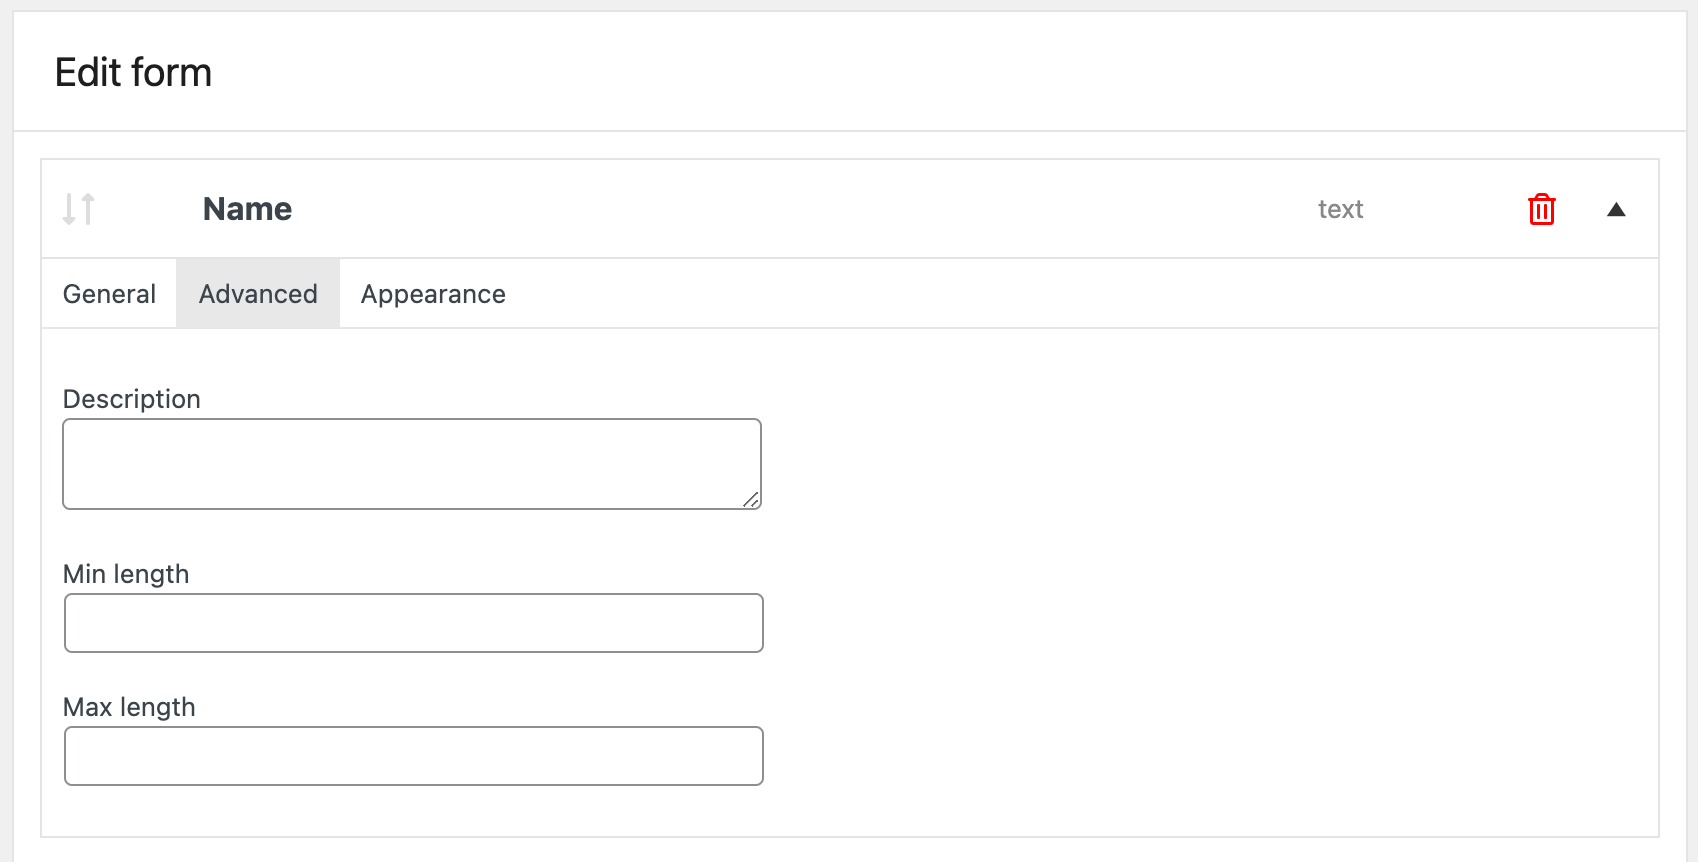
Description - a description that will be displayed under the field,
Min length - the minimum number of characters in the field,
Max length - the maximum number of characters in the field.
Appearance:

Placeholder - add the text of the field.
CSS class - add your own CSS class.
It is possible to swap fields using the drag & drop method.

Refund Request on My Account page
On the My Account → Orders page, the customer will see a button to Refund Request (depending on the conditional logic settings). After clicking on the Return button, the customer will be redirected to the Order return page.

To return all products purchased, click Check all.

PRO It is also possible to allow partial refund requests. Customers can then ask for a refund of chosen items of the entire order.
After sending the Refund Request, the customer can cancel the request by just clicking Cancel Request.

The Refund request will be removed from the Return Request list. After canceling the return, the customer can resend the Refund request.
Refund request without logging in [PRO]
The plugin also allows customers who have placed an order in the store but do not have a customer account (or have such an account but have not logged in to place the order) to submit a refund request. Such clients do not have access to the My Account tab, so it is necessary to create a separate subpage for them where they can submit a request.
- Prepare a new subpage such as Refund Form or edit an existing one.
- Paste the shortcode
[flexible_refund_public]in the selected place and save the changes. - On the selected subpage, a return form will appear containing the following fields:
Order number - here the customer provides the order ID (visible in the order confirmation email)
Email - here the customer provides the email address used when placing the order

- If the customer enters the correct data (an existing order number and a matching email address), the form will redirect to the refunds subpage (the same as for logged-in customers). If the data is not correct (an existing order number and a non-matching email address), the form will display an error message.
Manage refunds by the Store Administrator
If you enable the Automatic refund option in the main plugin settings, you do not need to perform any additional actions. The refund will be made automatically. Otherwise, all return requests can be found in the WooCommerce → Return Request list.
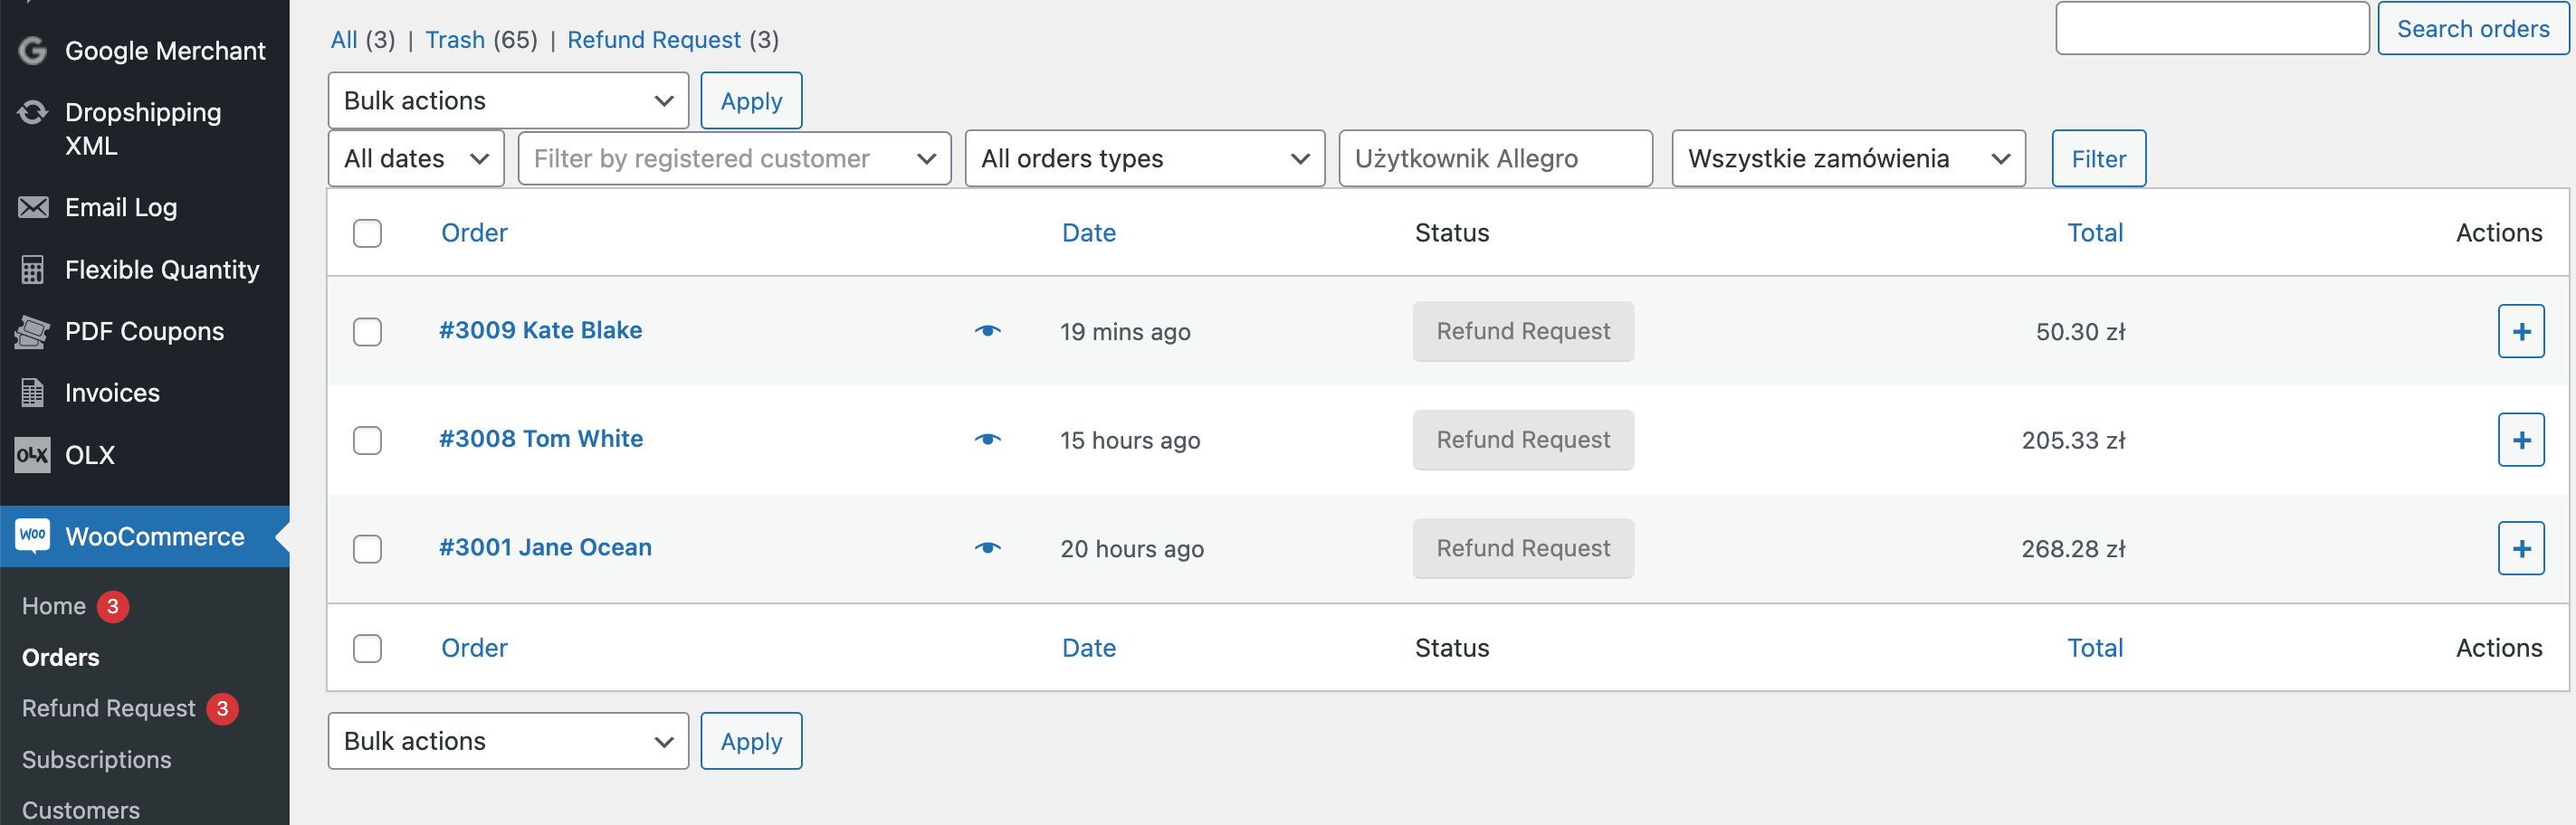
Go to the Refund Request list and click on one of the orders. You will see the Refund Table and possibly information sent by the customer via the Refund Form.

Refund order statuses:
Approved - the refund has been approved, and the order amount will be refunded to the customer.
Shipment - the administrator is waiting for product shipping.
Verifying - the return is verified by the administrator.
Refused - the return has not been accepted by the administrator.
Choose status and click Update. You can add a note for a customer. The content of the note will be added to the email message.
You will find all information about the Refund Request in the order's notes.

E-mails
You can find all the e-mail messages generated by the plugin in WooCommerce → Settings → Emails.
PRO Edit and add new addresses to which the return email is to be sent.
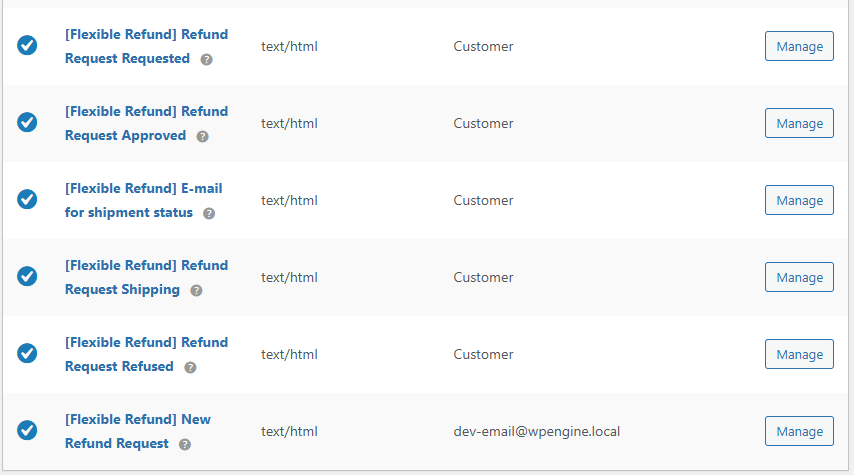
To edit or enable / disable e-mail, click Manage.

Enable/Disable - enable or disable this email notification.
Subject - use the default email title or create your own. You can use the following shortcodes:{site title}, {site address}, {site_url} .
Email heading - use the default email heading or create your own. You can use the following shortcodes: {site title}, {site address}, {site_url}.
Additional content - you can edit email content. You can use the following shortcodes: {shop_title}, {shop_address}, {shop_url}, {shop_email}, {refund_url}, {refund_note}, {refund_order_table}, {order_table}, {customer_name}, {order_id}, {order_date}, {order_number}, {order_payment_method}, {coupon_code}.
Email Type - you can use the following email types: plain text, HTML, or multipart.
Free vs. PRO Feature Comparison
To make it even easier for you to see the difference between the free and pro versions of the Flexible Refund and Return Order for WooCommerce plugin, we've prepared for you a summary table of all the features. Take a look and decide which version you choose.
| Feature | FREE → | PRO → |
| Return shipping costs | ✅ | ✅ |
| Full refunds | ✅ | ✅ |
| Partial refunds | ❌ | ✅ |
| Refund form builder | ✅ | ✅ |
| Text, textarea, checkbox, radio, select with description field types in the refund form | ✅ | ✅ |
| Multi-Select, Upload, HTML field types in the refund form | ❌ | ✅ |
| Refund and return policy, terms and conditions, or conditions for returns and warranty requests | ✅ | ✅ |
| Privacy and refund policy checkbox | ✅ | ✅ |
| Include the terms and conditions text and conditions to accept | ✅ | ✅ |
| Describe the return policy and refund requirements of your WooCommerce store | ✅ | ✅ |
| Refund button for an order on the customer My Account page -> Orders | ✅ | ✅ |
| Withdraw the refund request with the cancel button | ✅ | ✅ |
| Refund Request management page | ✅ | ✅ |
| Automatic emails to the customer after the refund request status changes | ✅ | ✅ |
| Return button visibility (conditional logic) | ❌ | ✅ |
| Reimbursement of funds On Coupon | ❌ | ✅ |
| Auto Refund button | ❌ | ✅ |
| Auto hide refund button | ❌ | ✅ |
