Contents
About plugin
The Dropshipping Export Products for WooCommerce plugin allows you to export products to CSV and XML feeds in several different formats. These are:
- Custom XML,
- Ceneo,
- Google Merchant,
- Homebook,
- Nokaut.
Main Settings
Category Mapping
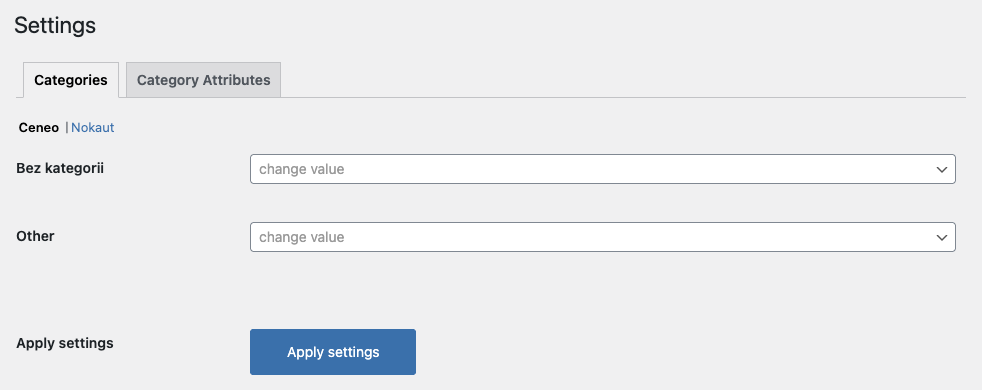
Select the comparison site whose categories and attributes you want to map. Available options are for Polish comparison sites:
- Ceneo,
- Nokaut.
Assign a price comparison site category to WooCommerce product categories located in the first column using the searchable dropdown field.
Attribute Mapping
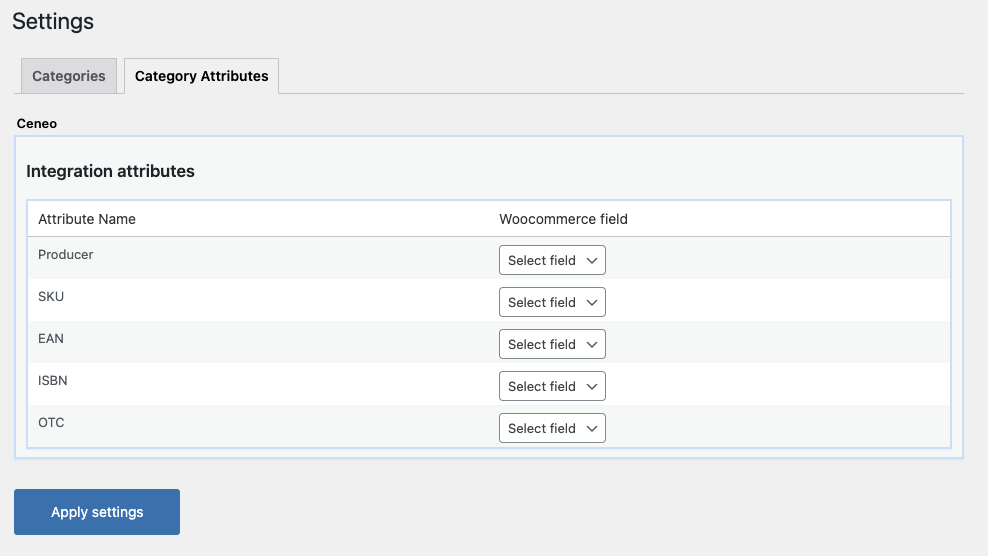
In the Attributes tab, there is a mapping table of Ceneo attributes with WooCommerce attributes. When no Ceneo category is mapped to a WooCommerce category, this tab only contains the Ceneo integration attributes:
- Manufacturer,
- SKU,
- EAN,
- ISBN,
- OTC,
After mapping Ceneo categories with WooCommerce categories, additional attributes depending on the Ceneo category will appear in the attribute mapping table.
Export Manager
The tab contains a table that allows you to quickly manage all exports and view their most important statistics. Click the Create new button if you need a new export file.
Export name
The column shows the name of the export and additional options (when hovering over its area):
- Edit - allows you to edit the export from the beginning (from step 1/4)
- Edit mapper - allows you to edit the export at the Product mapper stage (from step 3/4)
- Edit options - allows you to edit the export at the Export options stage (from step 4/4)
- Clone - allows you to clone the export with all its settings
- File url - allows you to download a CSV or XML export file
- Delete - allows you to delete the export
Cron schedule
The column shows the schedule for automatic export to a file.
Actions
The column shows actions unrelated to the export configuration:
- Export now - allows you to start the export process manually and preview it
- Stop synchronization - allows you to disable automatic export for the Cron schedule (set in step 4/4) as long as automatic export is enabled
- Active synchronization - allows you to enable automatic export for the Cron schedule as long as automatic export is disabled
Status
The column shows the current status of the export:
- Synchronization active - export will run automatically for cron schedule
- Synchronization stopped - the export will not start automatically (it is possible to activate it or run it manually)
- Synchronization in progress - the export process has started and is in progress
Export statistics
The column contains information related to the products e.g. how many of them were exported or omitted during the process.
Created
The column shows the date the export was created.
Export setup steps
Export: step 1
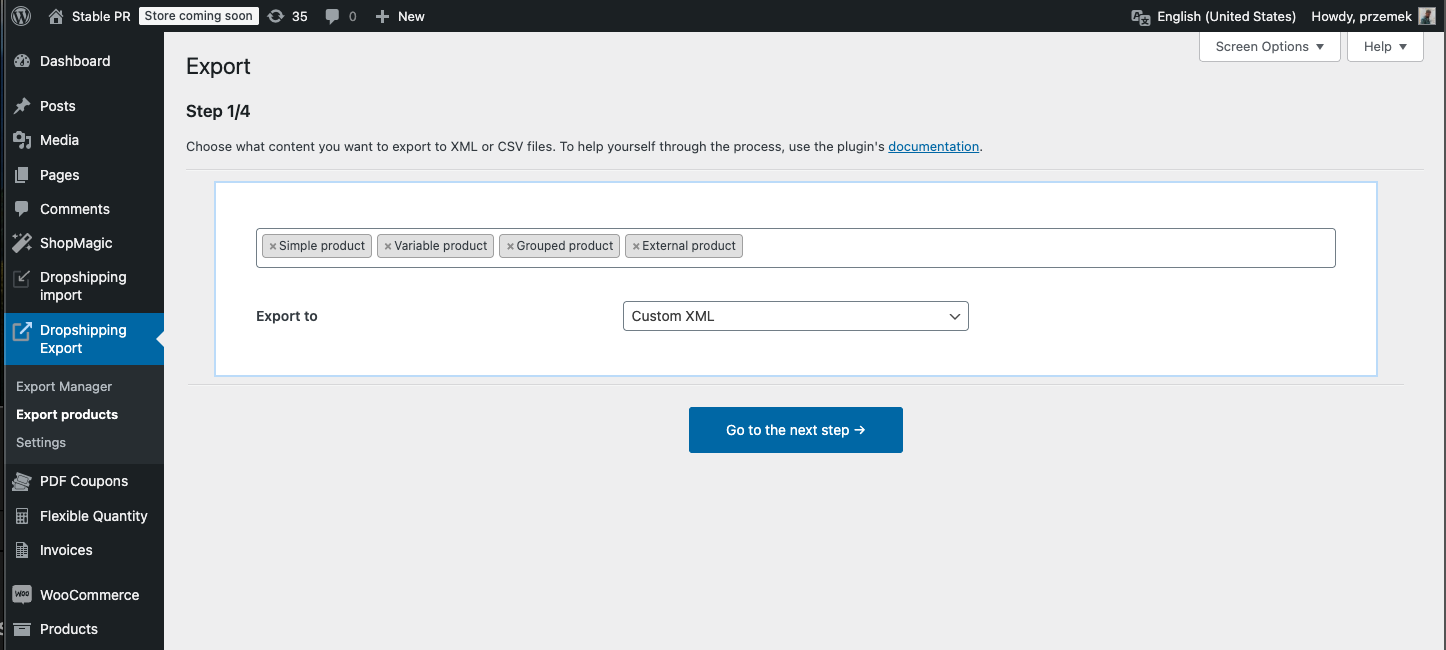
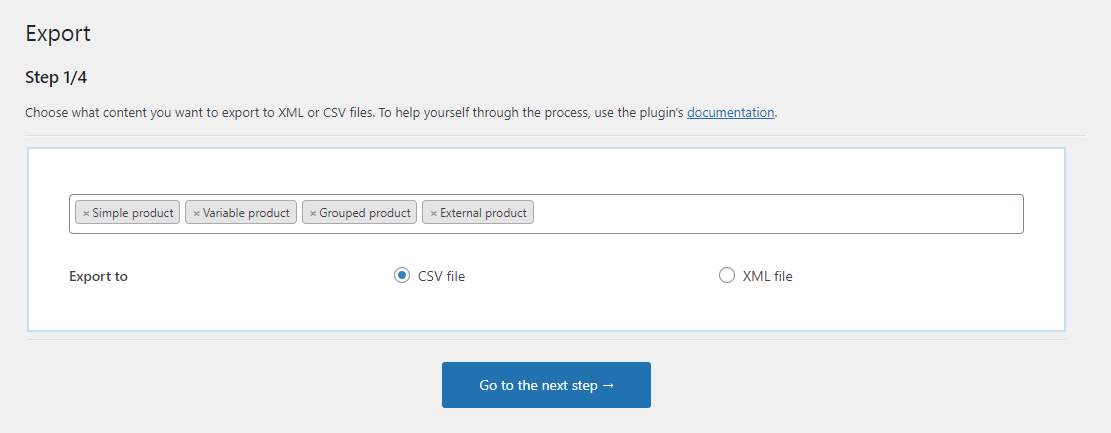
The first step contains basic settings regarding what and in what form will be exported.
Use the multi-select field to select what type of product will be included in the export.
The available options are:
- Simple product
- Variable product
- Grouped product
- External product
You will set a more precise narrowing in step 2/4.
Export to
Select the export file format - the options are:
- Custom XML,
- Custom CSV,
- Ceneo,
- Nokaut,
- Homebook,
- Google Merchant,
- More is comming soon. If you are interested let us know
You will set the exact location of the file in step 4/4.
Conditional Logic: step 2
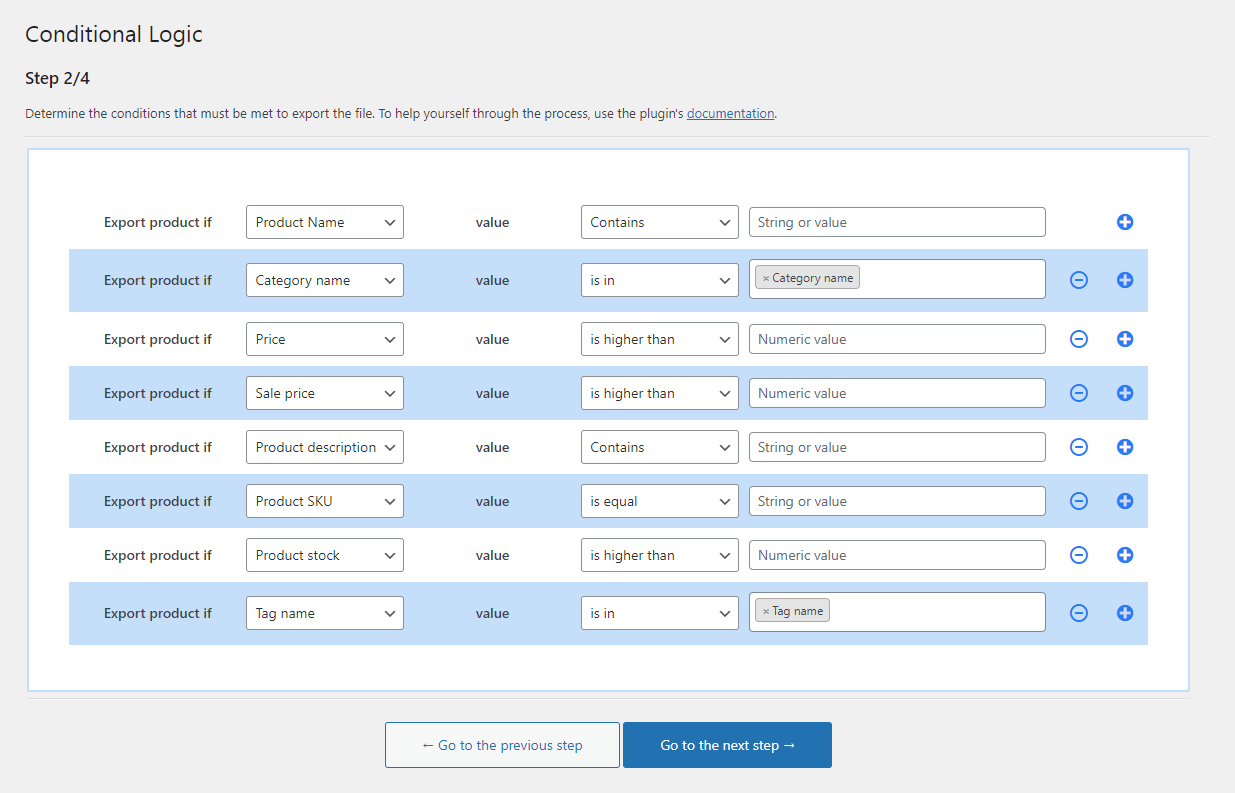
The second step contains conditional logic settings that allow you to narrow down even more precisely which products will be included in the export. The product will be included if it meets all the set conditions.
- Select from the list which product parameter will be checked.
The available options are:- Product name
- Category name
- Price
- Sale price
- Product description
- Product SKU
- Product stock
- Tag name
- Choose what will be the relation between the parameter and the value.
The available options depend on the selected parameter:- contains
- is in
- is not in
- is higher than
- is lower than
- is equal
- Enter the value to be checked. If the value is not completed - then the condition will not be taken into account.
Available formats are:- Category name (multi-select)
- String or value - use the pipe (|) separator to separate the values you type
- Numeric value
- Tag name (multi-select)
- Click the PLUS button if you need another condition. Click the MINUS button if you no longer need a specific condition.
Export product if 'Product name' value is in 'Album' +
Export product if 'Product stock' is higher than '0'The product will be included in the export if its name contains the text Album and its stock is greater than 0.
Product mapper: step 3
Product fields for price comparison feeds
The third step contains sections with settings for information that will be exported with the product.
The sections are depending on the type of file to which you export products. They will be different for:
- Custom XML and Custom CSV
- Ceneo
- Homebook
- Google Merchant
After selecting the export type for price comparison feeds (Google Merchant, Homebook, Ceneo), the section will contain two columns. The left column will display the attributes required by the comparison site, while the right column will show WooCommerce fields whose content will be mapped and exported to the feed. Note, that all fields for price comparison sites are required, so you cannot choose whether to export them.
See the table with fields available to export:
| Google Merchant | Nokaut | Homebook | Ceneo |
|---|---|---|---|
| Brand (g:brand) | Product ID (id) | Product ID (id) | Product ID (id) |
| Product ID (g:id) | Product name (name) | Product name (name) | Product name (name) |
| Group ID (g:item_group_id) | Product description (description) | Product description (description) | Product price (price) |
| Title (title) | Product price (price) | Product price (price) | Weight (weight) |
| Product description (description) | Product stock quantity (instock) | Availability (avail) | Product main category (cat) |
| Link (link) | Weight (weight) | Product main category (cat) | Custom attributes (attr) |
| Product type (g:product_type) | Availability (availability) | Product Images (imgs) | |
| Product main category (g:google_product_category) | Product main category (cat) | Attributes (attrs) | |
| Product Images (g:image_link) | Product Images (image) | Url (url) | |
| Condition (g:condition) | Attributes (property) | ||
| Availability (g:availability) | Url (url) | ||
| Product price (g:price) | |||
| MPN (g:mpn) | |||
| Sale price (g:sale_price) | |||
| Adult (g:adult) | |||
| Adwords redirect (g:adwords_redirect) | |||
| Age group (g:age_group) | |||
| Color (g:color) | |||
| Condition (g:condition) | |||
| Custom label 0 (g:custom_label_0) | |||
| Product price (g:price) | |||
| MPN (g:mpn) | |||
| Sale price (g:sale_price) | |||
| Adult (g:adult) | |||
| Adwords redirect (g:adwords_redirect) | |||
| Age group (g:age_group) | |||
| Color (g:color) | |||
| Condition (g:condition) | |||
| Custom label 0 (g:custom_label_0) | |||
| Product price (g:price) | |||
| MPN (g:mpn) | |||
| Sale price (g:sale_price) | |||
| Adult (g:adult) | |||
| Material (g:material) | |||
| Multipack label (g:multipack) | |||
| Pattern (g:pattern) | |||
| Sale price effective date (g:sale_price_effective_date) | |||
| Shipping label (g:shipping_label) | |||
| Size (g:size) | |||
| Size system (g:size_system) | |||
| Size type (g:size_type) | |||
| Product stock quantity (stock) | |||
| Tax (g:tax) | |||
| Transit time label (g:transit_time_label) | |||
| Unit pricing base measure (g:unit_pricing_base_measure) | |||
| Unit pricing measure (g:unit_pricing_measure) | |||
| Weight (g:shipping_weight) | |||
| Shipping width (g:shipping_width) |
Product fields for Custom XML and Custom CSV
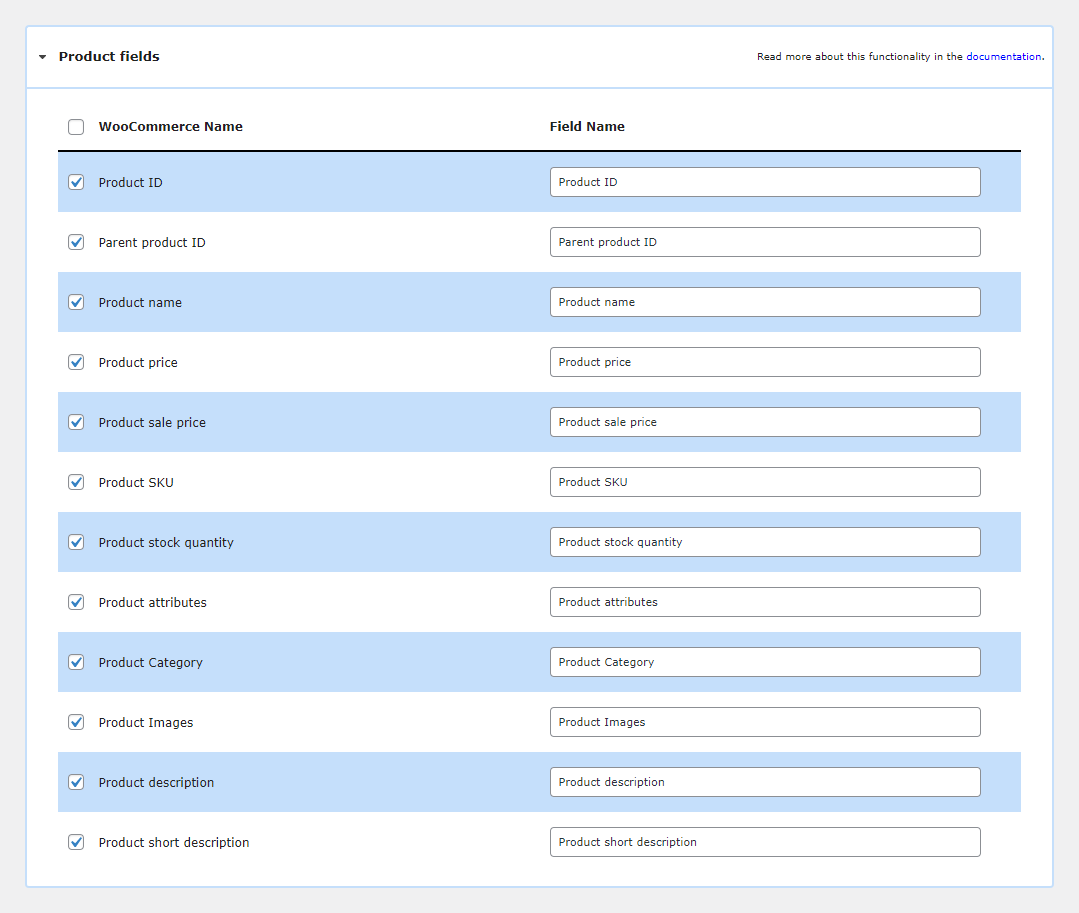
For Custom XML and CSV feeds, you can uncheck fields that will not be exported.
The second column contains the original name of the field in WooCommerce - this name is not editable.
Enter your own field name in the Field name column - it will replace the original field name (optional).
Product attributes
Select attributes
The default option is Select all attributes. All attributes will be exported with this setting.
If you select attributes in the Except field - then these attributes will not be included in the export (all other attributes will be included).
The second option is Add only selected attributes. In the multi-select field (on the right) select the attributes to be exported. The others will be skipped.
Add attributes as single value
Check this option to export all attributes as one value (in one cell).

Advanced
The section contains advanced settings related to the so-called modifiers.
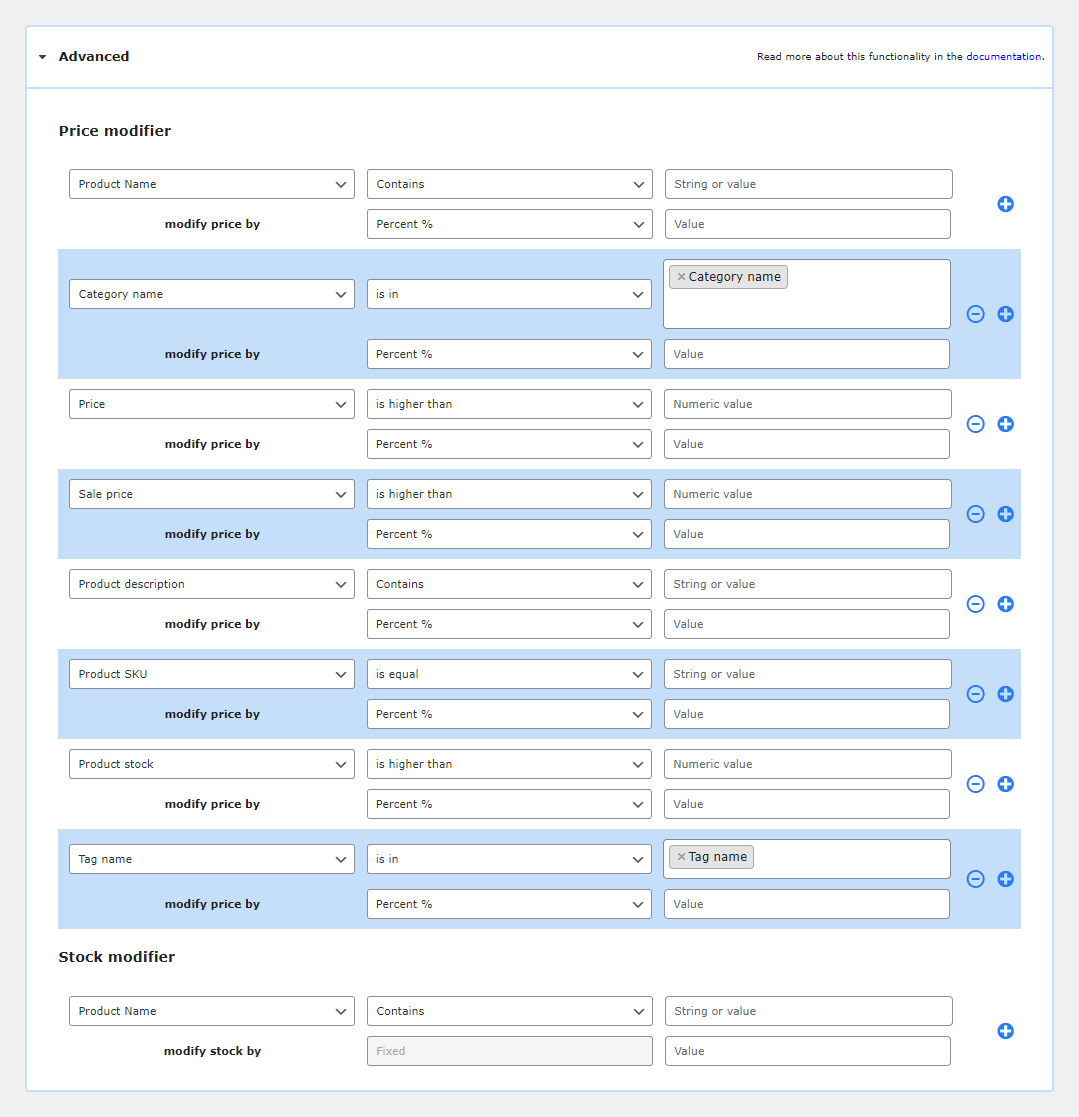
Price modifier
The price modifier allows you to bulk change (increase or decrease) the regular and promotional price of each exported product.
- Set conditional logic - then the modification of prices will apply to each product that meets all the conditions.
- Select from the list which product parameter will be checked e.g. Category name.
- Choose the relation between the parameter and the value e.g. Contains.
- Enter the value to be checked e.g. Clothing. If the value is not completed then the condition will not be taken into account.
- Set the modifier value.
- Percent - the regular price of the product will be changed by the percentage value entered in the Value field e.g. by 10%.
- Fixed - the regular price of the product will be changed by the value entered in the Value field expressed in currency units e.g. by $10.
- Click the PLUS button if you need another condition. Click the MINUS button if you no longer need a specific condition.
'Product name' is in 'Album'

modify price by Percent % '20'
Stock modifier
The stock modifier allows you to bulk change (increase or decrease) the stock of each exported product.
- Set conditional logic - then the modification of the stock will apply to each product that meets all the conditions.
- Select from the list which product parameter will be checked e.g. Category name.
- Choose the relation between the parameter and the value e.g. Contains.
- Enter the value to be checked e.g. Clothing. If the value is not completed then the condition will not be taken into account.
- Set the modifier value.
- Fixed - the stock level of the product will be changed by the value entered in the Value field expressed in units of measurement e.g. by 10 items.
- Click the PLUS button if you need another condition. Click the MINUS button if you no longer need a specific condition.
Product name is in 'Album'

modify stock by Fixed '10'
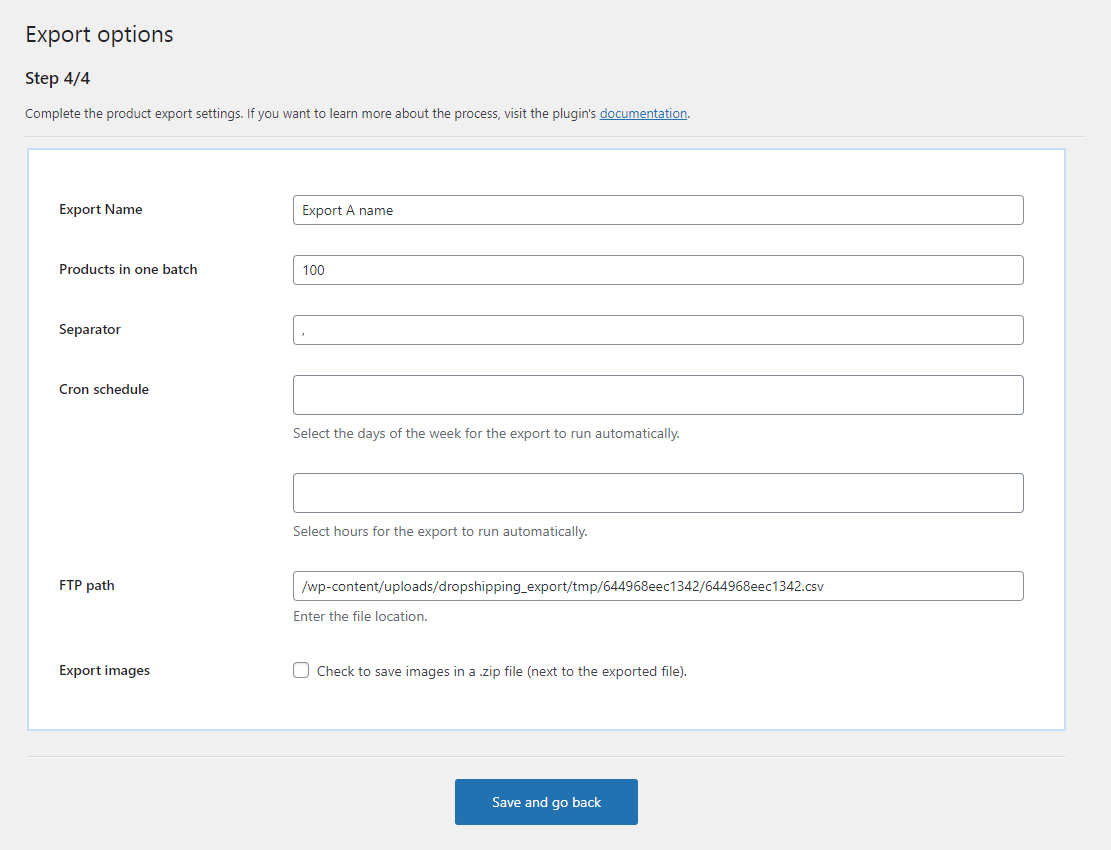
Export options: step 4
The fourth step contains the rest of the settings.
Export name
Enter a name for the export (optional). The name will be shown in the table in the Export Manager tab. The default name includes the date and time the export was created.
Products in one batch
Choose how many products will be exported in a single package - adjust this setting to your server. The default value is 100.
Creating an export file is divided into smaller packages - this allows you to adjust the entire process to the performance of the server on which the store is hosted. If the store uses an efficient server - then the process will be faster by setting more products in the package (e.g. 200). If the store uses a less efficient server - then the process will be slower. But the export will not cause an error by setting a lower value (e.g. 20).
You may also read more on how to raise the wp memory limit in WordPress.
Separator
Enter a separator between the values in the file. The default value is a comma (,).
Cron schedule
Set cron schedule for automatic export. Select the day of the week and the time of the planned export run from the list.
FTP path
Enter your own location to save the file on the server.
Export images
Check the checkbox to save the photos to a separate ZIP file (in the same location).
Export log
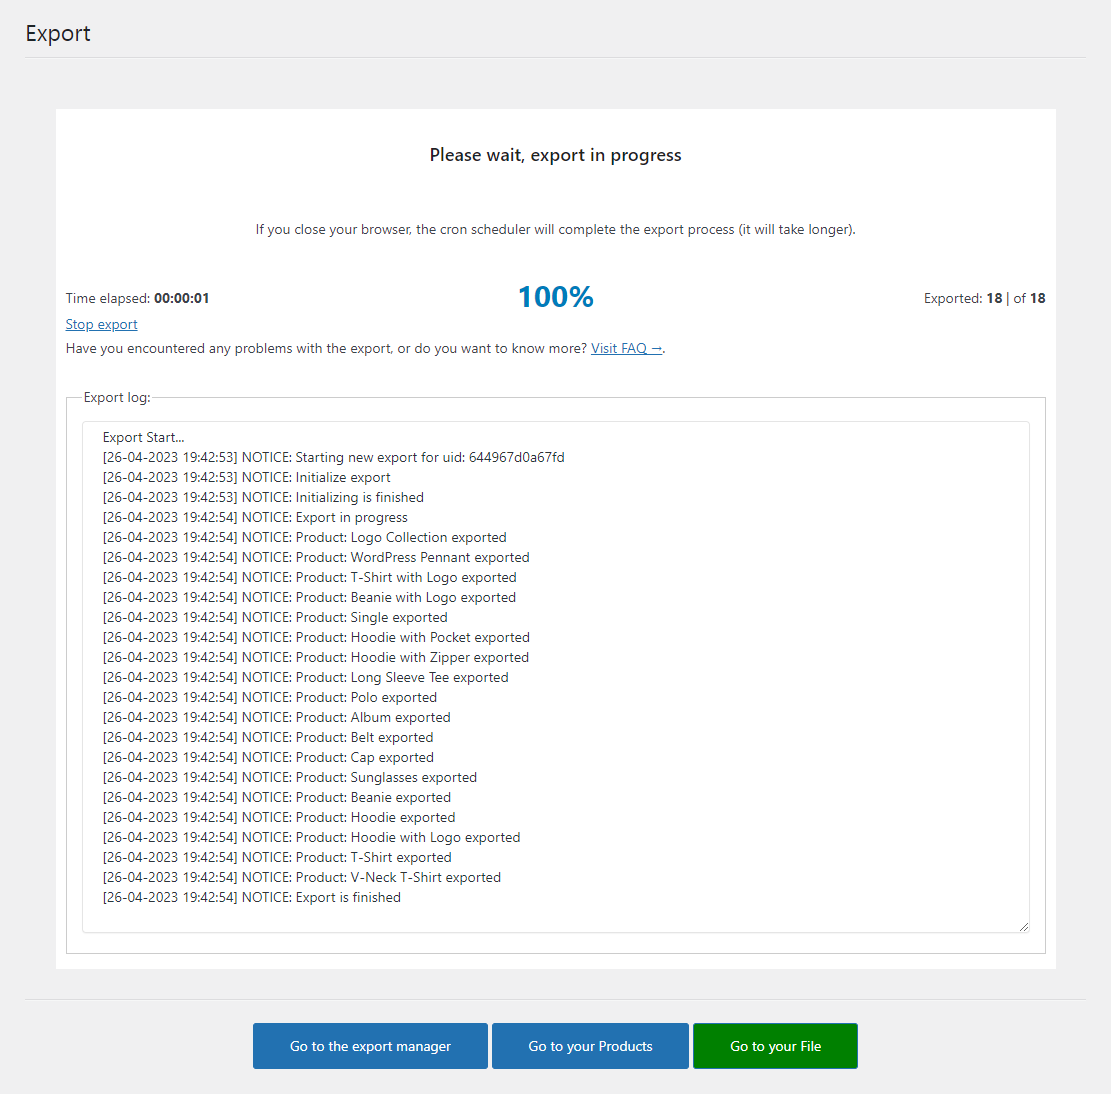
The Start Export button saves the settings and launches the export statistics and summary screen. Closing the window or browser will not stop the export as cron will finalize the whole process (but it will take longer).
The items visible on the screen are:
- the time elapsed since the export was started
- percentage of export progress
- export statistics e.g. 100 | of 1000 means that 100 products out of 1000 have been exported
- Stop export button used to stop the export
- export logs with a summary of the work of the exporter
