Contents
How to prepare your store for importing Allegro listings
- Start by logging into your Allegro account if you haven't already. Read more about configuring plugin settings.
- Add default Allegro categories – adding Allegro categories beforehand allows them to be automatically mapped to WooCommerce categories. Learn how to add default categories.
- Create WooCommerce categories – plan your category structure from the beginning to avoid time-consuming adjustments later. Go to Products → Categories to add them.
- Set up category mapping – to fully automate the import, link Allegro categories with WooCommerce categories. This ensures newly created products are assigned the correct store category. Learn more about category mapping here.
- Configure WooCommerce taxes – if taxes are enabled in your store, you’ll need to add shipping classes to allow the import to work. Read more about tax configuration in WooCommerce.
Automation – mapping
Part of the import and product creation process is automated. All auction attributes (parameters) will be added to your store. If an attribute already exists, new values will be added to it.
Auction images
All images from the listing will be added to the product gallery by default. The Allegro thumbnail will be set as the main product or variation image, depending on the import type.
Allegro listing import settings
Before importing listings, you'll need to configure the basic import settings.
Go to Allegro → Settings → Import.
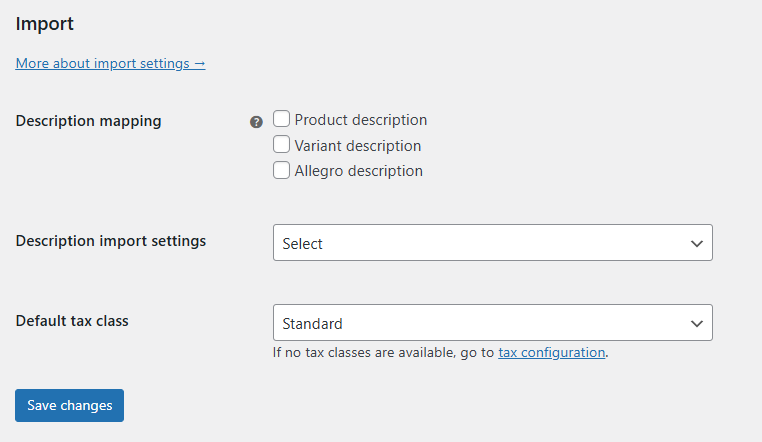
Description mapping
Select the default method for importing listing descriptions. This setting applies to all listings, but you can change it during the import. Multiple options are available:
- Product description – adds the main description to the product page in WooCommerce,
- Variation description – enables importing the description into the product variation,
- Allegro description – use this if the imported description is only for auctions and you plan to add your own product description. The Allegro description will be saved in the Auction description field in the product editor.
Description import settings
There are multiple ways to import the auction description depending on whether you need the entire text or just a part of it, with or without HTML tags.
Full description
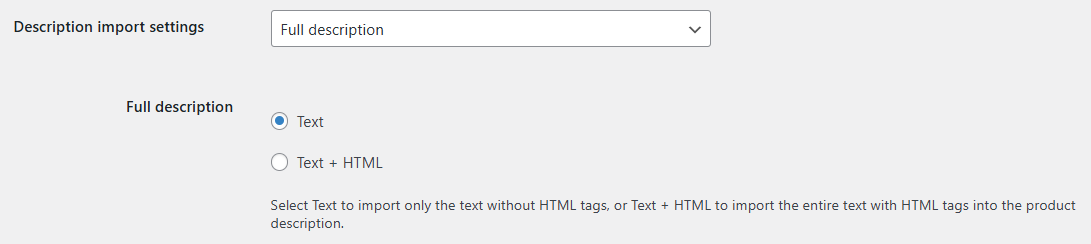
- Text – plain text only, HTML tags will be stripped.
- Text + HTML – the full template (description) including HTML tags.
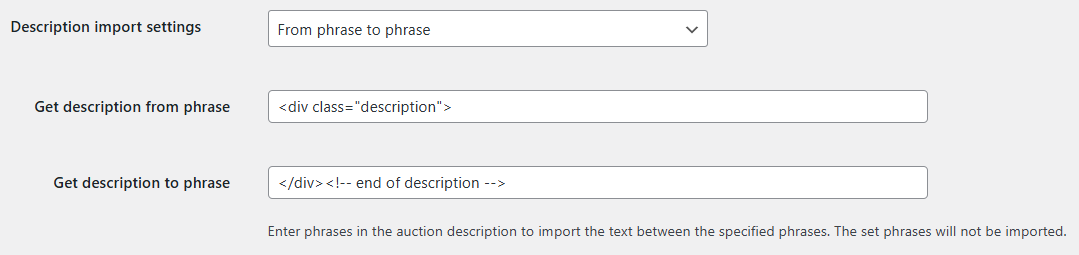
From phrase to phrase
Define phrases to import content located between them, including HTML tags. The phrases themselves won’t be imported. Make sure to use exact paths with tags and avoid short or common phrases to extract the desired content precisely.
Xpath
Xpath allows for precise selection of the content to import. Learn more about Xpath in this w3schools guide.

If you don’t want to dive into the details of Xpath, but still wish to extract a specific part of the description, simply copy the Xpath from your browser.
For Chrome:
- Right-click the desired part of the Allegro listing description,
- The browser will open the source code view with the selected element highlighted,
- Right-click the highlighted line again, choose Copy, then Copy Xpath,
- Paste the copied path into the Xpath field in the import settings or import table.
Default tax class
Setting a default tax class is required when importing listings, but only if taxes are enabled in your WooCommerce store. Select the default tax class that will be assigned to newly created products. You can still change this setting during the import.
Listing import table
You can import Allegro listings and create WooCommerce products from the Allegro → Import menu.
Filtering the listings list
Allegro categories – filter listings by a specific Allegro category. Use the All categories dropdown to select a category, then click Filter.

Listing titles – search listings by title, e.g. manufacturer name. Combined with category filtering, this allows for precise targeting. Enter a phrase into the search field and click Search.
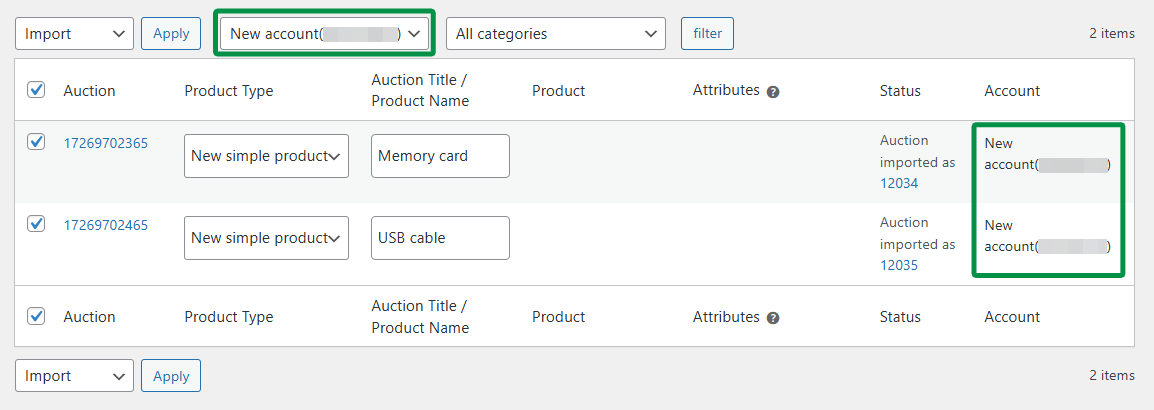
Allegro accounts – if you’ve connected multiple Allegro accounts, you can filter listings by account. Select the account name and click Search.

Import table columns
The default table includes the following columns:
- Listing – Allegro listing ID and a direct link to the listing.
- Product type – choose the WooCommerce product type to create. By default, a simple product is selected. Learn more about product types below.
- Listing title / Product name – this is the title from Allegro. You can edit it and it will become the WooCommerce product name.
- Product – if you're importing into an existing product or variation, use the search field to select it.
- Attributes – required for importing products with variations. These should match the attributes from the listing.
- Status – displays messages and errors related to the import.
- Account – shows which Allegro account is associated with the listing.
Additional columns are available via the screen options tab. Click Screen Options in the top right corner of the page.

- Allegro category – category assigned to the imported listing.
- WooCommerce category – available product categories in your store.
- Tax – available tax classes in your store.
- Description – description import settings.
In screen options, you can also set how many listings to display per page. The default is 25 listings per page. Increasing the number may be limited by your server’s capabilities and configuration.
Importing listings
Connecting your store to Allegro with the plugin does not automatically import listings as WooCommerce products. A few steps are needed to complete the process.
You can import listings in several ways to create different product types in WooCommerce. The import begins when you click the Apply button in the import panel. Only listings selected via the checkbox will be imported.
By default, simple products will be created. However, you can also create variable products or add variations to an existing product. If you already have products in your store, you can link them to Allegro listings and synchronize sales. Learn more in the guide How to manage products in WooCommerce? Basics.
If you've already configured the required import settings, just select the listings or use Select all, then choose Import from the bulk actions dropdown. Click Apply to start.
Once the import is successful, a confirmation will appear in the Status column: "Listing imported as" along with the new listing ID.

New simple product
The new simple product is the default import option. It’s also the basic product type in WooCommerce.
No additional configuration is needed. Just select the listings and use the Bulk actions → Import option.
New variable product
If the imported listing is one of several product variants you plan to sell and you haven’t created the product yet, use this option to define attributes for generating a variable product.
An attribute defines product variations. For example, a product like "T-shirt" can have variants based on the "color" attribute. You can use multiple attributes, such as color and size.
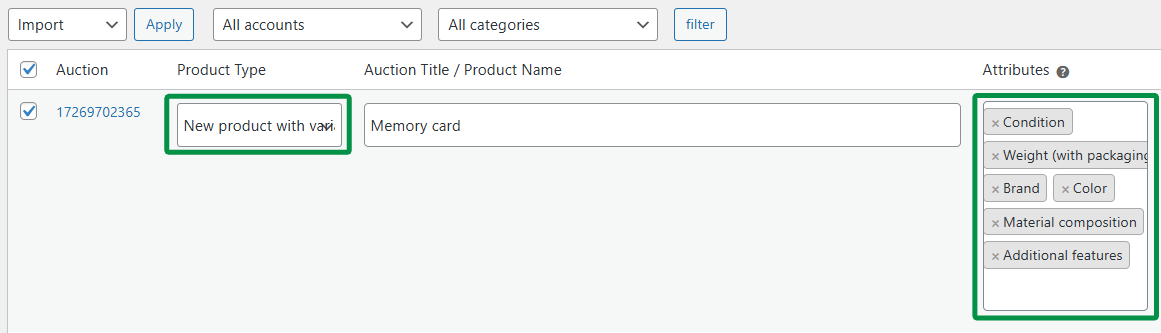
After selecting New variable product in the Product type column, define the attributes under the Attributes column. The dropdown contains parameters available in the Allegro listing. You can select multiple attributes.
If you're creating a new variable product, make sure to include all attributes that differ across listing variants. On the first import, select all varying attributes.
If you skip any differing attribute, the plugin will detect inconsistencies and prevent further variant imports. You’ll see a message: "Product has a different attribute value for field XXX".
In that case, go to Allegro → Listings and remove the product connection. Then repeat the import and create a new variable product, remembering to select all relevant attributes.
New variation
The New variation option lets you add new variants to an existing variable product.
After selecting New variation in the Product type column, search for the product or variation under the Product column.
Existing product
Listings published via the Allegro panel are not visible by default in WooCommerce. However, you can synchronize active listings with WooCommerce products. Product stock will sync with listing quantities. You’ll also be able to manage the listing directly from WooCommerce.
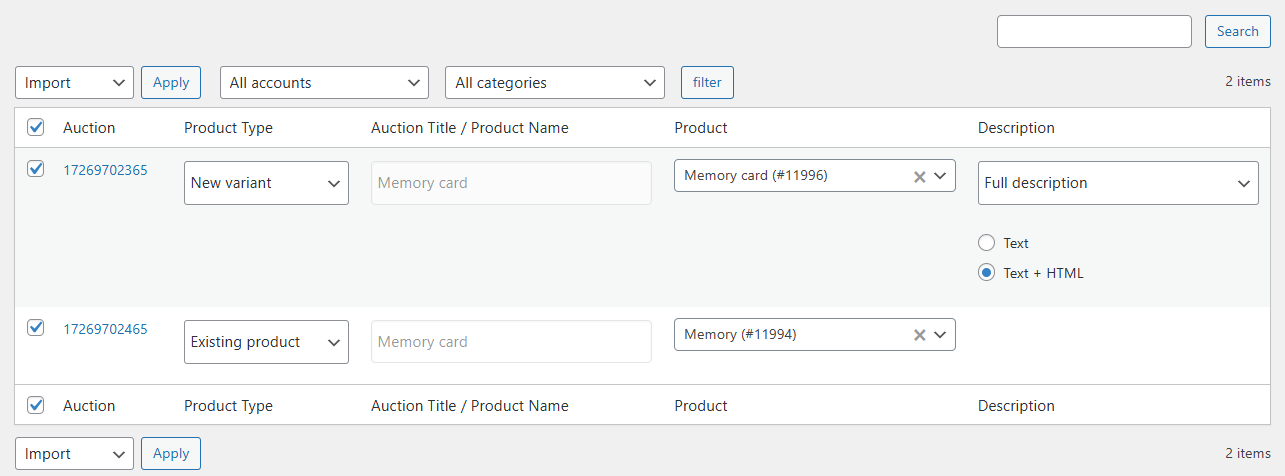
After selecting Existing product in the Product type column, search for the product or variation under the Product column.
Advanced
Filtering listings in the import list
The plugin includes a filter hook: woocommerce_allegro_filter_import_query. It allows you to control which listings appear in the import list. You can modify the Allegro API request to display only specific listings.
Example usage: filter listings priced above 50 PLN.
A full list of available request parameters can be found in the official Allegro documentation.
