Contents
Key plugin features
Dropshipping Export Orders PRO is used to export WooCommerce order data to CSV, XML, or JSON files. The plugin helps you prepare a file with orders and order items in the format needed for further processing, for example by a supplier, wholesaler, dropshipping operator, or internal order fulfillment system.
Key plugin features:
- Export to CSV, XML, and JSON - choose the file format required by the data recipient.
- Order field mapping - decide which data should be included in the export and change field names in the file.
- Conditional logic - export only orders that meet specific conditions, for example orders with a selected status, currency, creation date, order value, or orders containing a product from a selected category, tag, SKU, or name.
- Manual and automatic export - run the export immediately or set a cron schedule for selected weekdays and times.
- Saving the file on the server - specify the path where the plugin should save the generated file.
- Sending the file by email - after the export is complete, the plugin can send the file as an attachment to the specified address.
- Automatic order status change - after export, you can change the status of exported orders to a selected WooCommerce status.
- Export Manager - manage saved exports, run them again, edit, duplicate, delete, and check their status and statistics.
The plugin is especially useful when you regularly send orders outside WooCommerce, for example to a wholesaler, supplier, or warehouse system. You can prepare separate exports for different scenarios, for example only for orders with a specific status, from selected product categories, or processed in a specific currency.
Demo
On the demo page, you can check how the PRO versions of our plugins work before purchase. You only need a valid email address to create a test account.
Installation
Subscription activation
Export Manager
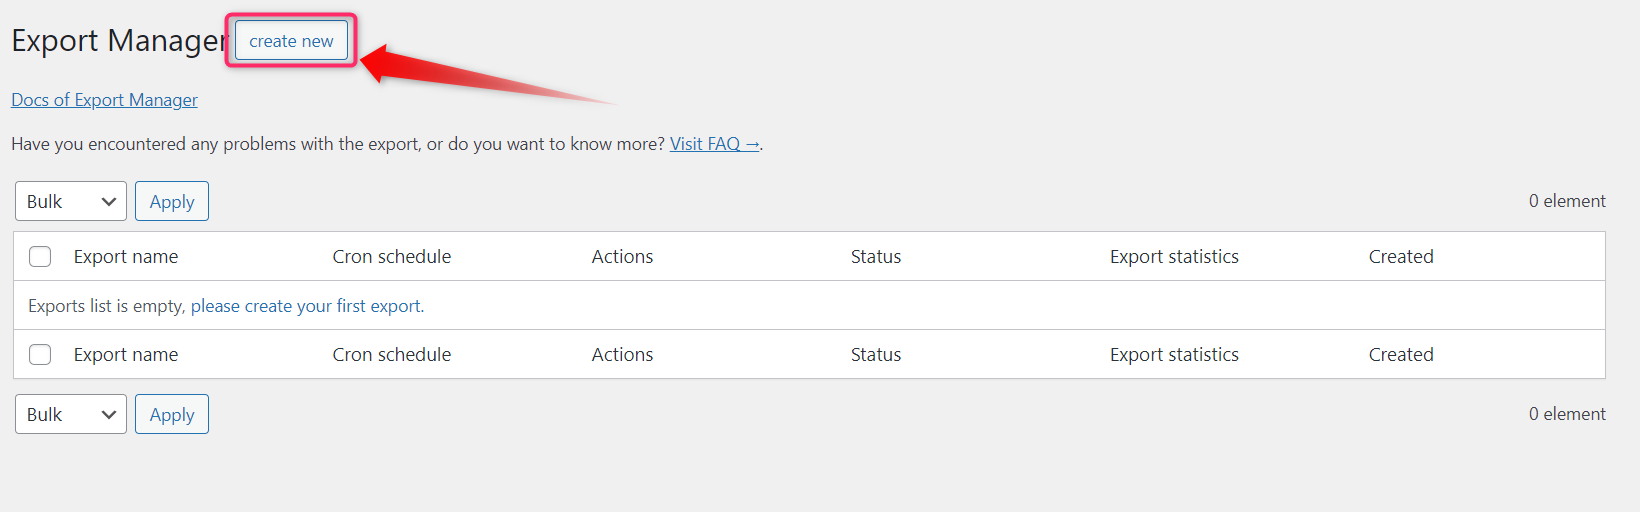
The tab contains a table that lets you quickly manage all exports and preview their most important statistics. Click the Add new button if you need a new export file.
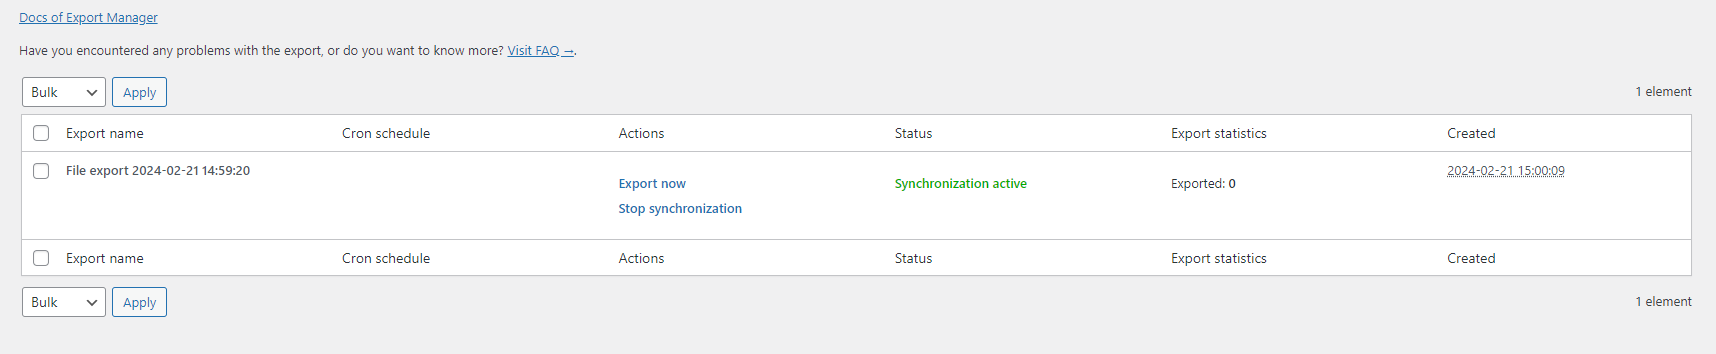
Export name
The column shows the export name and additional options (on hover):
- Edit - lets you edit the export from the beginning (from step 1/4),
- Edit mapping - lets you edit the export at the Product Mapper stage (from step 3/4),
- Edit options - lets you edit the export at the Export options stage (from step 4/4),
- Duplicate - lets you clone the export with all its settings,
- Delete - lets you delete the export.
Cron schedule
The column shows the schedule (date/time) for automatic export to a file.
Actions
The column shows actions not related to export configuration:
- Export now - lets you manually start the export process and preview it
- Pause synchronization - lets you disable automatic export for the cron schedule (set in step 4/4), provided that automatic export is enabled
Status
The column shows the current export status:
- Synchronization active - the export will run automatically according to the cron schedule,
- Synchronization paused - the export will not run automatically (it can be activated or run manually),
- Synchronization in progress - the export process has started and is in progress.
Export statistics
The column contains order-related information, such as how many orders were exported or skipped during the process.
Created
The column shows the export creation date.
Export configuration steps
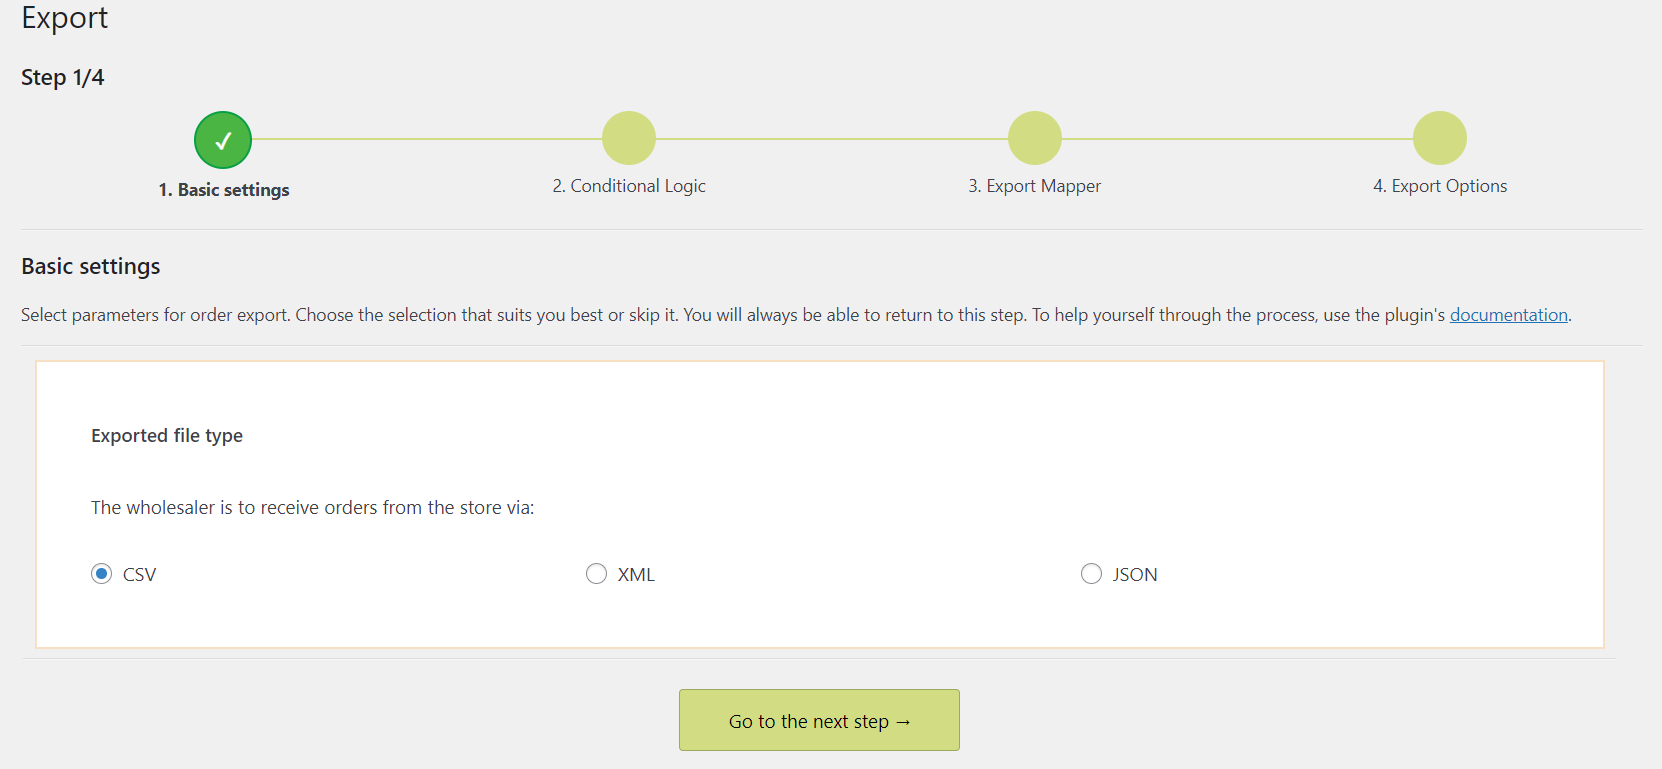
Export: step 1
The first step contains basic information about the type of file to be exported. You can choose from three file types:
- CSV,
- XML,
- JSON.
Conditional logic: step 2
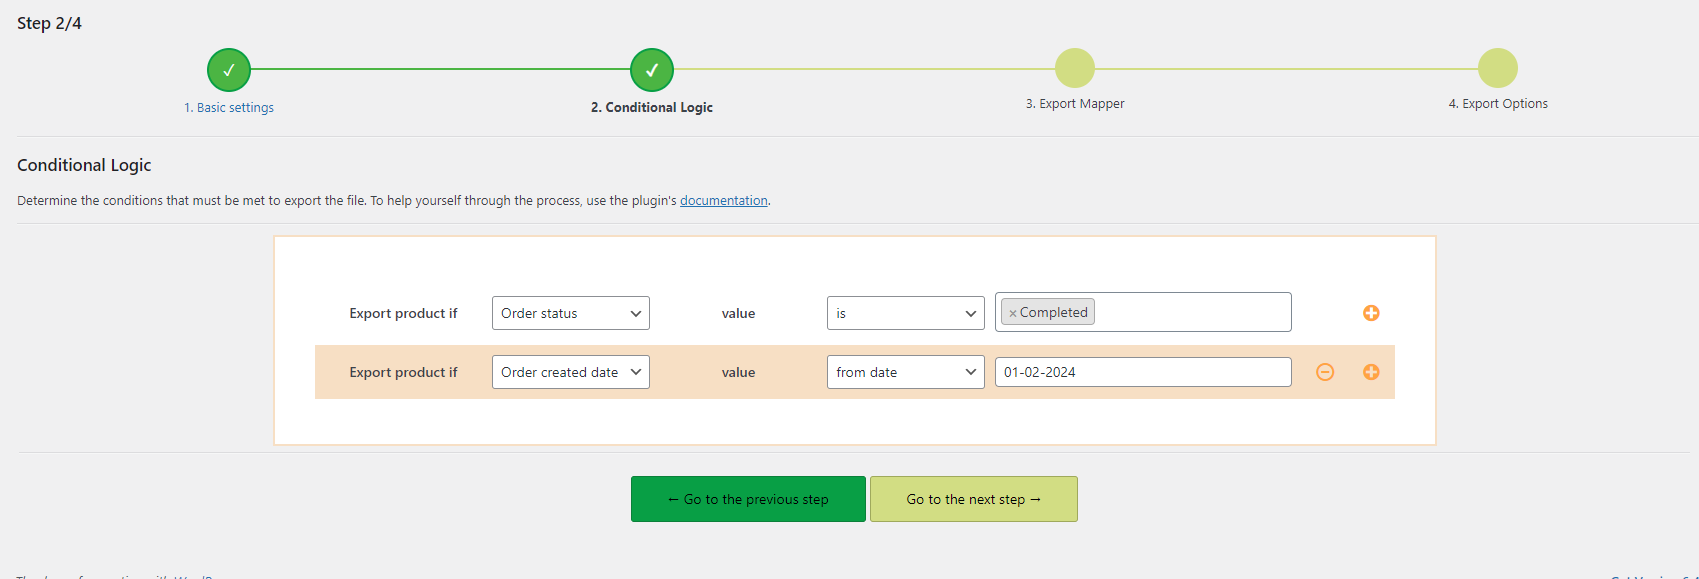
The second step contains conditional logic settings that let you narrow down more precisely which orders will be included in the export. An order will be included if it meets the specified conditions.
- Select from the list which order parameter should be checked.
The available options are:
- Order status,
- Order email address,
- Order currency,
- Order date,
- Total order value,
- Order type,
- Product name,
- Product category,
- Product SKU,
- Product tag.
- Choose the relation between the parameter and the value.
The available options depend on the selected parameter:- is in,
- is equal to,
- contains,
- from date,
- to date,
- is greater than,
- is less than,
- is equal to,
- is.
- Enter the value that should be checked. If the value is not completed, the condition will not be taken into account.
The available formats are:- Order status (multi-select),
- Text or value - use the pipe separator (|) to separate entered values,
- Date selection from the calendar,
- Category (multi-select),
- Tag name (multi-select).
- Click the PLUS button if you need another condition. Click the MINUS button if you no longer need a specific condition.
Export the order if 'Order status' has the value 'Completed' +
Export the order if 'Date' is from '01.02.2024'The order will be included in the export if its status is completed and it has existed since 01.02.2024.
Export mapper: step 3
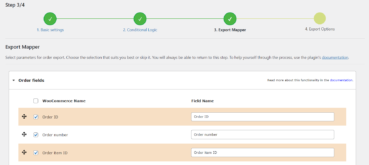
The third step contains sections with settings for the information that will be exported together with the order.
Order fields
The section contains a table showing all fields available for export.
Clear the checkbox next to a specific row if that field should not be included in the export.
The second column contains the original WooCommerce field name - this name cannot be edited.
Enter your own field name in the Field name column - it will replace the original field name (optional).
Export options: step 4
The fourth step contains the remaining settings.
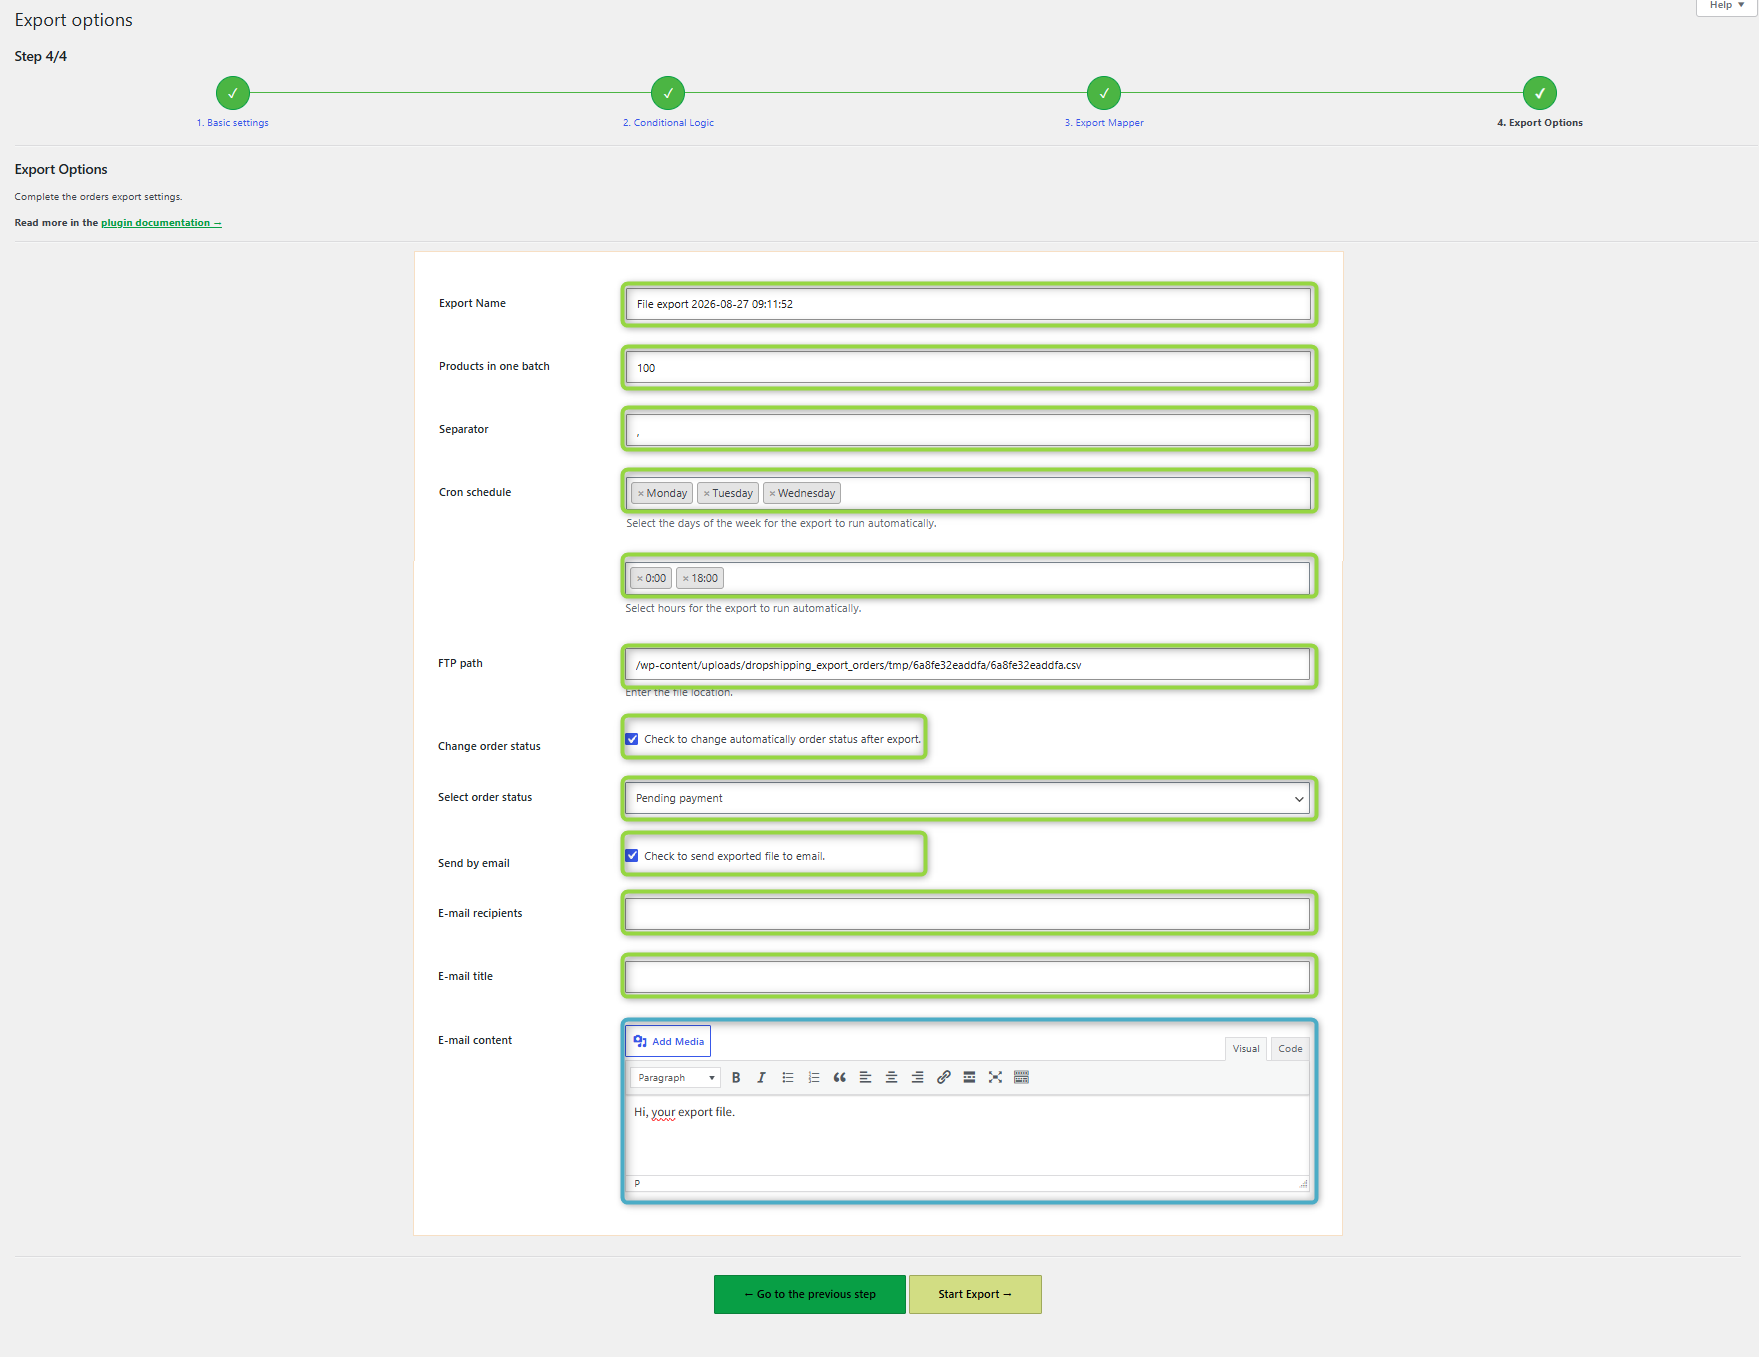
Export name
Enter the export name (optional). The name will be shown in the table in the Export Manager tab. The default name contains the date and time when the export was created.
Products in one batch
Choose how many orders will be exported in a single batch - adjust this setting to your server. The default value is 100.
Creating the export file is divided into smaller batches. This lets you adjust the whole process to the performance of the store server. If the store uses a high-performance server, the process will be faster when you set a higher number of orders in a batch (for example, 200). If the store uses a less powerful server, the process will be slower, but setting a lower value (for example, 20) will prevent the export from causing an error.
Separator
Enter the separator between values in the file. The default value is a comma (,).
Cron schedule
Set the cron schedule for automatic export. Select the weekday and time for the planned export from the list.
FTP path
Enter your own location for saving the file on the server.
Change order status
Select this option if you want order statuses to change after export. You can choose the appropriate status from the drop-down list.
Select order status
Select the order status that will be set after export.
Send by email
Select this option if you want a message to be sent after the export is complete.
Email recipient
Enter the recipient address to which you want to send the message.
Email title
Enter the subject of the message you want to send.
Email content
Complete the email content that will be sent. You can format it in the editor according to your needs.
Export logging
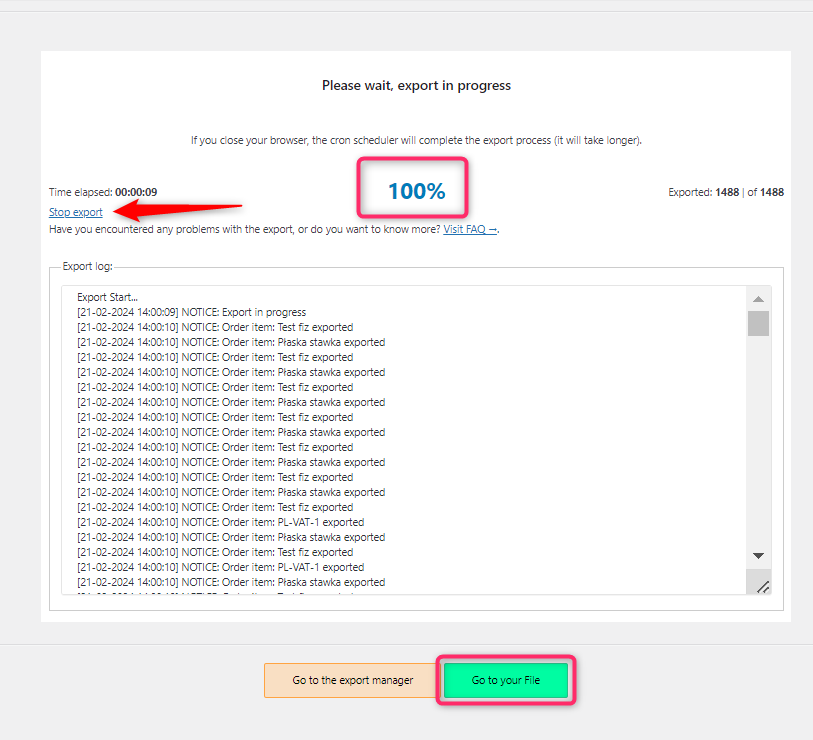
The Start Export button saves the settings and opens a screen with export statistics and summary. Closing the window or browser will not stop the export, because cron will finish the whole process (but it will take longer).
The elements visible on the screen are:
- the time that has passed since the export started,
- the percentage progress of the export,
- export statistics, for example 100 | of 1000 means that 100 orders out of 1000 have been exported,
- the Stop export button used to stop the export,
- export logs with a summary of the exporter’s work.