Contents
OLX API connection: important information
OLX WooCommerce allows building, managing, closing, and synchronizing OLX adverts for WooCommerce products. It supports both simple and variable products.
The plugin requires Client ID and Client Secret numbers to connect to the OLX API.
First, it will be possible to connect the application after:
- registering an OLX account
- getting the credentials for connecting to OLX API
- adding an OLX application
- setting the OLX WooCommerce plugin
- preparing adverts (OLX listings)
OLX API: creating an account
It's possible to create an account for:
- Ukraine in the OLX Developer Portal
- Bulgaria in the OLX Developer Portal
- Portugal in the OLX Developer Portal
- Romania in the OLX Developer Portal
- Kazakhstan in the OLX Developer Portal
- Poland in the OLX Developer Portal
Getting OLX API credentials
The exact process to access API is described in the OLX documentation:
Registration requires an email address and password or logging in with Google or Facebook accounts. The registration process is moderated by the OLX team and requires approval.
Adding an OLX application
Once your account has been approved by the OLX team, go for the:
- Ukraine to the Applications
- Bulgaria to the Applications
- Portugal to the Applications
- Romania to the Applications
- Kazakhstan to the Applications
- Poland to the Applications
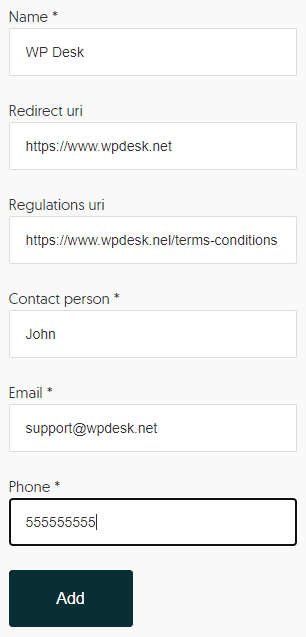
Then click Add Application. OLX requires filling out an application form along with your contact information and website address.
Setting the OLX WooCommerce plugin
After getting OLX API keys, you may open the plugin settings in the WordPress dashboard.
A sample application form looks like this:
Authorization
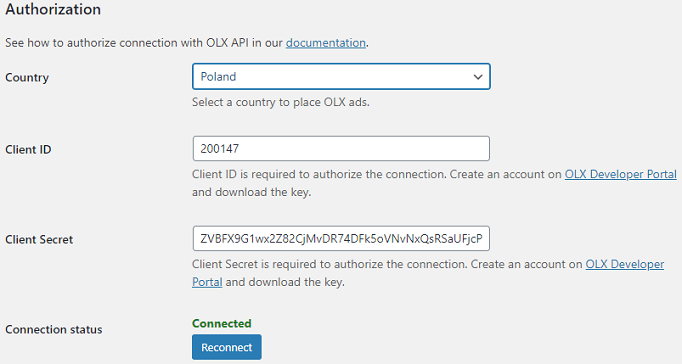
Country - Country is a selection added since version 2.0.0 of the plugin. Select the country you want to sell in. You can choose from Poland, Bulgaria, Kazakhstan, Ukraine, Romania, and Portugal.
Client ID
Client Secret
Connection Status - Here you can check if the connection to the OLX application has been authorized.
Seller Details
Filling out the fields is also required to authorize the connection and add the ad.
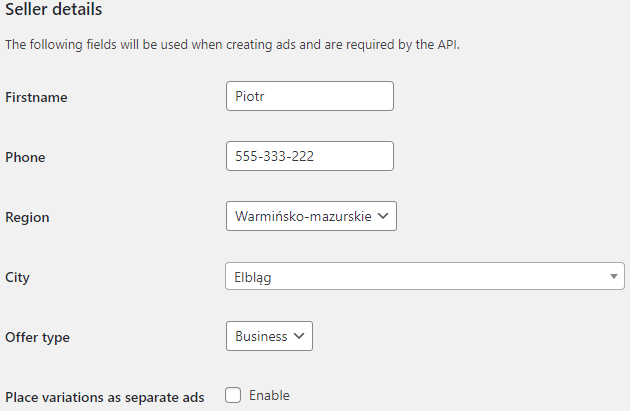
First name - enter a name that will be visible for your adverts.
Phone number - enter a phone number which will be visible next to the adverts. The phone number must be real because it is validated by the OLX API while creating an advert.
Region - select the region where you run the sale.
City - select a place where you run the sale. A list of cities will be generated based on the selected region. Your choice will be visible next to the ad.
Offer type - choose one of the available options:
- Private,
- Company.
Place variations as separate ads - it's also possible to decide if product variations should be displayed as separate ads. If you check this option, then product variations will be displayed as separate advertisements. Contrary, if you leave the option unchecked, then variations will be added within the main product.
Preparing adverts (OLX listings)
To place an adverts go to OLX → Add new and fill the advert fields.
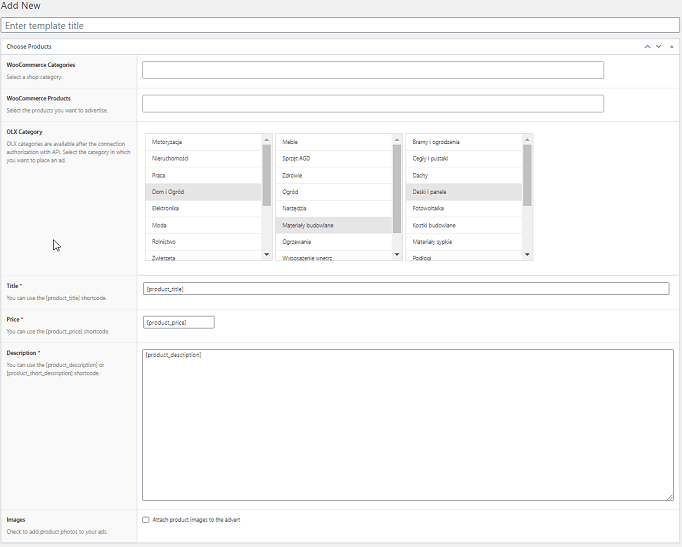
Enter template title - fill in the title for the template. You will be able to find the template in OLX > Template List.
WooCommerce categories - select a category of WooCommerce products.
WooCommerce products - based on the selected category, products will appear in this field, based on which you will be able to list adverts.
OLX Category - select the OLX category in which you want to list adverts. Make sure to select the final branch of the category.
Title - fill in the title of the advert. You can use the shortcode [title_product] to include product titles in your adverts.
Price - fill in the price of the adverts. You can use the shortcode [product_price] to include product prices in your adverts.
Description - fill in the description of the adverts. You can use shortcode [description_product] or [short_description_product] to include product descriptions in your adverts.
Attributes - depending on the selected OLX category, various attribute fields will appear in the settings. Some of them are required and must be filled in.
Images - check a box to include images used with the products in the adverts. A maximum of eight product images will be downloaded to the adverts.
Clicking the button Create advert transfers a request with the data to the OLX API. At this moment, the announcement is created in the system and receives the status New, then Waiting. Once the advert is accepted by an OLX moderator, its status will change to Active.
Adverts: history and management
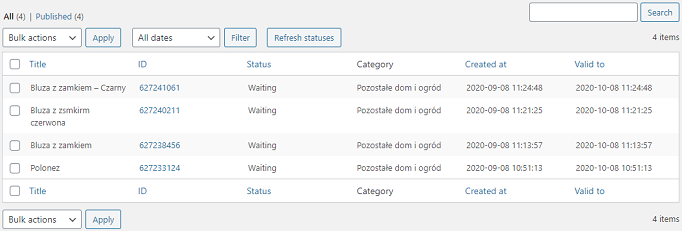
In the Adverts tab, you will find a list of adverts that have been posted using the plugin along with information about the ad Title, ID, Status, Category, and expiration dates. Clicking on the ID number will redirect you to the adverts on OLX.
Using bulk actions it is possible to:
- Close adverts - select the advert and in the bulk actions select End the advert, then click Apply. Closing an advert is possible for New and Active statuses.
- Move to trash - select the advert and in the bulk actions select Move to trash, then click Apply. Moving to trash is possible for New and Active statuses.
- Refresh status - click Refresh status button in the top menu.
List of templates
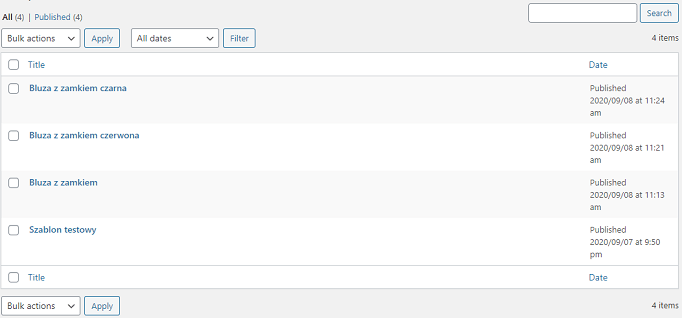
In the Template List tab, you can find all saved advert templates that you've created. Based on them, you can quickly create new OLX adverts.
See how to create an advert template.
Questions and troubleshooting
Why the application does not connect to OLX API?
Check if the Client ID and Client Secret are correct (without any extra/ missing characters). If the settings are blank, you may check the steps to (connect to OLX API).
How does OLX API work?
The OLX application programming interface (API) allows getting and sending information with external software. The OLX WooCommerce plugin uses the options available in the OLX API to build adverts and manage listings from WordPress.
Client ID and Client Secret (from the OLX account) are required to authorize the plugin so it's allowed by the OLX API.
