If you've ever found yourself scratching your head, wondering how to make your WooCommerce checkout page smarter and more user-friendly, you're in for a treat. Today, we're diving into the world of conditional logic with the Flexible Checkout Fields PRO plugin. This amazing tool allows you to personalize your checkout process based on your customers' country selection.
Contents
- Getting Started with Flexible Checkout Fields PRO
- The Magic of Conditional Logic
- Setting Up Conditional Logic for the Country Field in WooCommerce checkout
- Sample Scenarios
- Tips for Using Conditional Logic Effectively
- Wrapping Up
- Take Control of WooCommerce Edit Checkout Fields Using Smart Conditional Logic
- How to show or hide a WooCommerce checkout field for a specific country
- WooCommerce Conditional Logic, Custom Fields & Product Options in one plugin!
- How to set conditional logic based on the number of products in the cart
- Best plugin to speed up WooCommerce Checkout (conditional & custom fields)
Getting Started with Flexible Checkout Fields PRO
Before we roll up our sleeves and get to the fun part, make sure you have the Flexible Checkout Fields PRO plugin installed and activated on your WordPress site. This plugin is a powerhouse for customizing checkout fields in WooCommerce, making your checkout process as breezy or detailed as you need it to be.
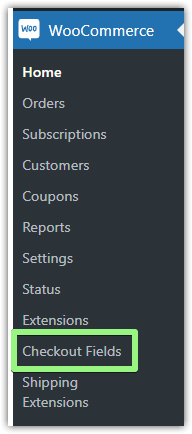
✅ After installing the plugin, go to its settings. You will find the plugin after installation here:
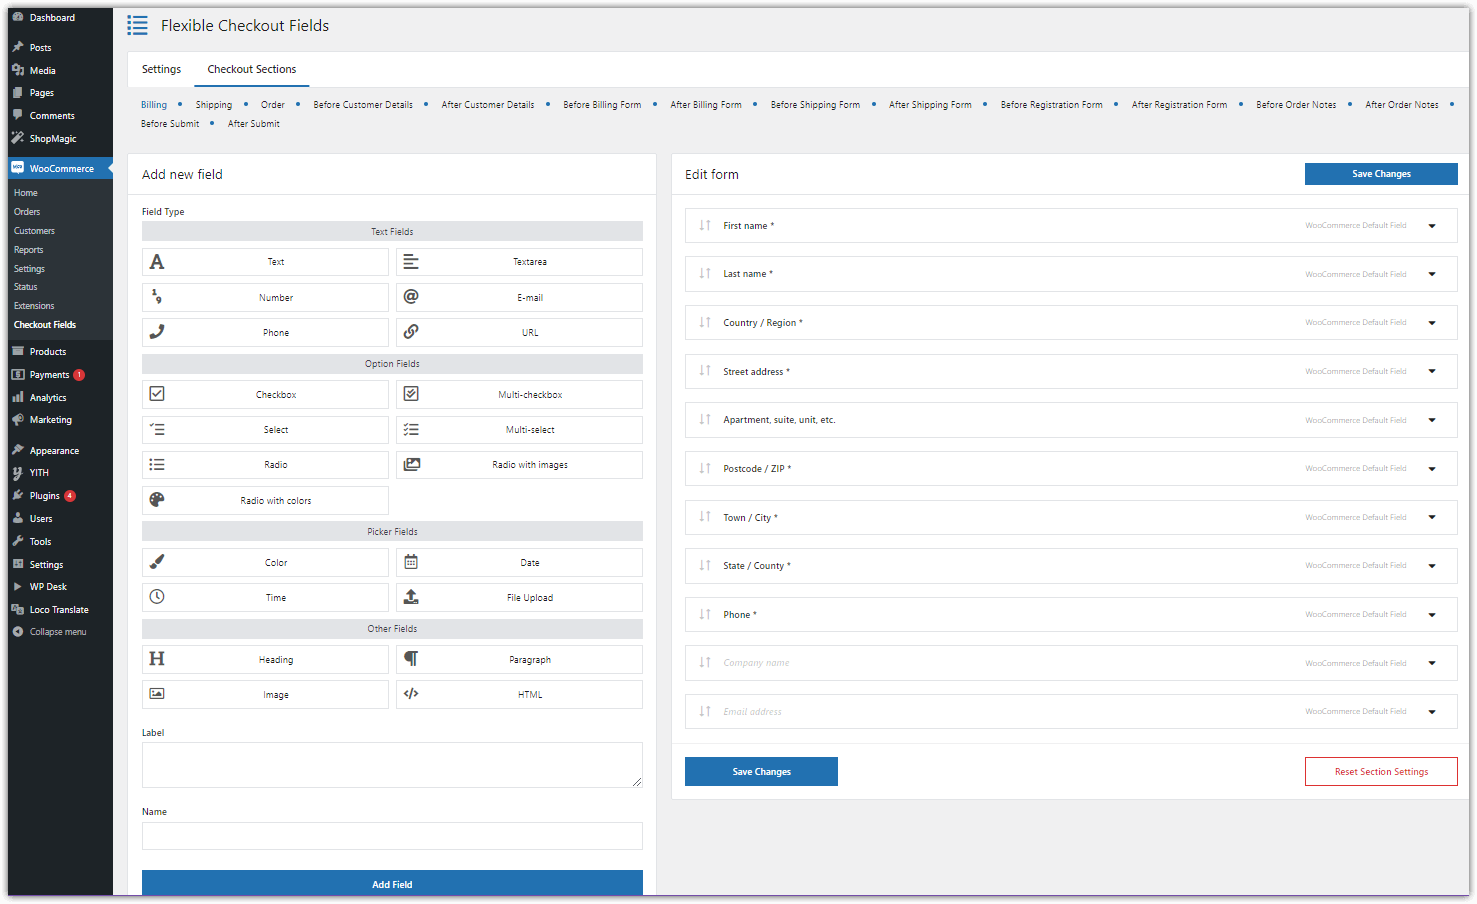
😍 The plugin itself, on the other hand, looks like this:
The Magic of Conditional Logic
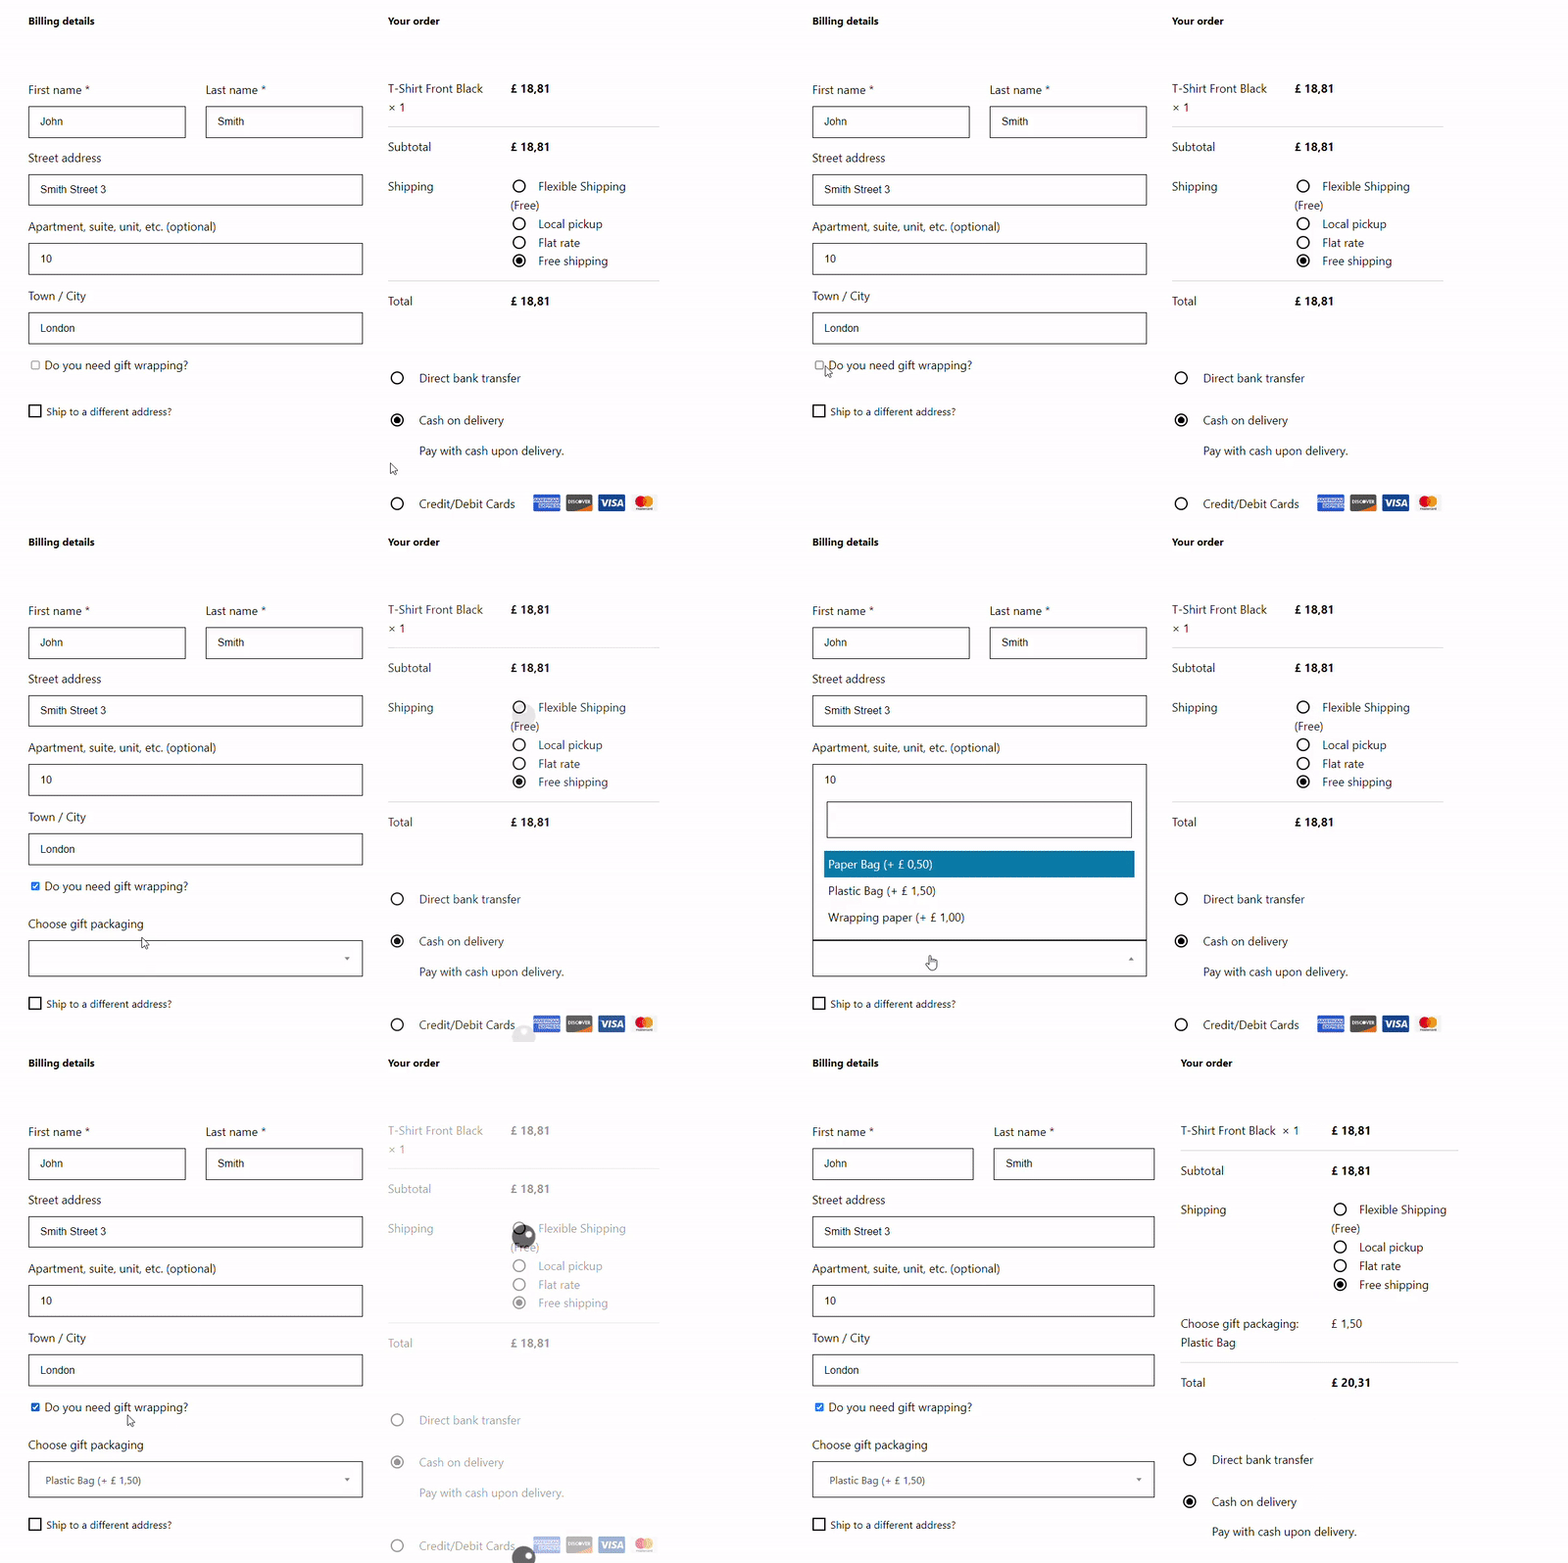
Conditional logic is like having a smart assistant on your checkout page🤩. It allows you to show or hide fields based on what options the customer selects. For instance, if a customer chooses a specific country, you can tailor the checkout fields to match that country's shipping requirements or payment preferences.
Setting Up Conditional Logic for the Country Field in WooCommerce checkout
Here’s a step-by-step guide to adding conditional logic to the country field in your WooCommerce store.
1. Edit the Country field: Look for the Country/Region WooCommerce Default Field in your list of checkout fields. Click on it to expand its settings.
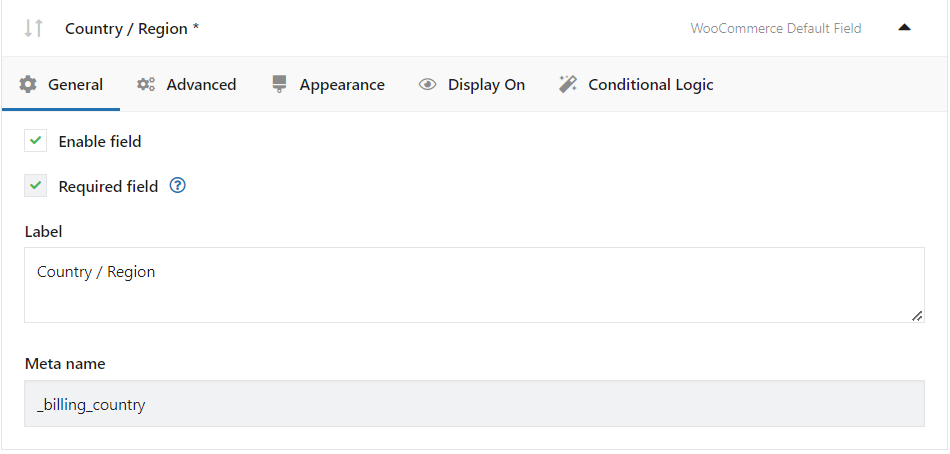
2. Enable Conditional Logic: You should see the Conditional Logic tab. Go there and start setting up your conditions.

3. Set Your Conditions: Decide what fields you want to show or hide based on the customer's country selection.
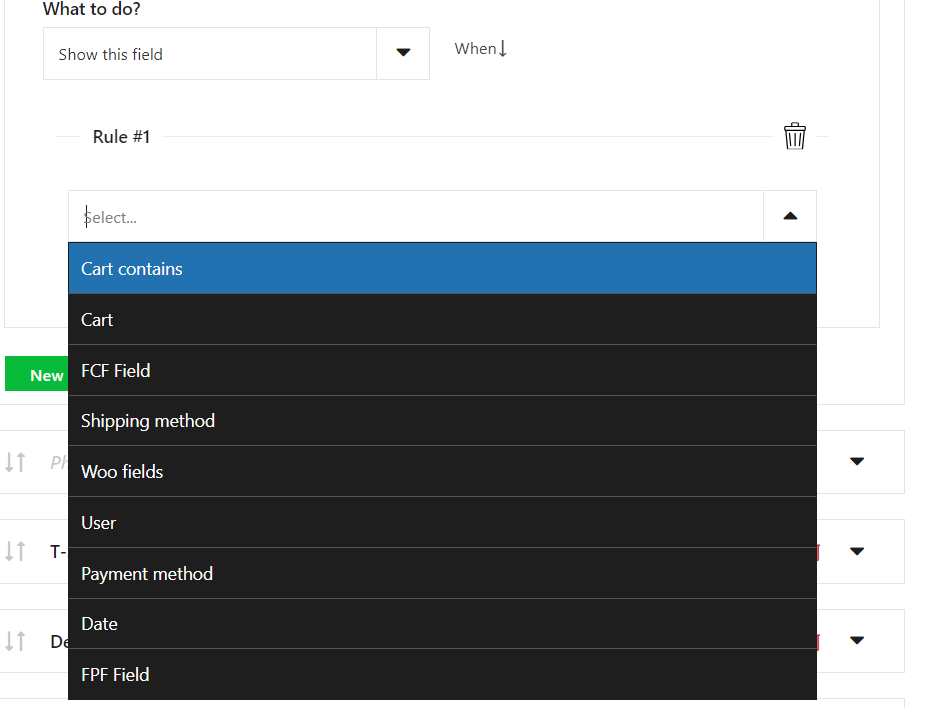
Sample Scenarios
Let's put this feature into action with some scenarios that show off the power of conditional logic in the checkout process🔥.
Scenario 1: VAT Number for EU Customers
You want to collect a VAT number from customers in the European Union but don't want to clutter the checkout for customers outside the EU.
-
-
- Condition: If the country is within the EU.
- Action: Show the VAT number field.
-
First, in the VAT Number field, go to the General tab and enable this field.
Then, go to the conditional logic tab and set conditions in the first Group.
🗒️ Look how I did it:
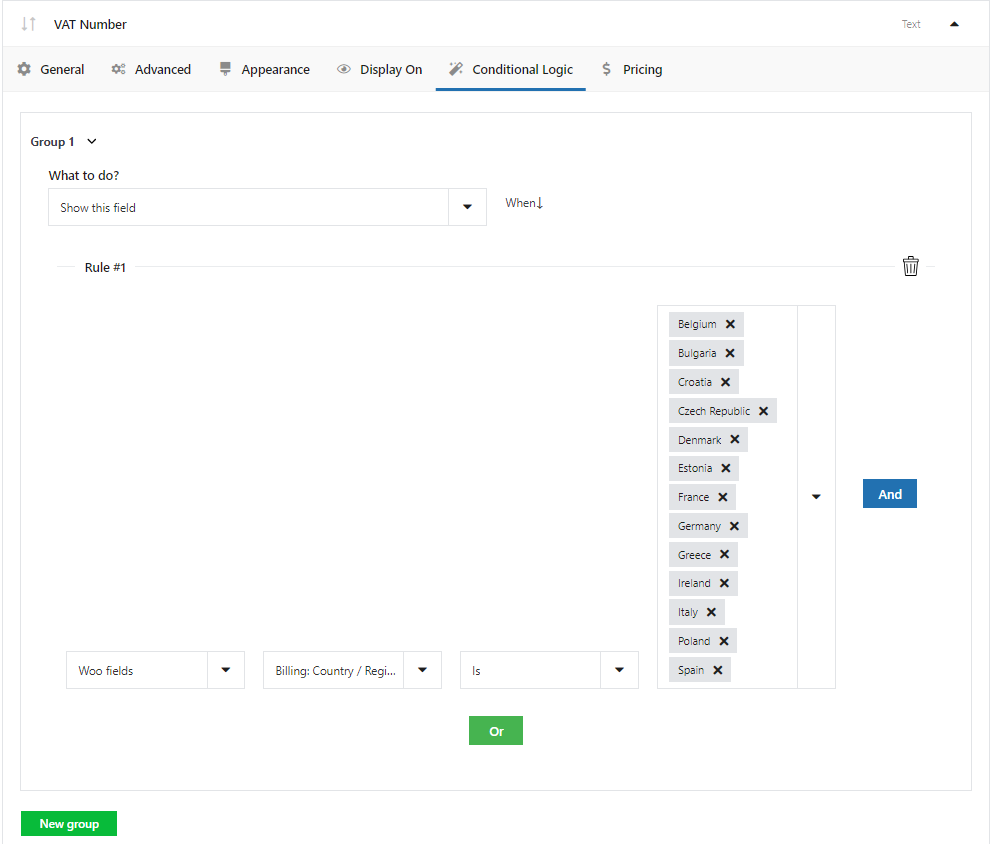

👉🏽 This setup ensures that only customers from the countries I have chosen and who need to provide a VAT number see the field, making the checkout cleaner for everyone else.
Scenario 2: State Field for Specific Countries
In some countries, like the USA, the state field is essential for shipping and billing. However, for countries without states or provinces, this field is unnecessary and can be confusing.
-
-
- Condition: If the country is the USA, Canada, or Australia.
- Action: Show the state/county field.
-
🗒️ Look how I did it:
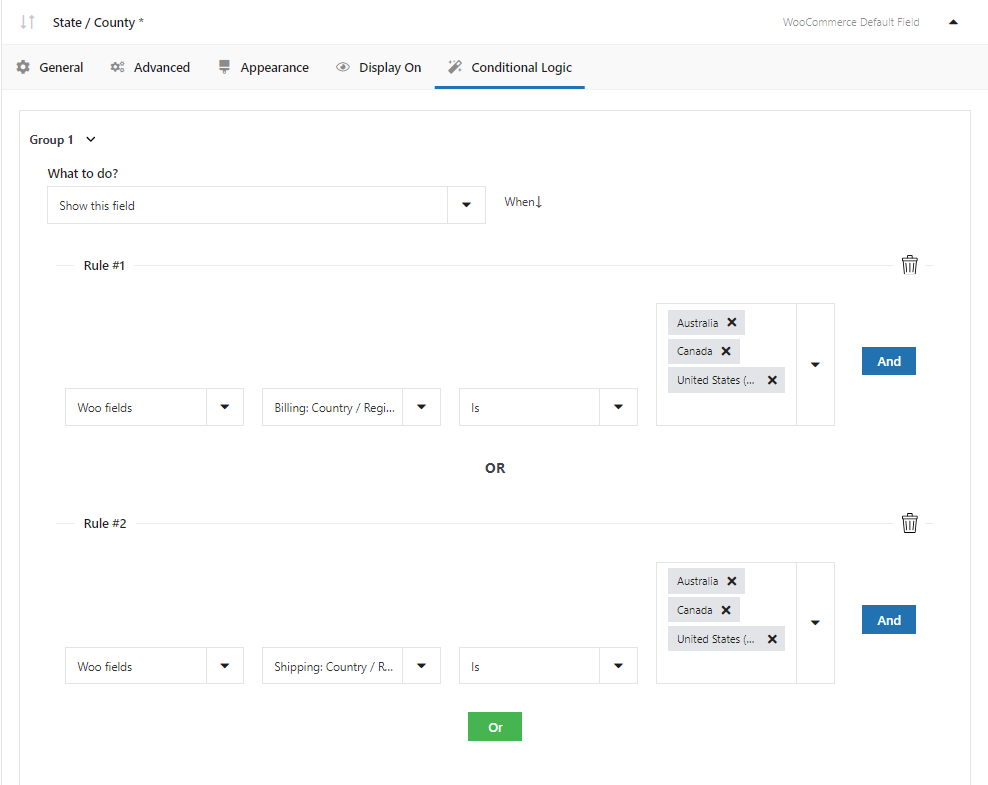
I merged the two rules with the logical operator OR.
👉🏽 With this condition, customers from these countries will see the state field, while others won't, simplifying their checkout experience.
Scenario 3: Custom Message for International Orders
You might want to display a custom message or disclaimer for customers placing international orders, informing them about additional shipping time or customs fees.
-
-
- Condition: If the country is not your home country.
- Action: Show a custom message field with the necessary information.
-
🗒️ Look how I did it:
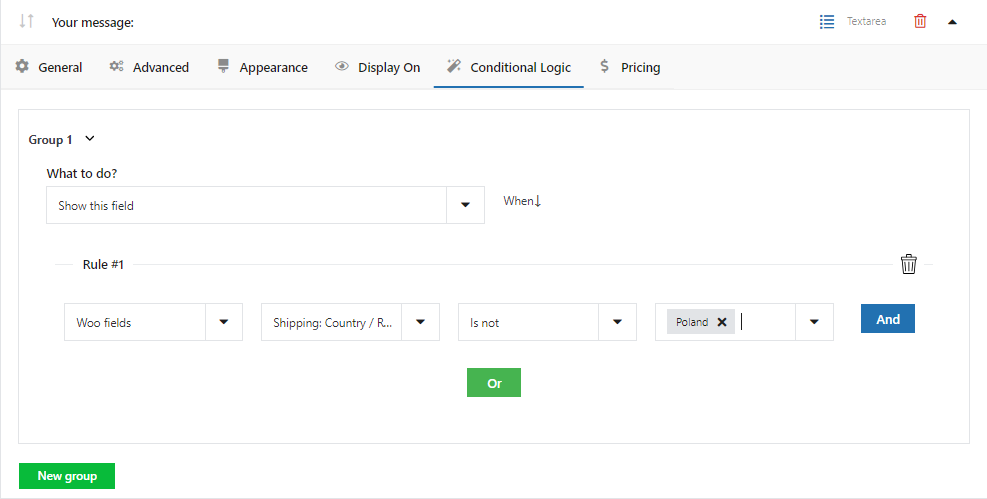
Psst... Yes, I'm from Poland 🥟
👉🏽 This approach keeps your customers well-informed and sets the right expectations for their order.
Tips for Using Conditional Logic Effectively
-
-
- Keep It Simple: Don't overcomplicate your checkout with too many conditions. Focus on making it easier for your customers.
- Test Thoroughly: Always test your conditions to ensure they work as expected for different scenarios.
- Consider User Experience: Use conditional logic to enhance the user experience, not to overwhelm your customers with fields and information.
-
Wrapping Up
Conditional logic is a powerful feature that can significantly enhance the checkout experience on your WooCommerce site. By tailoring the checkout process to the customer's country, you can make your site more user-friendly, increase conversions, and ensure you collect all the necessary information for a smooth order processing.
Remember, the key to effective use of conditional logic is understanding your customers and their needs. With a bit of creativity and strategic planning, you can create a checkout process that feels personalized and efficient. So go ahead, give it a try, and watch your WooCommerce store soar to new heights of customer satisfaction!

