Contents
Introduction
- Flexible Chat is a WordPress plugin that connects your website to an n8n-powered chat workflow. It allows you to create an AI-driven chat interface that can handle customer support, lead qualification, and automated conversations directly on your site.
- The plugin acts as a bridge between WordPress and your n8n workflow, sending user messages and metadata via webhook and receiving structured responses in real time.
- The plugin provides seamless integration with n8n chat workflows via webhook, allowing smooth communication between the chat interface and your automation processes.
- The chat UI is fully customizable — you can adjust colors, typography, and layout to match your brand and design preferences.
- It includes a welcome screen with predefined conversation topics, helping guide users from the very beginning.
- The system supports persistent chat history (optional), allowing conversations to be maintained across sessions if needed.
- AI responses are streamed in real time, providing an experience similar to ChatGPT with progressively appearing messages.
- It supports file uploads with MIME-type restrictions, giving you control over what types of files users can send.
- A built-in message feedback system (👍 / 👎) lets users quickly rate responses.
You can attach custom metadata to every request, making it easier to pass additional context to your workflows. - All text elements are fully localizable, giving you complete control over language and messaging.
- The chat window is fully responsive and includes a floating button, ensuring a smooth experience on both desktop and mobile devices.
Getting Started
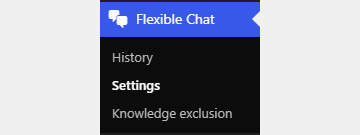
Install the plugin files via the WordPress Plugins panel. After activation, you will find the settings panel in the WordPress sidebar under Flexible Chat. The plugin offers three main sections: History, Settings, and Knowledge Exclusion.
Settings panel
History
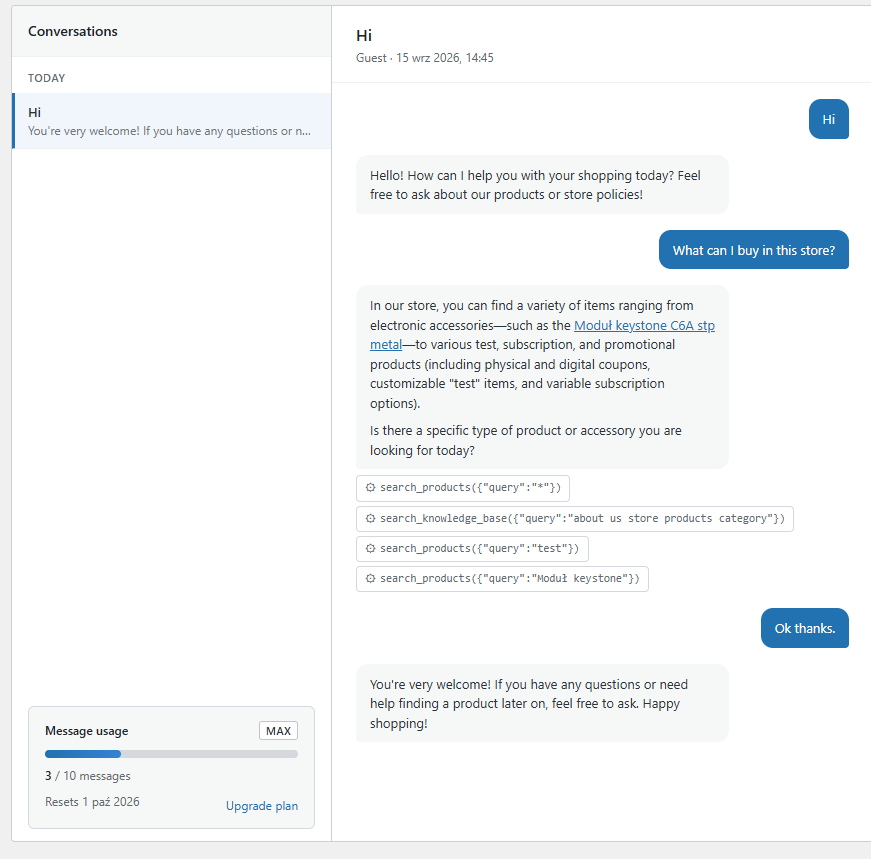
This is the panel where users can view their previous chats. The panel is divided into two sections. On the left, you will find a list of previous conversations. On the right, you will see the content of the selected conversation.
Settings
The plugin settings menu consists of the following tabs:
- General
- Appearance
- Text Customization
- Advanced
General
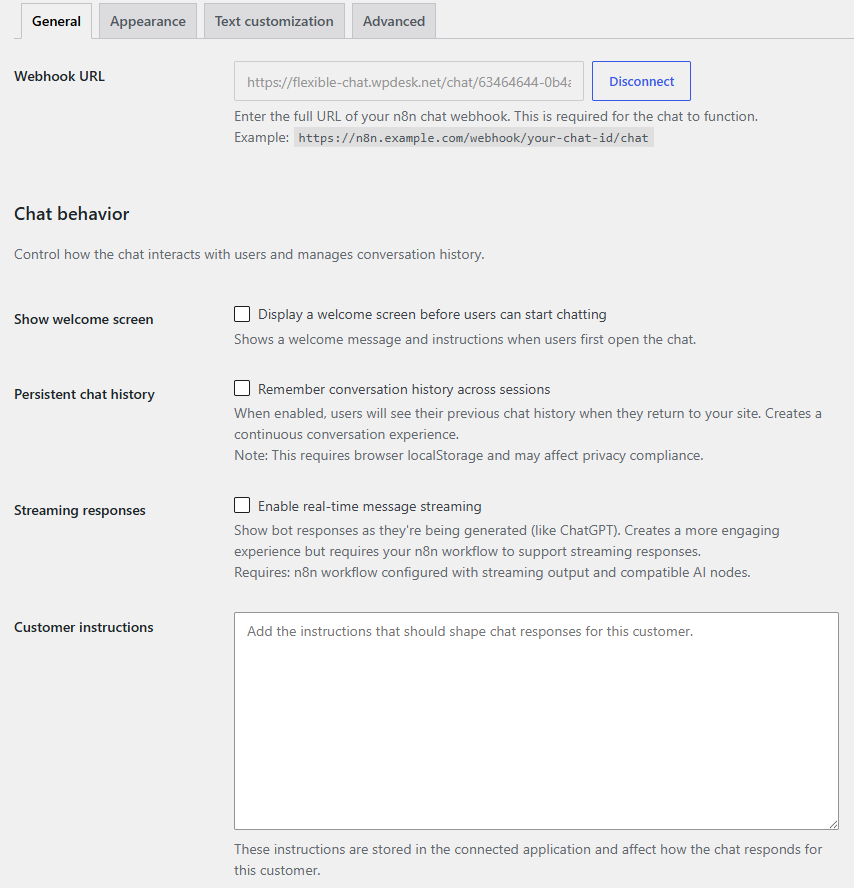
Webhook URL This field is required for the chat to function properly. It defines the endpoint where all chat messages are sent. Enter the full URL of your n8n chat webhook.
https://n8n.example.com/webhook/your-chat-id/chat
Chat Behavior
Show Welcome Screen Enable or disable the welcome screen before users start chatting. When enabled, users will see a greeting screen with instructions and optional conversation topics before starting the chat.
Persistent Chat History When enabled, chat history is stored in browser localStorage. Users can return to previous conversations across sessions. Note: This may affect privacy compliance depending on jurisdiction.
Streaming responses Enables real-time AI message streaming. Bot responses appear progressively as they are generated.
Requires:
- n8n workflow with streaming support
- Compatible AI nodes
Customer instructions
Appearance
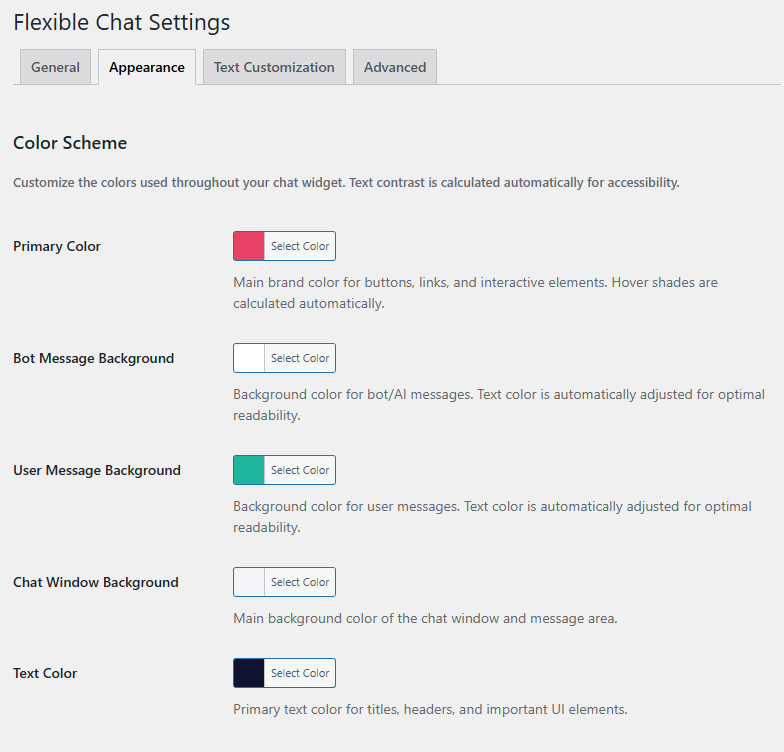
Flexible Chat allows visual customization to match your website design.
Color Scheme
All colors are automatically processed to ensure accessibility and contrast compliance.
Primary Color Main brand color used for buttons, links, and interactive elements. Hover states are generated automatically.
Bot Message Background Background color for AI/bot messages. Text color is automatically adjusted for readability.
User Message Background Background color for user messages.
Chat Window Background Main background color of the chat window and message area.
Text Color Primary text color used for headers, titles, and important UI elements.
Typography
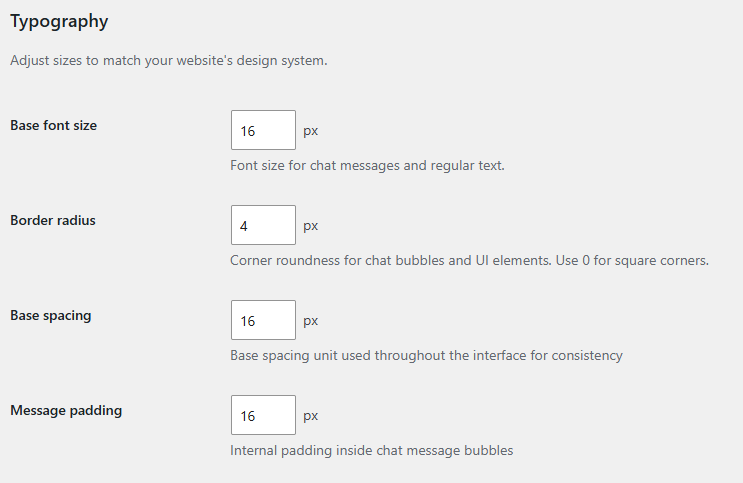
Base Font Size Controls the font size for chat messages and general UI text.
Border Radius Controls the roundness of chat bubbles and UI elements. Set to 0px for sharp corners.
Base Spacing Defines the global spacing unit used throughout the interface.
Message Padding Internal padding inside chat message bubbles.
Window Dimensions
Window Width Recommended range: 350px – 500px
Window Height Recommended range: 500px – 700px
Chat Button Size Controls floating button size when chat is closed.
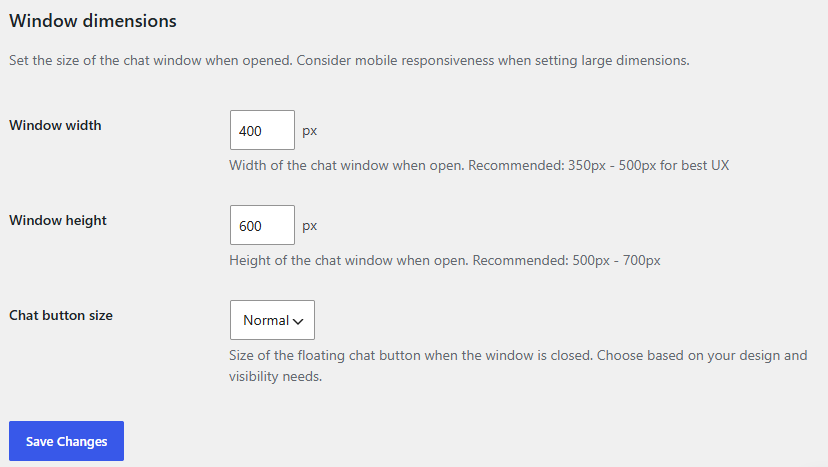
Available options:
- Small
- Normal,
- Large
Text Customization
Customize all visible text in the chat interface.
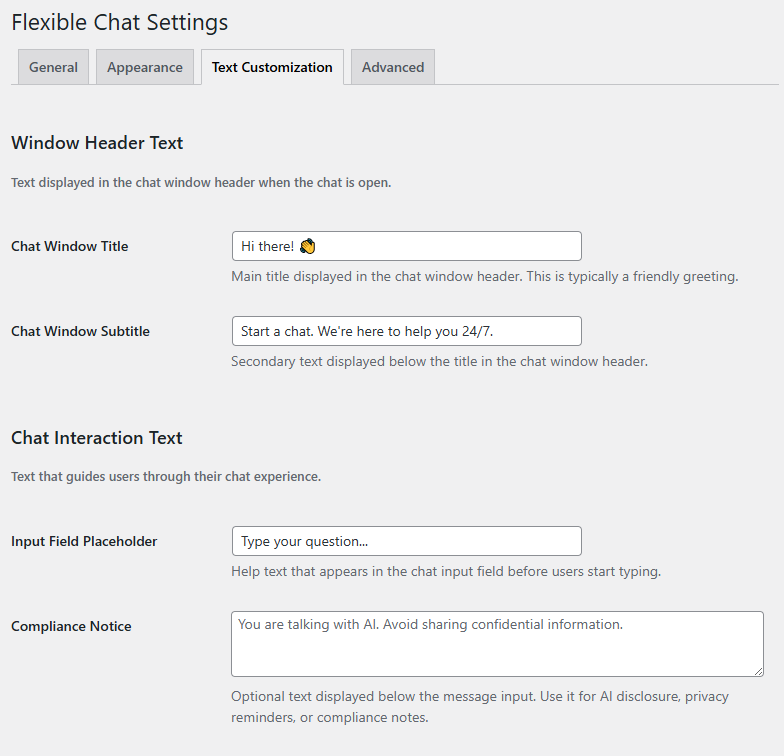
Window Header Text
Chat Window Title: Main greeting displayed in the chat header.
Example: Hi there! 👋
Chat Window Subtitle: Secondary supporting text below the title.
Example: Start a chat. We're here to help you 24/7.
Chat Interaction Text
Input Field Placeholder: Placeholder text shown inside the message input field.
Example: Type your question...
Compliance Notice: Optional notice displayed under the input field.
Example: You are talking with AI. Avoid sharing confidential information.
Welcome Messages
Shown only if “Show Welcome Screen” is enabled.
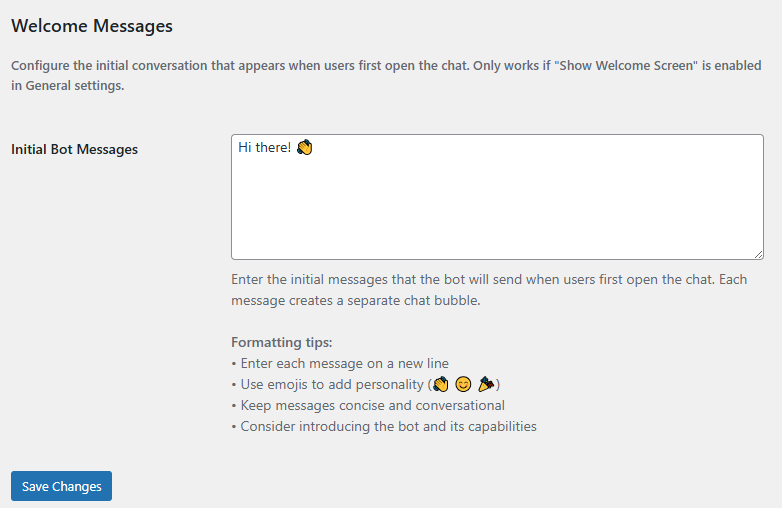
Initial Bot Messages: Each line represents a separate message bubble:
Example: Hi there! 👋 How can we help you today?
Advanced
n8n Integration Settings
A panel for configuring how data is sent to the n8n workflow. We recommend changing these settings only if your workflow requires different field names.
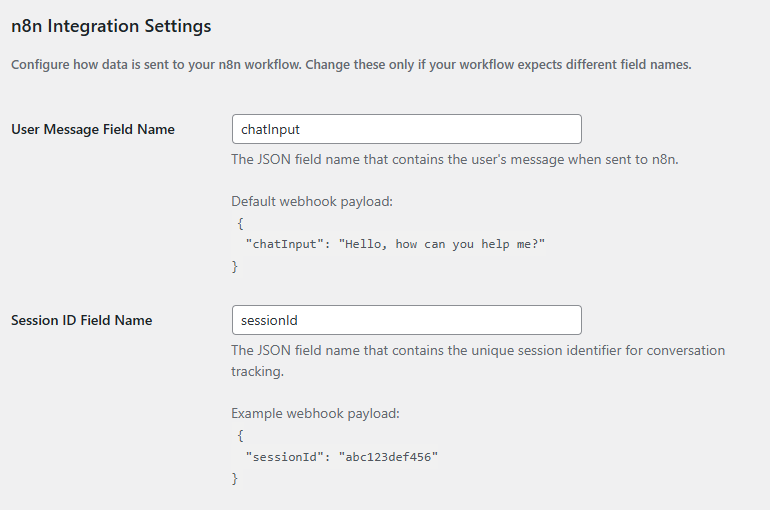
User Message Field Name Use this field to define under which key the user's input will be passed in the request payload. This should match the field expected by your n8n workflow (e.g. message, text, or user_input). Default: chatInput
Example payload:
{

"chatInput": "Hello, how can you help me?"

}
Session ID Field Name
The JSON field name that contains the unique session identifier for conversation tracking. Use this field to define under which key the session ID will be passed in the request payload. This allows your n8n workflow to recognize and maintain context for a specific user conversation across multiple messages (e.g. session_id, chat_id, or conversation_id). Default: sessionId
Example payload:
{

"sessionId": "abc123def456"

}
Used for tracking conversation continuity.
Custom Metadata
Send additional context data with every chat request. Must be valid JSON format. Use this field to include extra information in the request payload, such as user attributes, environment details, or custom flags. This data can be used by your n8n workflow to customize responses or control logic (e.g. {"user_role": "admin", "source": "website"}).
Send additional context with each request.
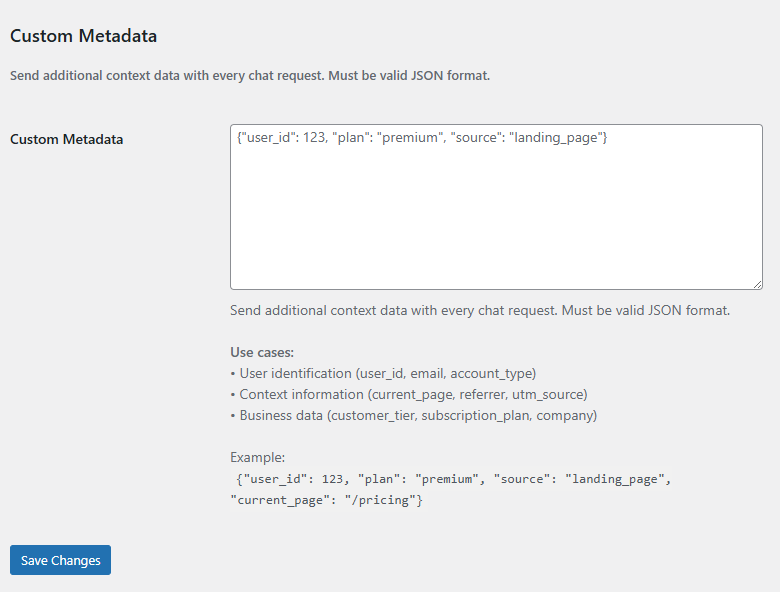
Example:
{

"user_id": 123,

"plan": "premium",

"source": "landing_page",

}
Use cases:
- User identification (user_id, email, account_type)
- Context tracking (current_page, referrer, UTM parameters)
- Business segmentation (subscription_plan, customer_tier)
Knowlege Exclusion
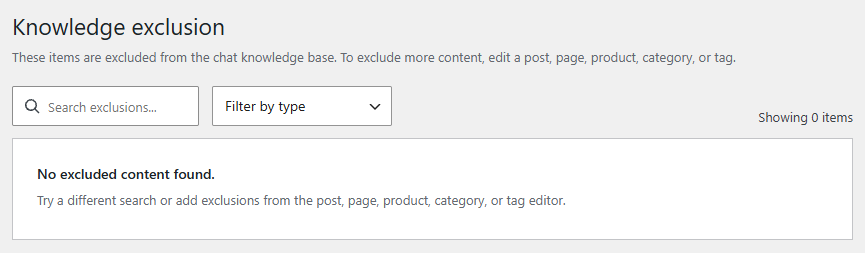
Use Knowledge exclusion to exclude selected website content from the knowledge available to Flexible Chat. You can exclude individual posts, pages, and products, or content assigned to a category or tag.
Exclusions do not change the content’s publication status or visibility on your website. Excluded products are also omitted from Flexible Chat’s product search results.
Exclude a post, page, or product
- Open the post, page, or product in the WordPress editor.
- Find the Exclude from Flexible Chat.
- Enable the toggle.
- Save or update the item.
The item is excluded from subsequent knowledge indexing. If it has already been indexed, the plugin sends a request to remove it from the connected knowledge base.
Exclude content by category or tag
Use this option to exclude a group of items without editing each one separately.
- Go to Posts → Categories or Posts → Tags. For WooCommerce products, go to Products → Categories or Products → Tags.
- Open the category or tag you want to exclude.
- Enable Exclude from chat knowledge.
- Save the changes.
You can also enable this option when creating a category or tag.
The exclusion applies to content assigned to that category or tag. An item remains excluded if any of its assigned categories or tags is excluded, even when the item’s own exclusion toggle is off.
For example, you can exclude a tag named Archived offers to keep posts assigned to it out of the chat knowledge base while leaving them published on your website.
Manage exclusions
Go to Flexible Chat → Knowledge exclusion in your WordPress dashboard.
The page lists exclusions added in the content, category, and tag editors.
- Search exclusions — enter a search phrase to find matching entries.
- Filter by type — narrow the list to a content type.
- Title — click the title to open the item’s editor.
- Type — identifies the entry as a post, page, product, category, tag, or another supported type.
- Remove — removes the selected exclusion.
The table shows items explicitly marked as excluded. Content excluded through a category or tag does not appear as a separate entry unless it also has its own exclusion enabled.
To add another exclusion, open the relevant content, category, or tag editor.
Security & Best Practices
- Always validate incoming data in n8n workflows
- Restrict allowed file types in production
- Avoid storing sensitive data in localStorage unless necessary
- Use HTTPS webhook endpoints only
- Sanitize metadata before processing
Troubleshooting
Chat does not work
- Verify webhook URL is correct
- Ensure n8n workflow is active
No AI response
- Check workflow execution in n8n
- Validate output format
File upload not working
- Ensure file uploads are enabled
- Check MIME type restrictions
Streaming not working
- Confirm AI node supports streaming output
- Check workflow configuration
