Managing your WooCommerce store efficiently means automating and integrating with the right external tools. WooCommerce webhooks are an excellent way to send data to external apps or systems in real-time, without manual intervention. In this guide, we’ll walk you through the benefits of using webhooks, show you how to set them up, and introduce the ShopMagic Webhooks add-on.
WooCommerce webhooks & why you should read this post
If you’re looking to automate key workflows and enhance customer management, webhooks are essential. By setting up webhooks, you can:
- Send real-time data without delays.
- Automate repetitive tasks like order updates or customer notifications.
- Sync customer data with CRMs or marketing platforms.
- Custom-tailor integrations to meet your needs.
- Send data for invoicing or stock management/ updates.
Let’s dive into how webhooks can benefit your store.
Table of contents
- What are WooCommerce webhooks and why use them?
- Setting up webhooks in WooCommerce
- Managing and testing webhooks
- Fixing common webhook issues
- Integrate WooCommerce with ShopMagic Webhooks
What are WooCommerce webhooks and why use them?
Webhooks in WooCommerce allow your store to send data to external systems through REST API when specific events happen. This means you no longer need to manually send information; it’s done automatically and instantly.
For example, every time a customer places an order, a webhook can send the order details to your CRM, keeping your records up-to-date.
Webhooks eliminate the need for constant monitoring and ensure data is delivered in real-time. This streamlines your operations and allows for quicker responses to customers.
Setting up webhooks in WooCommerce
To get started, go to your WordPress dashboard and navigate to WooCommerce > Settings > Advanced > Webhooks.
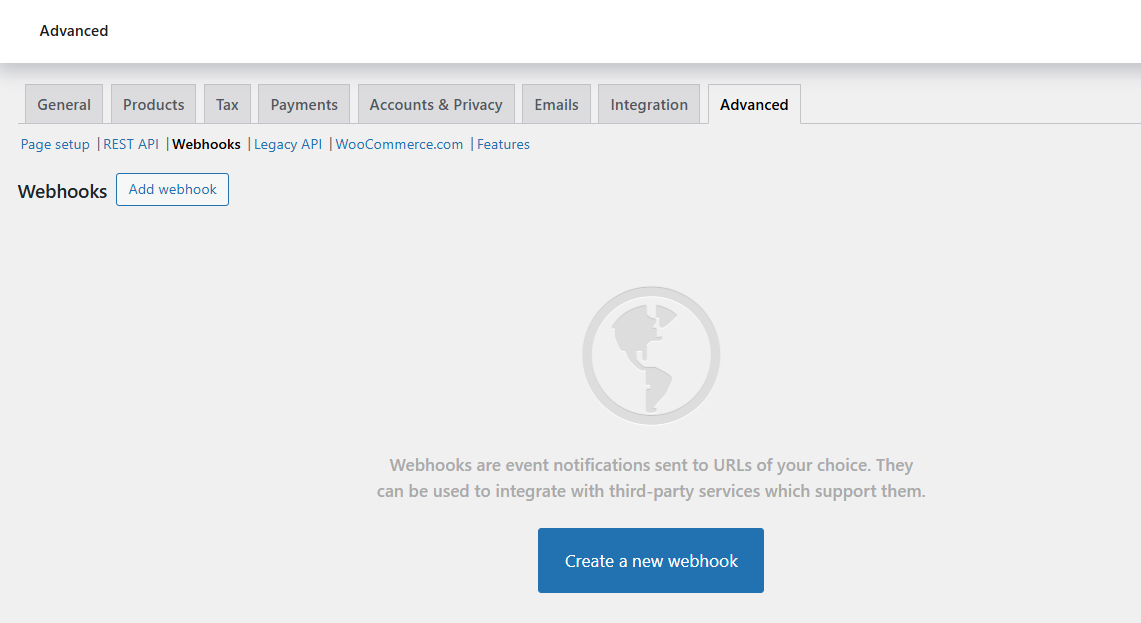
Then, click Add Webhook.
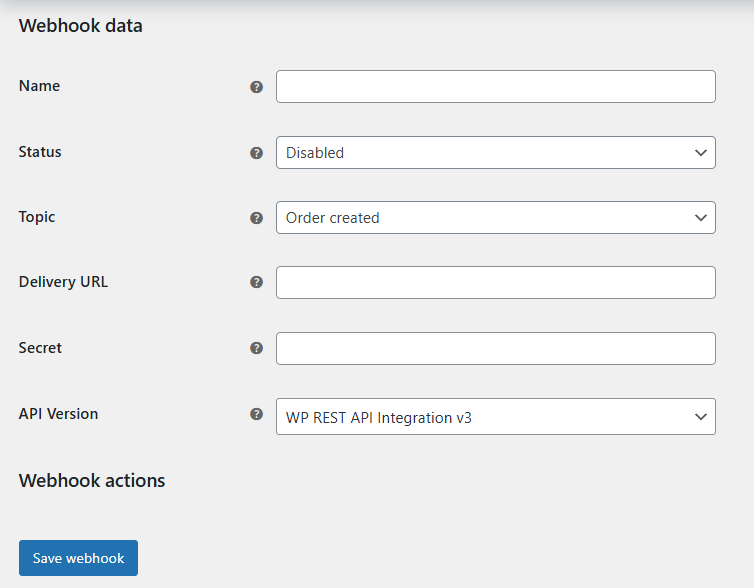
Let’s say you want to notify your CRM every time an order is created. Select “Order Created” from the topic dropdown and enter your CRM’s API URL in the Delivery URL field.
Make sure the webhook status is set to Active, then click Save Changes.
That’s it! WooCommerce will automatically send data to your CRM whenever a new order is placed.
Managing and testing webhooks
Once your webhook is live, managing it is easy. You can view and edit your webhooks from the Webhooks page in WooCommerce. Here, you can also deactivate or delete webhooks as needed.
To test, create a test order in your WooCommerce store. Check if the data is correctly received by your external service.
If something’s wrong, WooCommerce logs (in WooCommerce > Status > Logs) provide helpful insights into what’s going wrong.
Fixing common webhook issues
Webhook issues can range from incorrect URLs to failed deliveries. Always ensure your Delivery URL is correct.
If your external service requires an API key or other authentication, make sure those are added in the webhook settings.
If you’re getting an error like 401 (Unauthorized), it’s usually an issue with authentication. Double-check your API keys or tokens, and confirm that the receiving service allows your requests.
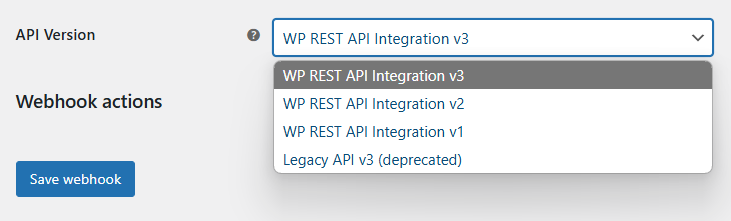
Also, make sure you use the right version of REST API.
Finally, check the security settings (for example, if you have such a plugin in WordPress).
Integrate WooCommerce with ShopMagic Webhooks
ShopMagic Webhooks add-on makes it easier to integrate WooCommerce with external services like CRMs, email platforms, and more directly through ShopMagic.
But with ShopMagic, you can also send data to multiple services automatically whenever a specific event occurs in your store with the ShopMagic Webhooks add-on.
For instance, you can use the Order Created event to send customer data to an email marketing platform. You can also use custom triggers from ShopMagic automations to send data to other services, enhancing ShopMagic automations.
ShopMagic Webhooks features:
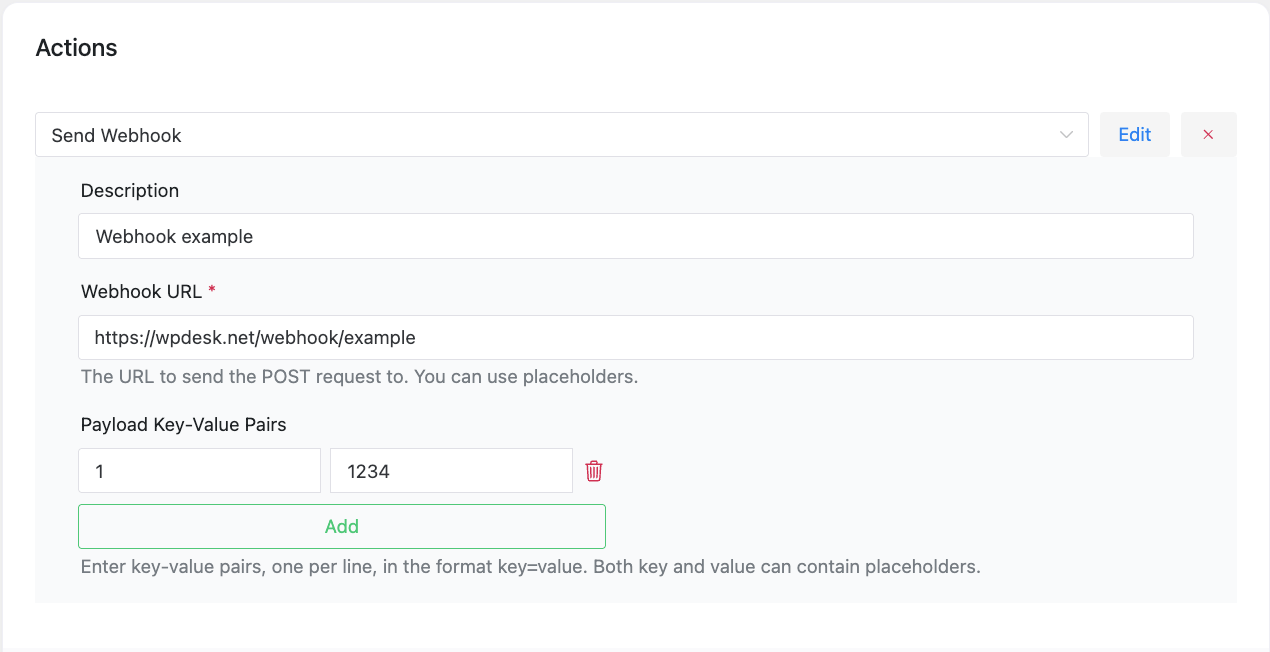
- Currently, the add-on supports POST method. It's planned to add GET, PUT, and DELETE methods in the future.
- You may send data to more endpoints using several webhooks.
- It's possible to set URL and use ShopMagic placeholders.
- Data and headers are sent using HTTP POST and Content-Type: application/json.
- Enables testing and troubleshooting directly from the ShopMagic interface (the plugin gathers errors).
For example, you can set up a webhook to send order details to a marketing CRM whenever a new order is placed. Set the URL, add any authentication headers, or use ShopMagic placeholders to send data.
This keeps your customer database updated in real-time, ready for the next marketing campaign.
Combining ShopMagic Webhooks with other add-ons
You can further enhance webhooks by combining them with ShopMagic’s other add-ons.
For example, use the ShopMagic Delayed Actions add-on to trigger webhooks after a delay.
This is perfect for situations where you want to follow up with a customer two days after they place an order, rather than immediately.
Summary
Webhooks are an excellent way to automate your WooCommerce store’s communication with external services. By using ShopMagic Webhooks, you unlock even more powerful integrations for ShopMagic automations, making your store smarter and more efficient.
What to rememeber
- Webhooks allow for instant, real-time data transfer.
- Setting up webhooks is simple: just go to WooCommerce > Settings > Webhooks.
- Test and manage your webhooks regularly to ensure smooth operation.
- ShopMagic Webhooks add-on offers advanced features like method customization and integration with external services.
Start using webhooks today and streamline your WooCommerce store's integrations!
